
A last minute gift DIY: Stamp Kit & gift tags
It's no secret...I love stamps. As a bit of a paper-media champion, stamps are such an awesome way to personalize stationary, decorate fabric, or create art.
I mentioned I'd create a DIY gift tutorial and this is what I came up with. I'm surprised I didn't think of this earlier...I make stamps for myself all the time!

Materials
- A speedy cut stamp block, available at most art/craft stores. Usually about $5.
- A linoleum cutting tool. Mine are on extended loan from the woodshop where I did my undergrad, but you can pick one up ( made by Speedball ) from your local art store or online. They usually come with a set of tips...the one you'll mostly use is the V-gouge or U-gouge
- Scrap paper
- A pencil and marker (sharpie works fine)
- An ink pad of your choice. I like the ink from Yellow Owl Workshop, since you can use it on fabric. (They also have lots of awesome DIY kits, though I have never used them)
- A box to put the final stamps in
First, decide how many stamps you would like to carve, and what size. I chose to create a group of stamps that would fit, along with an ink pad, into a box.
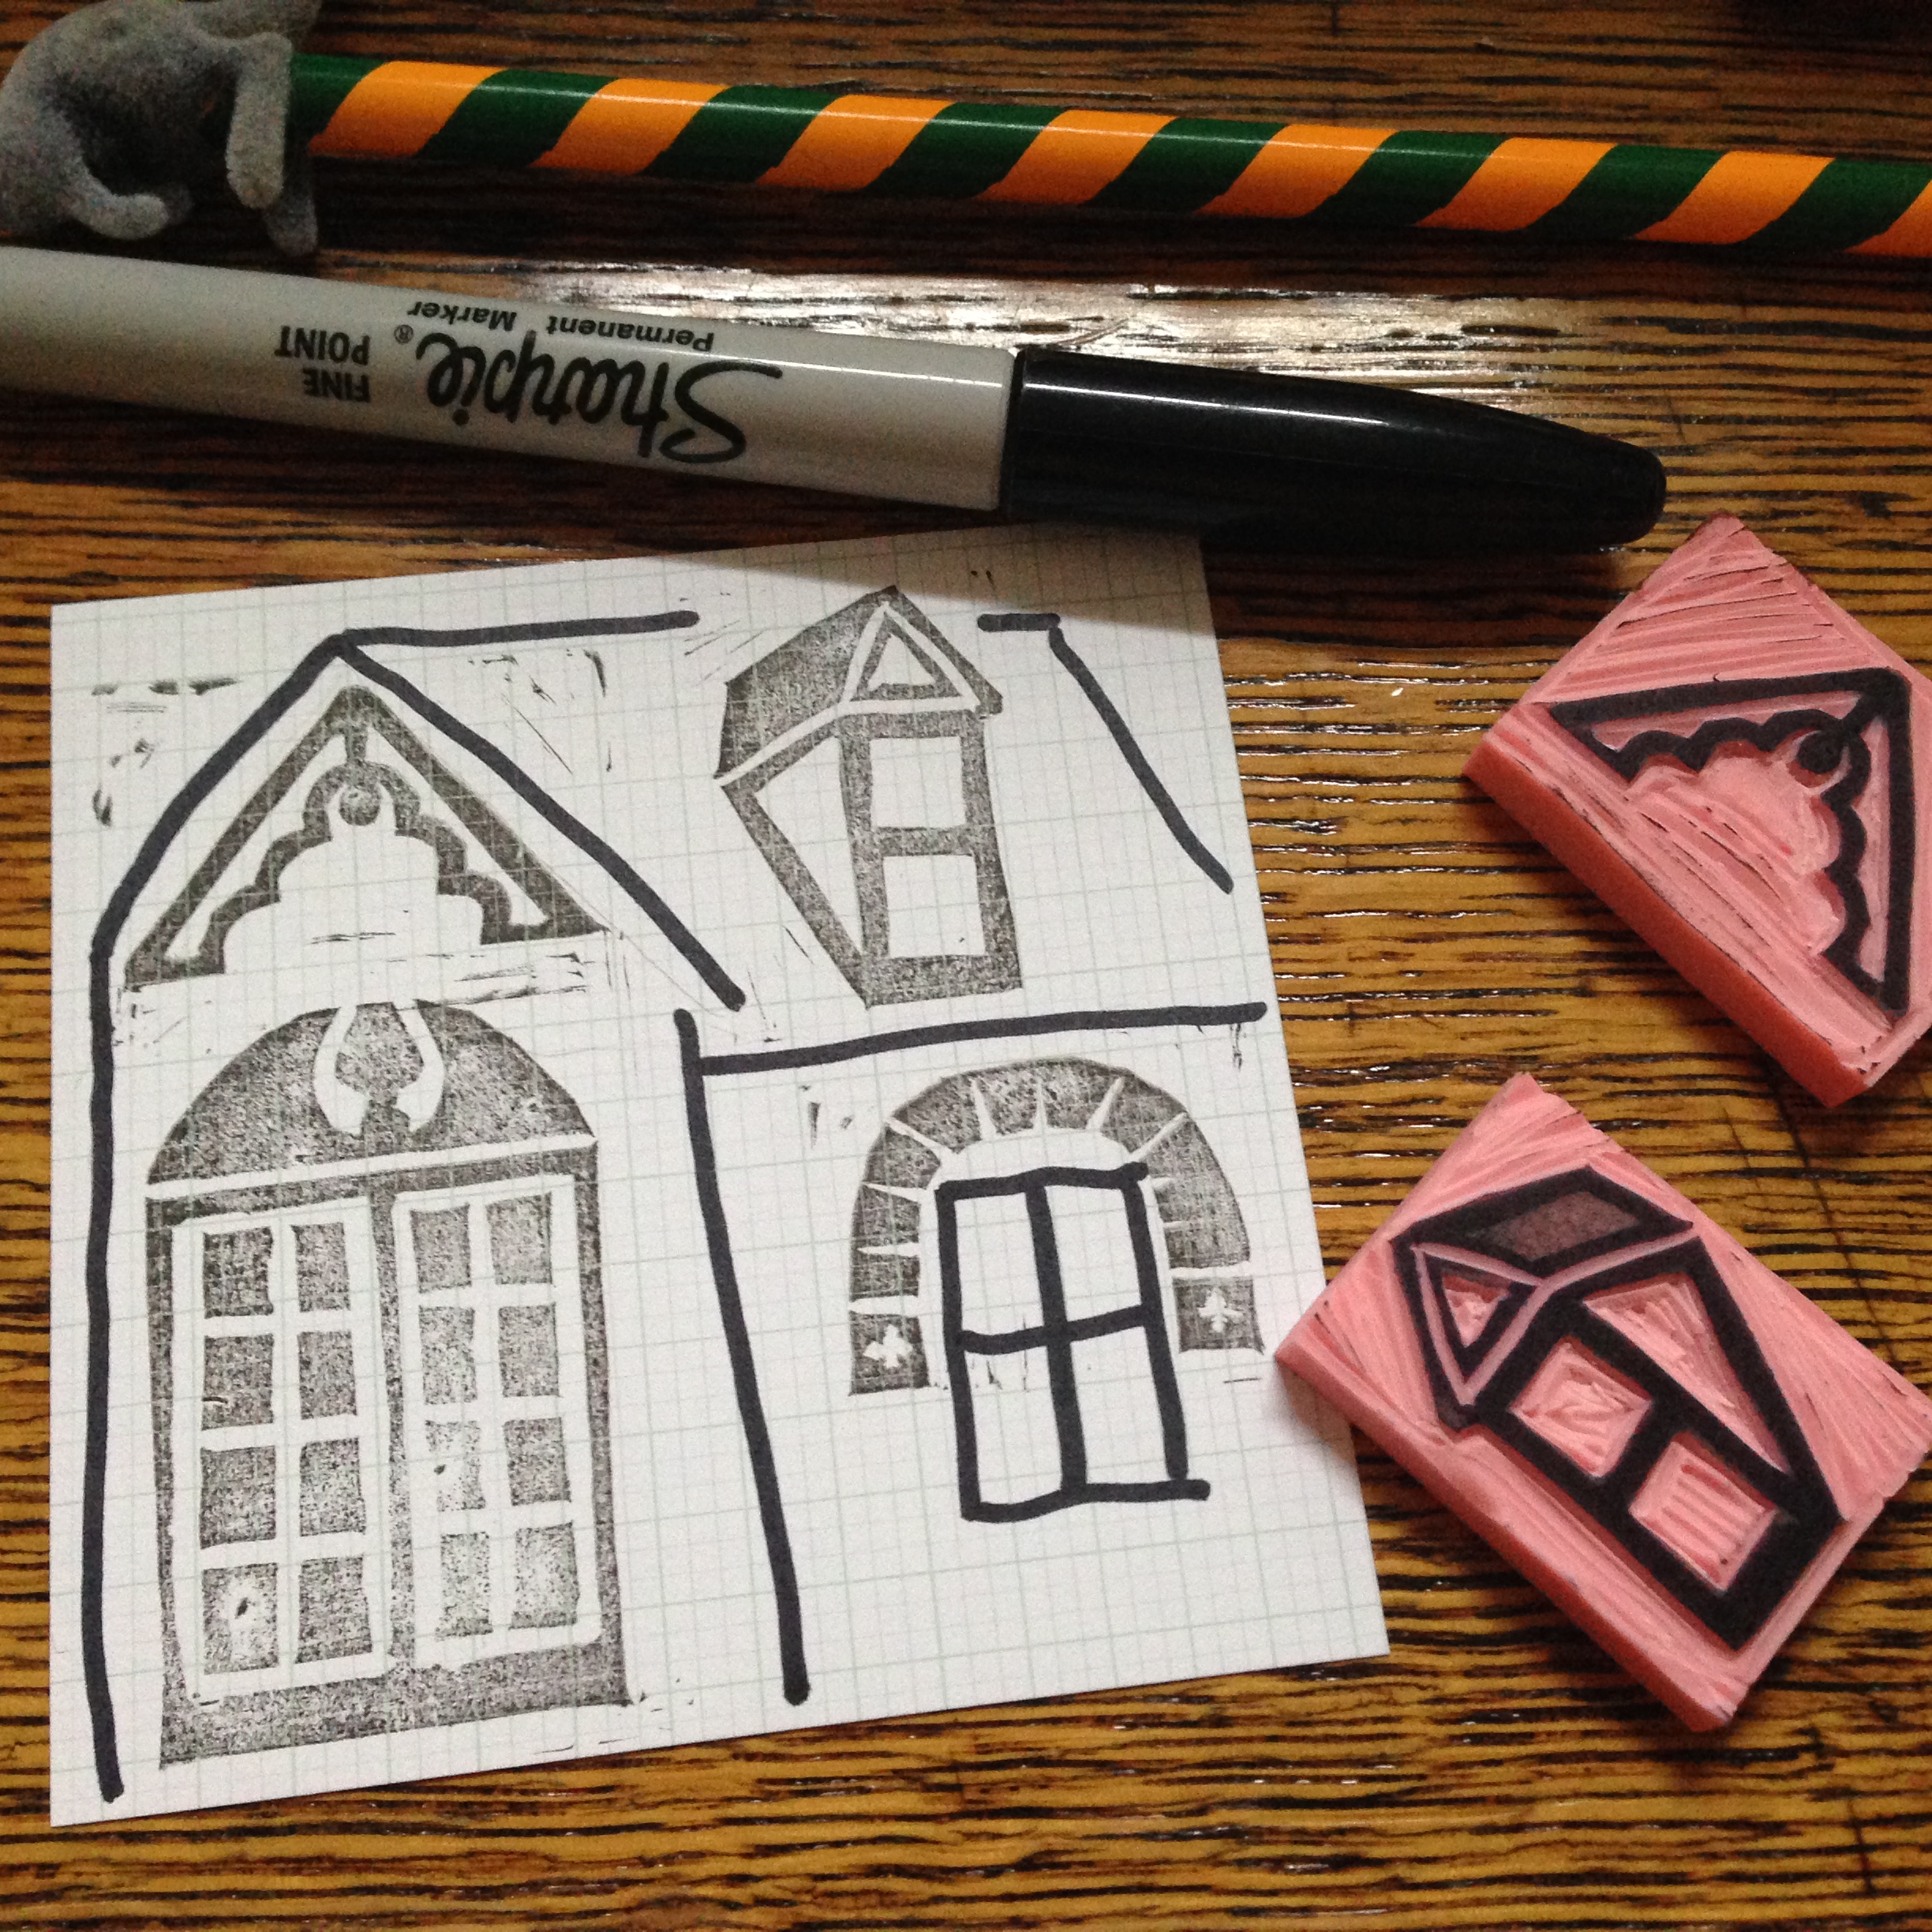
Look for inspiration! Creating groups of themed stamps are nice, and you can theme them for whomever is set to receive them. I chose to create stamps of architectural details pulled from one of my favorite books.

Once you've decided on your designs, draw them onto your block in pencil first, then copy in pen. *You'll want to draw your designs on the stamp in reverse, so they will print the correct way, especially text!* Most of my designs were symmetrical, so it wasn't necessary to reverse the image. If you need to do this, draw your design on tracing paper, then flip the paper over and copy the design onto the block.
When making stamps, simple shape with thick lines are easiest to cut. Drawing your design in pen will help to create thicker lines. You'll be cutting away the negative space.

After drawing in your designs with marker, you will want to cut apart your stamps if you have not already. An exacto knife (or sharp kitchen knife) works best for this purpose. Be careful and place some cardboard or a cutting mat underneath while you work!

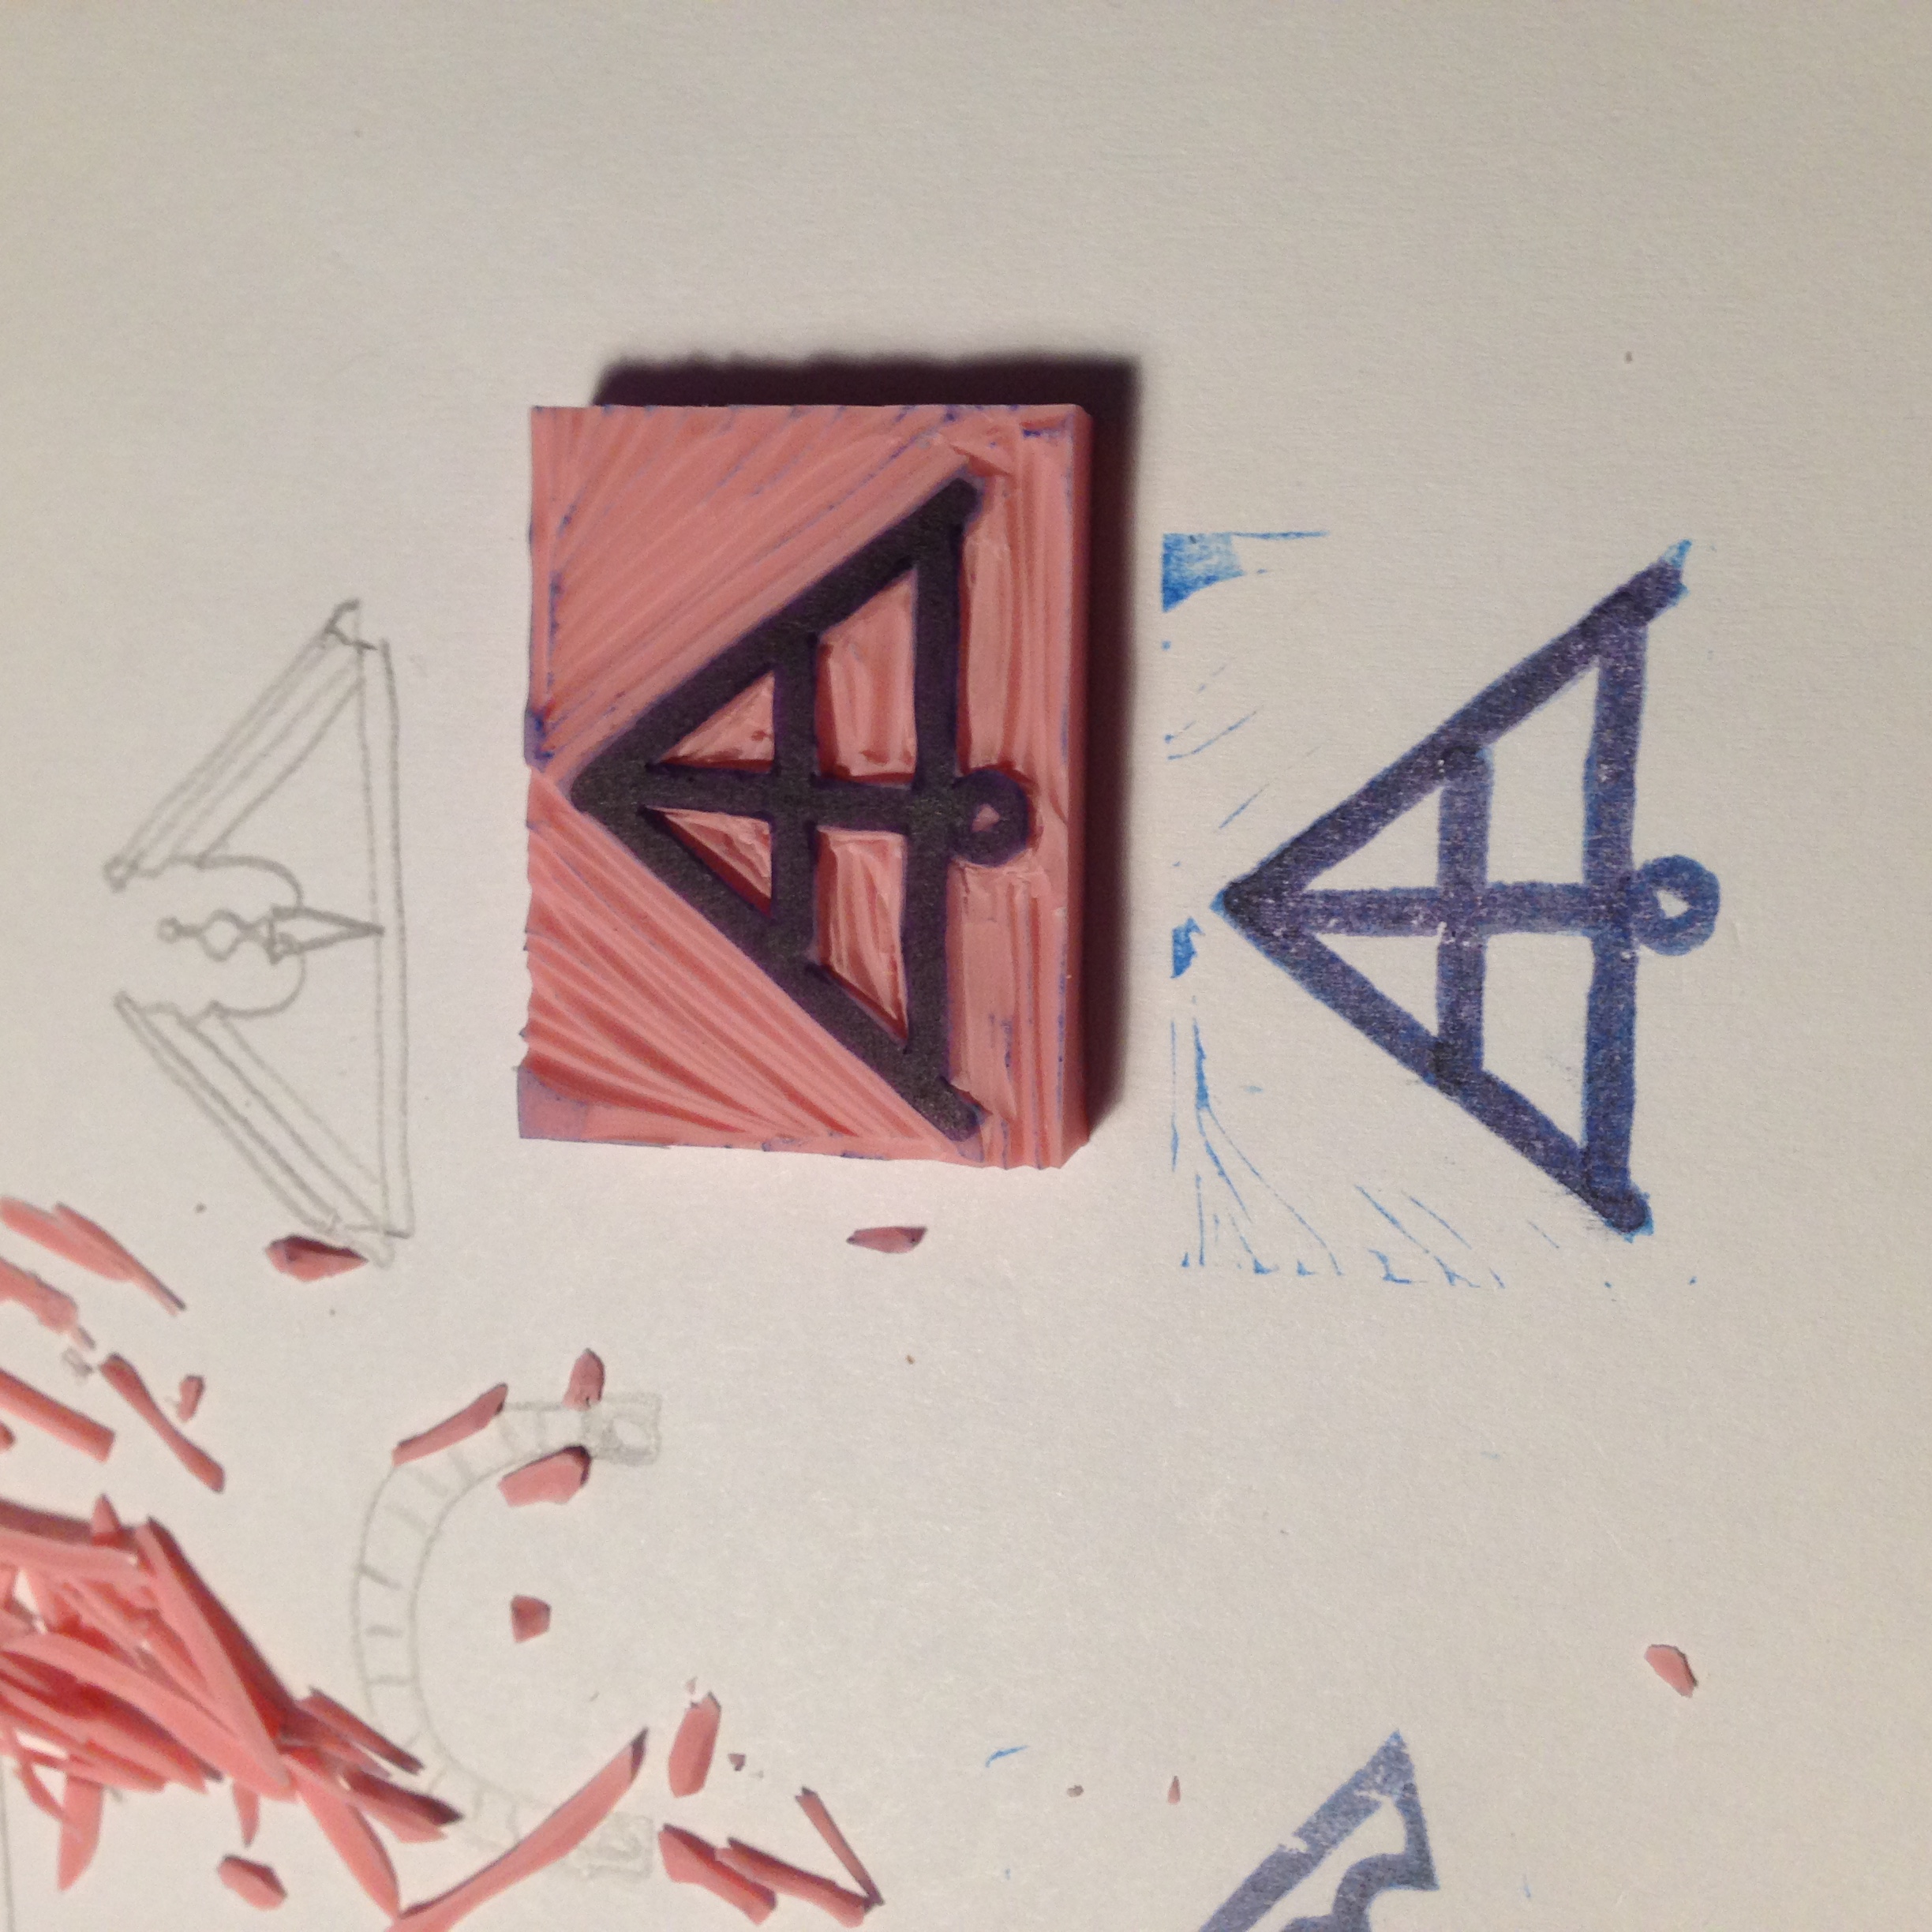
Once your blocks are ready, begin cutting away the negative space with your cutting tool. If you have scrap cutting block, try some practice cuts until you get the hang of it. Luckily, with stamps, the more 'hand-cut' they look the better. Don't get hung up on nicks or small mistakes.

Once you've carved your design, ink it and stamp onto scrap paper. You'll be able to see any parts that you've missed cutting out or negative space that aren't cut deep enough. Go back and fix these spots and test print again.
**A note: If you've drawn your designs in sharpie, you'll want to take a swab with alcohol and remove the sharpie before printing using lighter color ink, otherwise you'll get black sharpie ink in your print and possibly on your stamp pad. You can see this in the picture below where the black sharpie shows through the blue ink.**
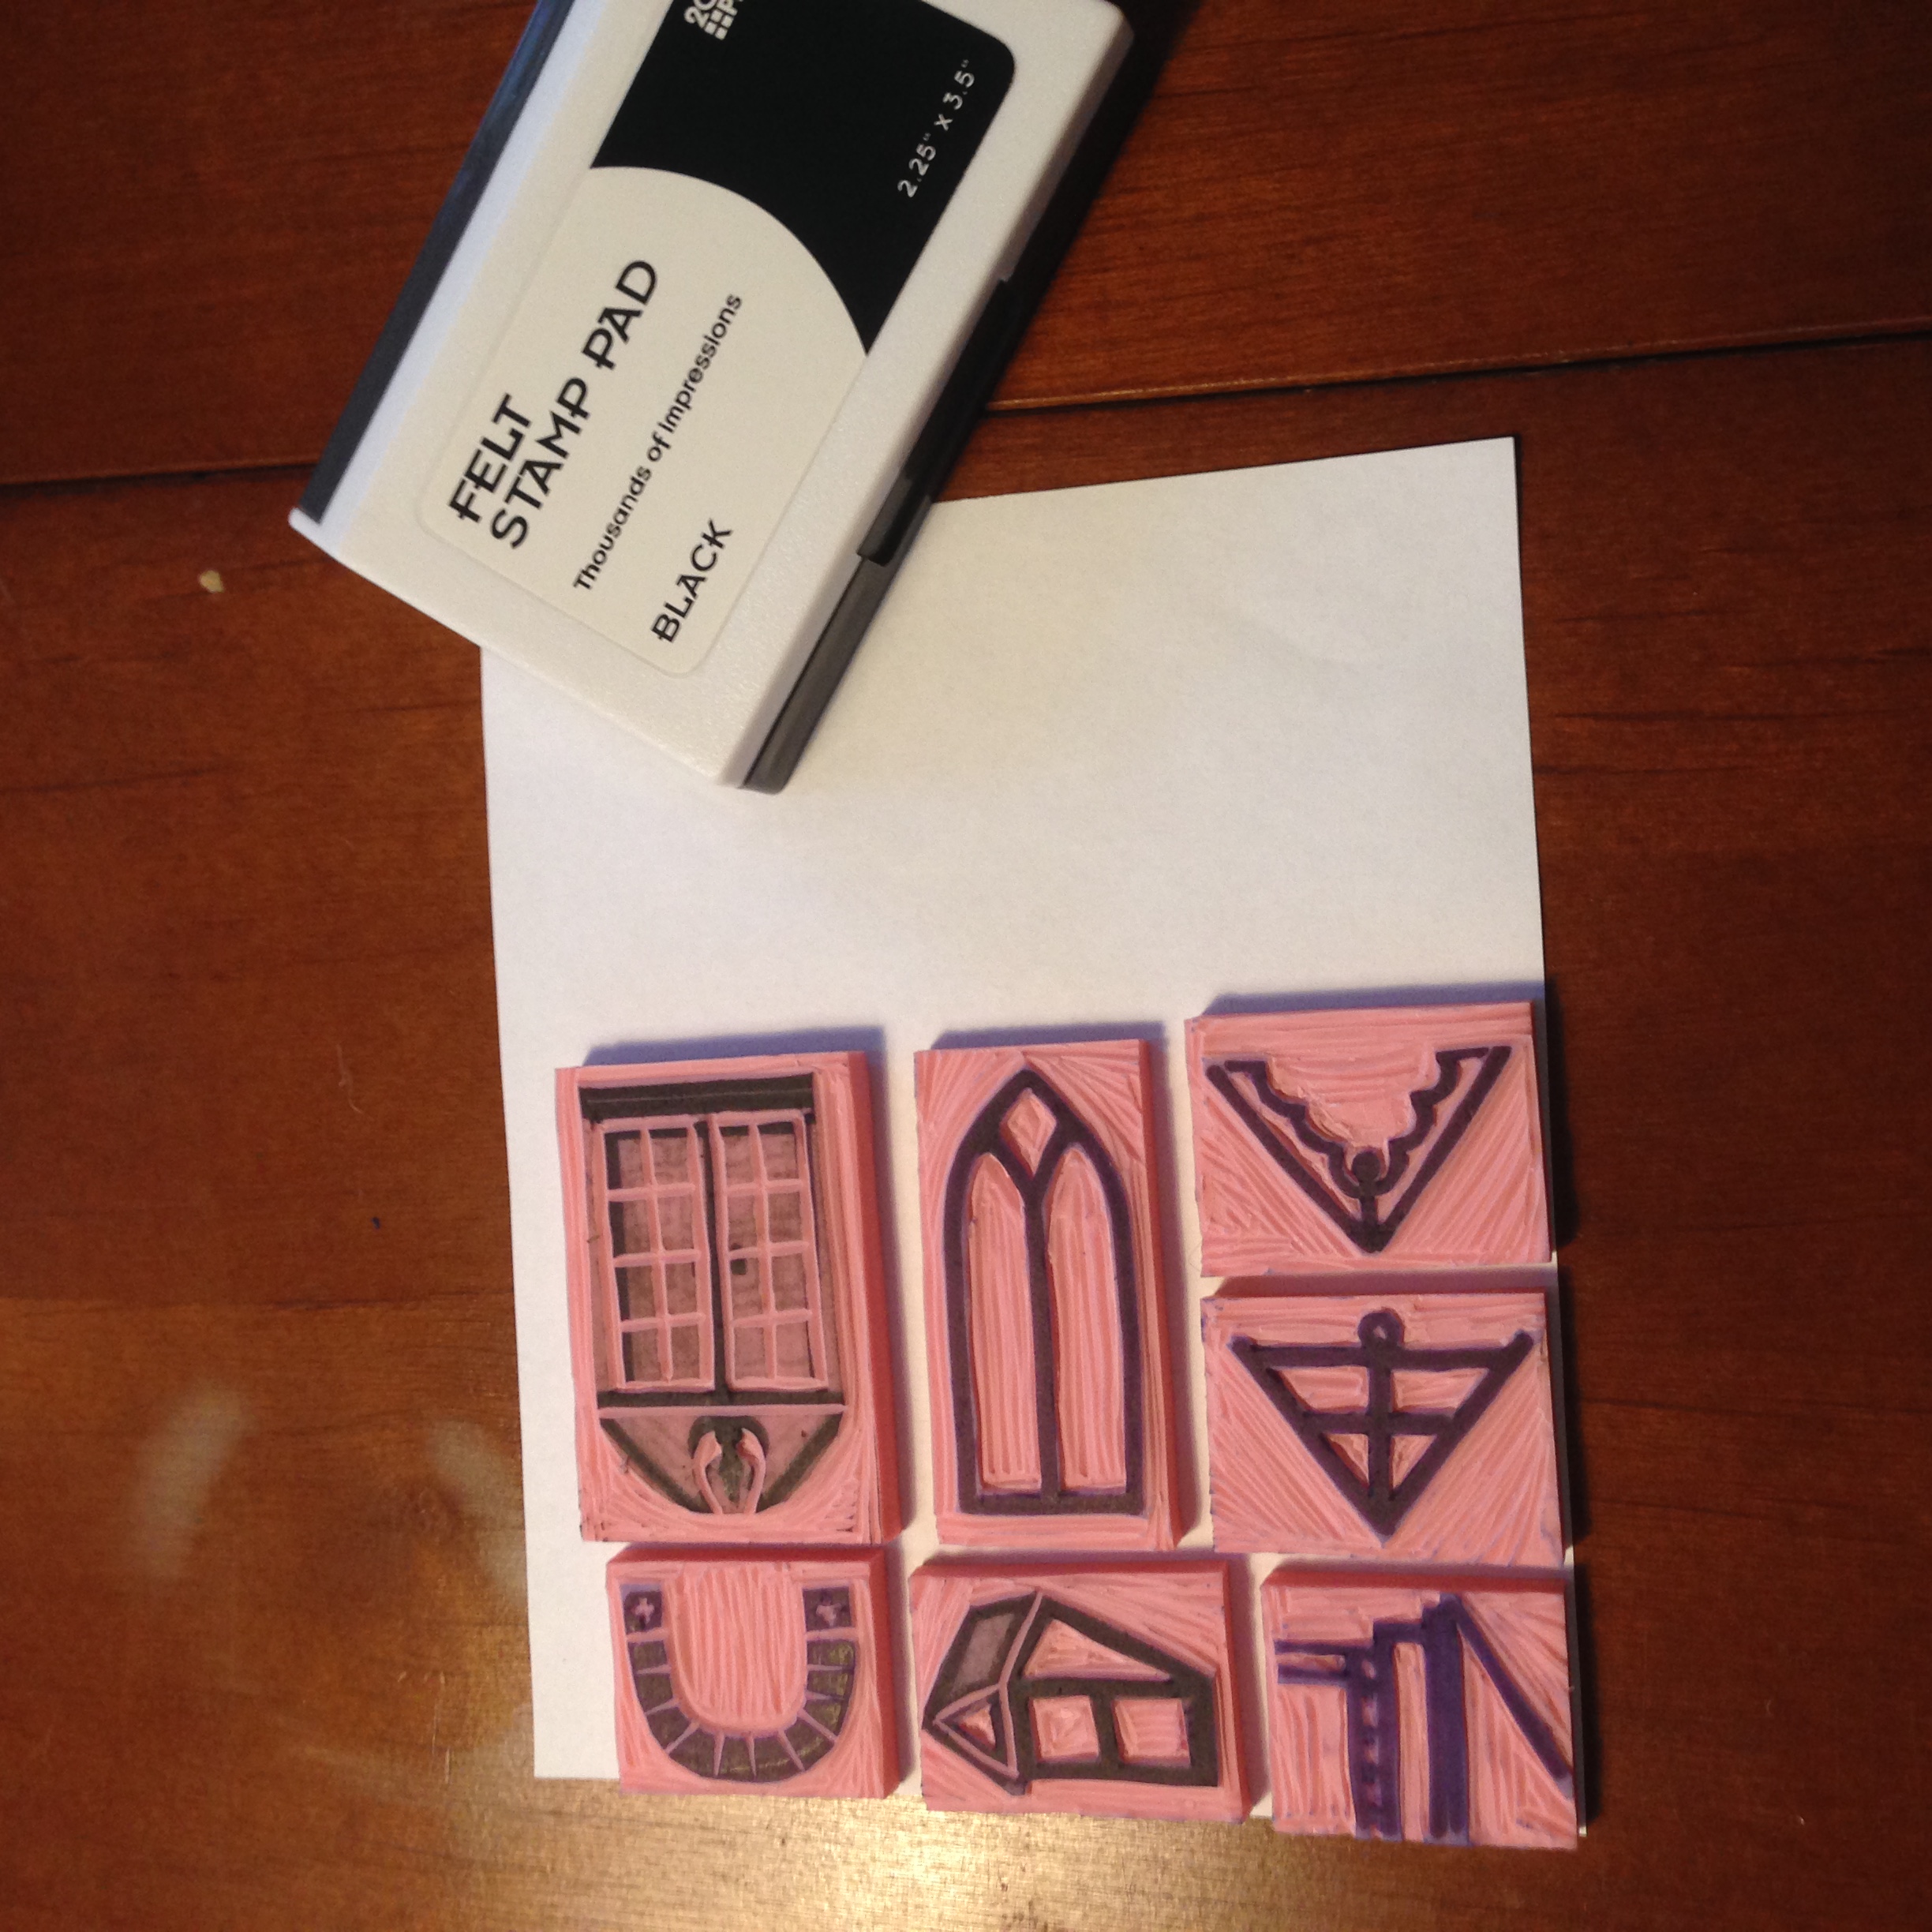
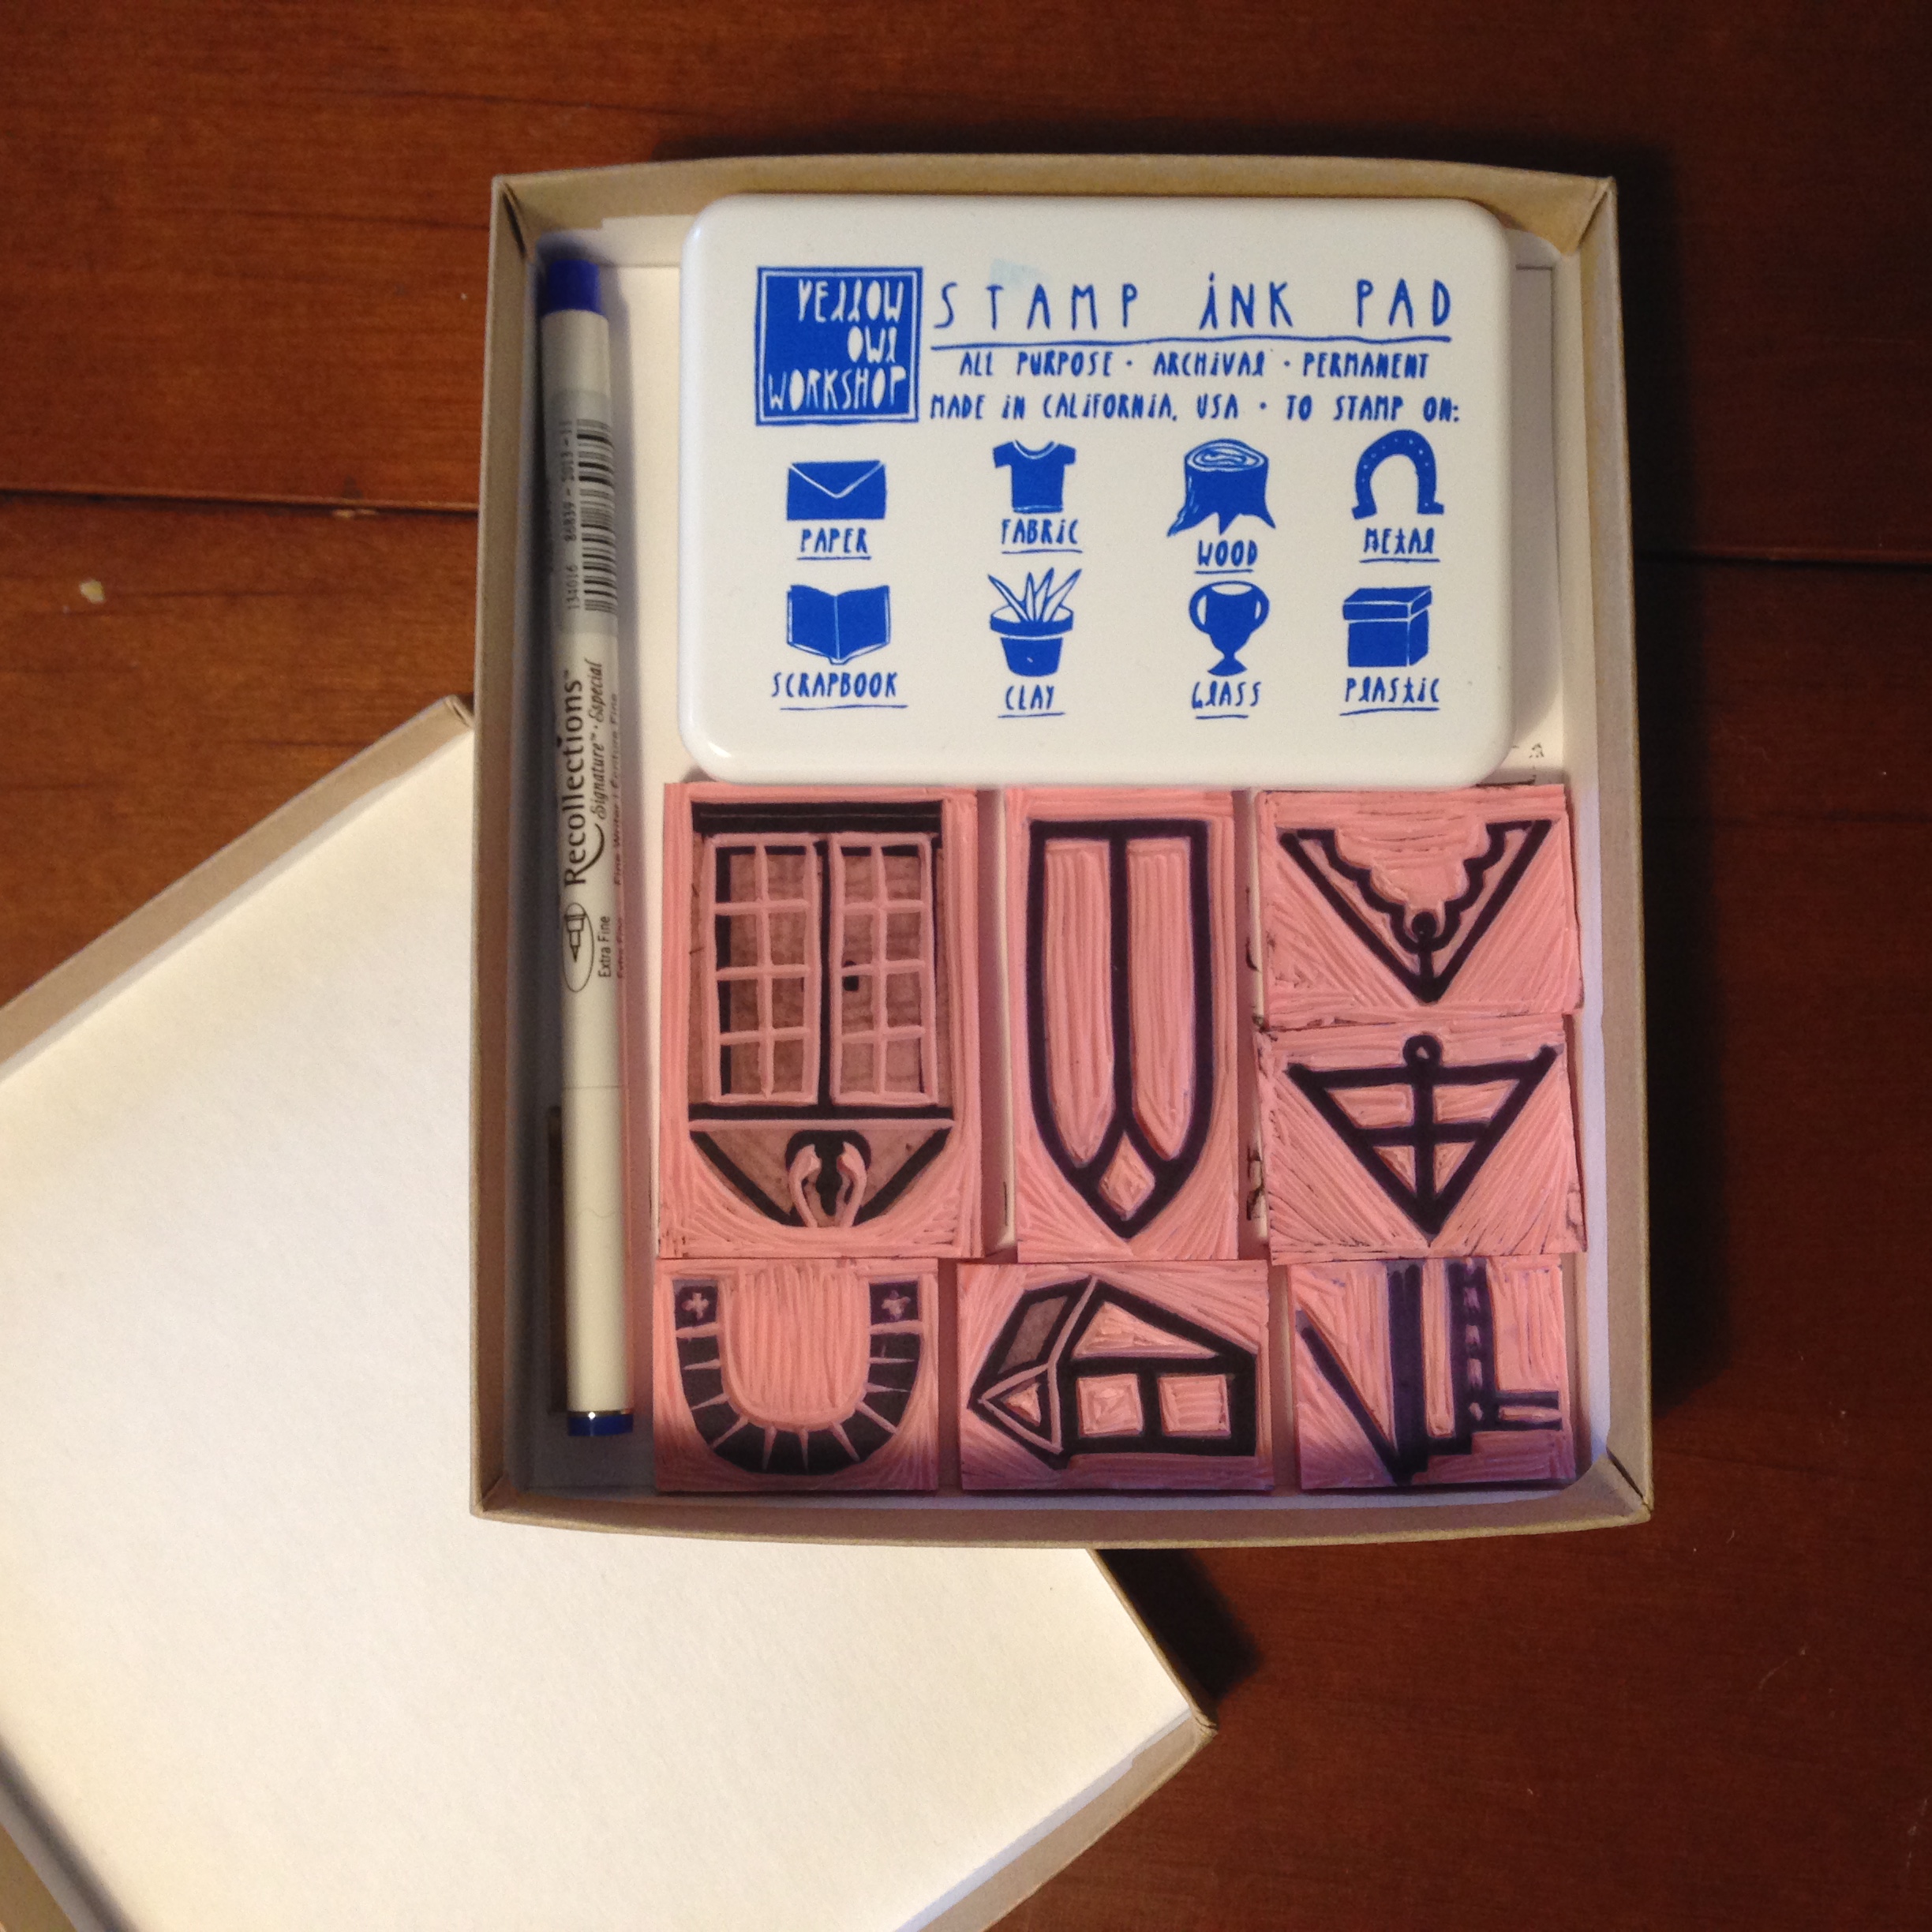
Once all of your stamps are complete, cut a sheet of paper that fits in the inside of your box. Layout your stamps where they will sit in the box, then stamp each one in its place, so they can be put back nicely after use.

Add a stamp pad and any other drawing accessories to the box and you're ready to go!
Once you've created your stamp kit, wrap up your box with some ribbon and a gift tag!
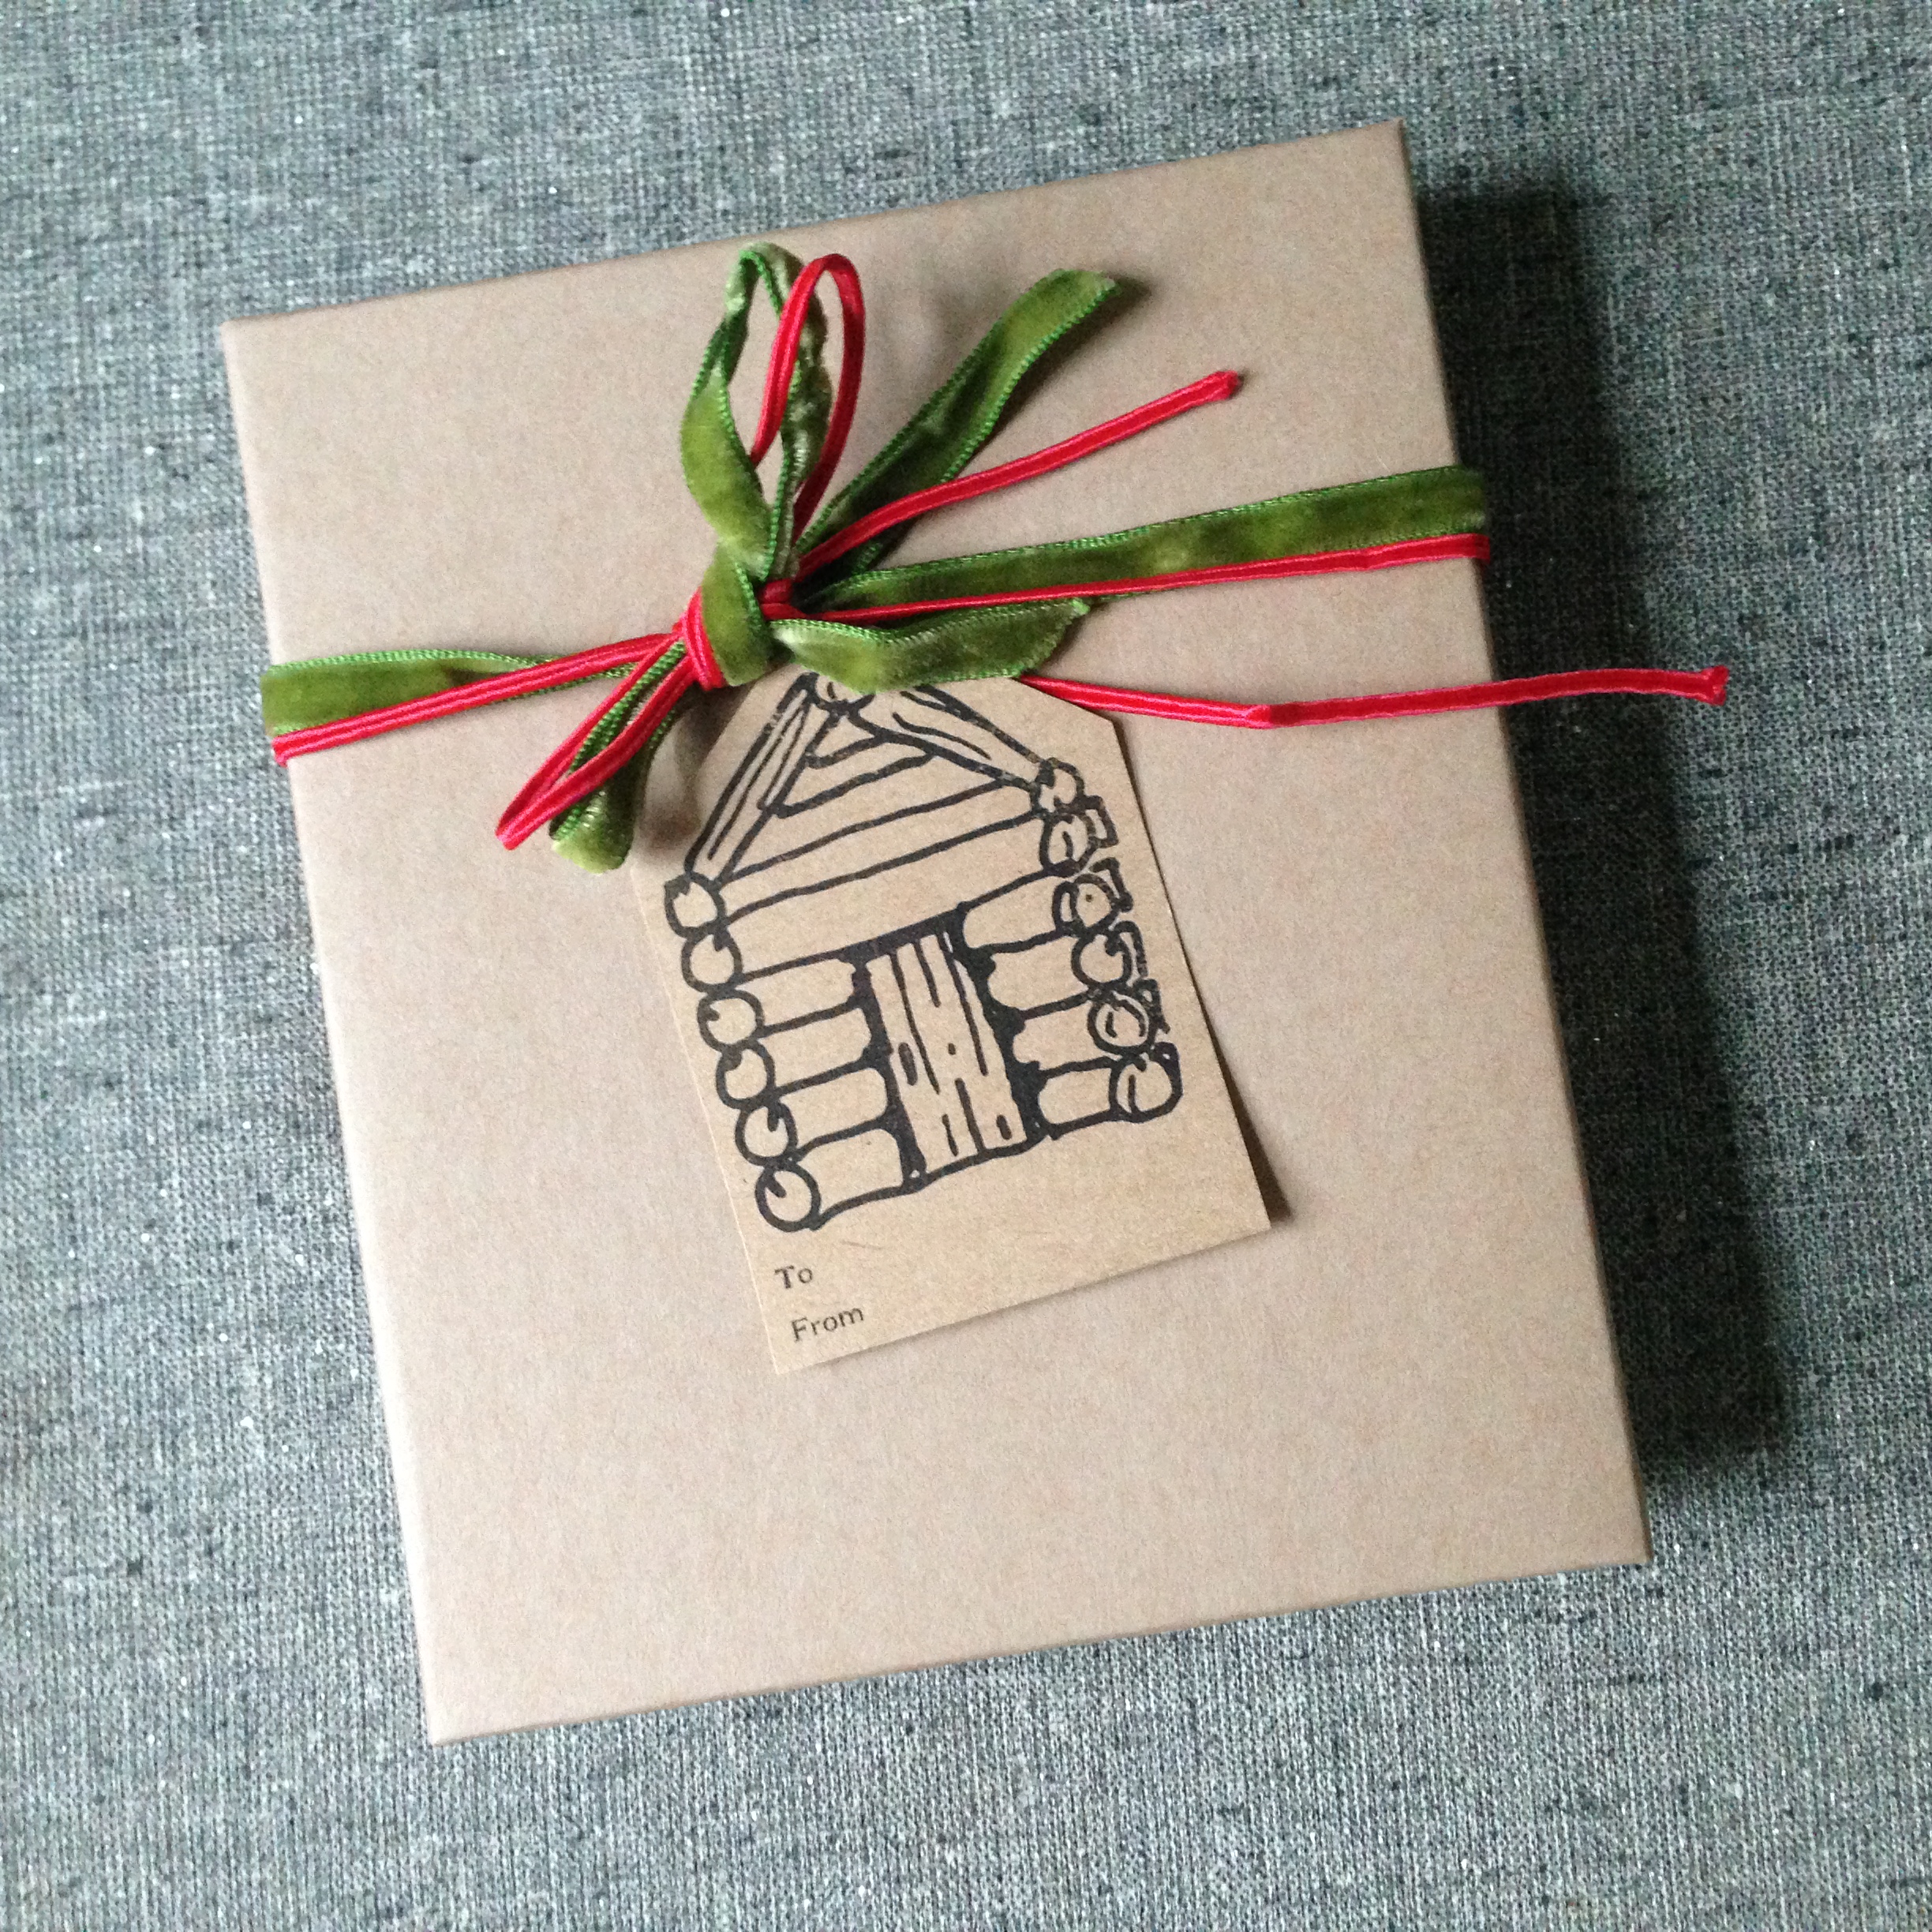
When writing up this tutorial, I felt compelled to make some Cabin inspired gift tags for you all to use and enjoy, especially if you plan on giving Cabin as a gift!
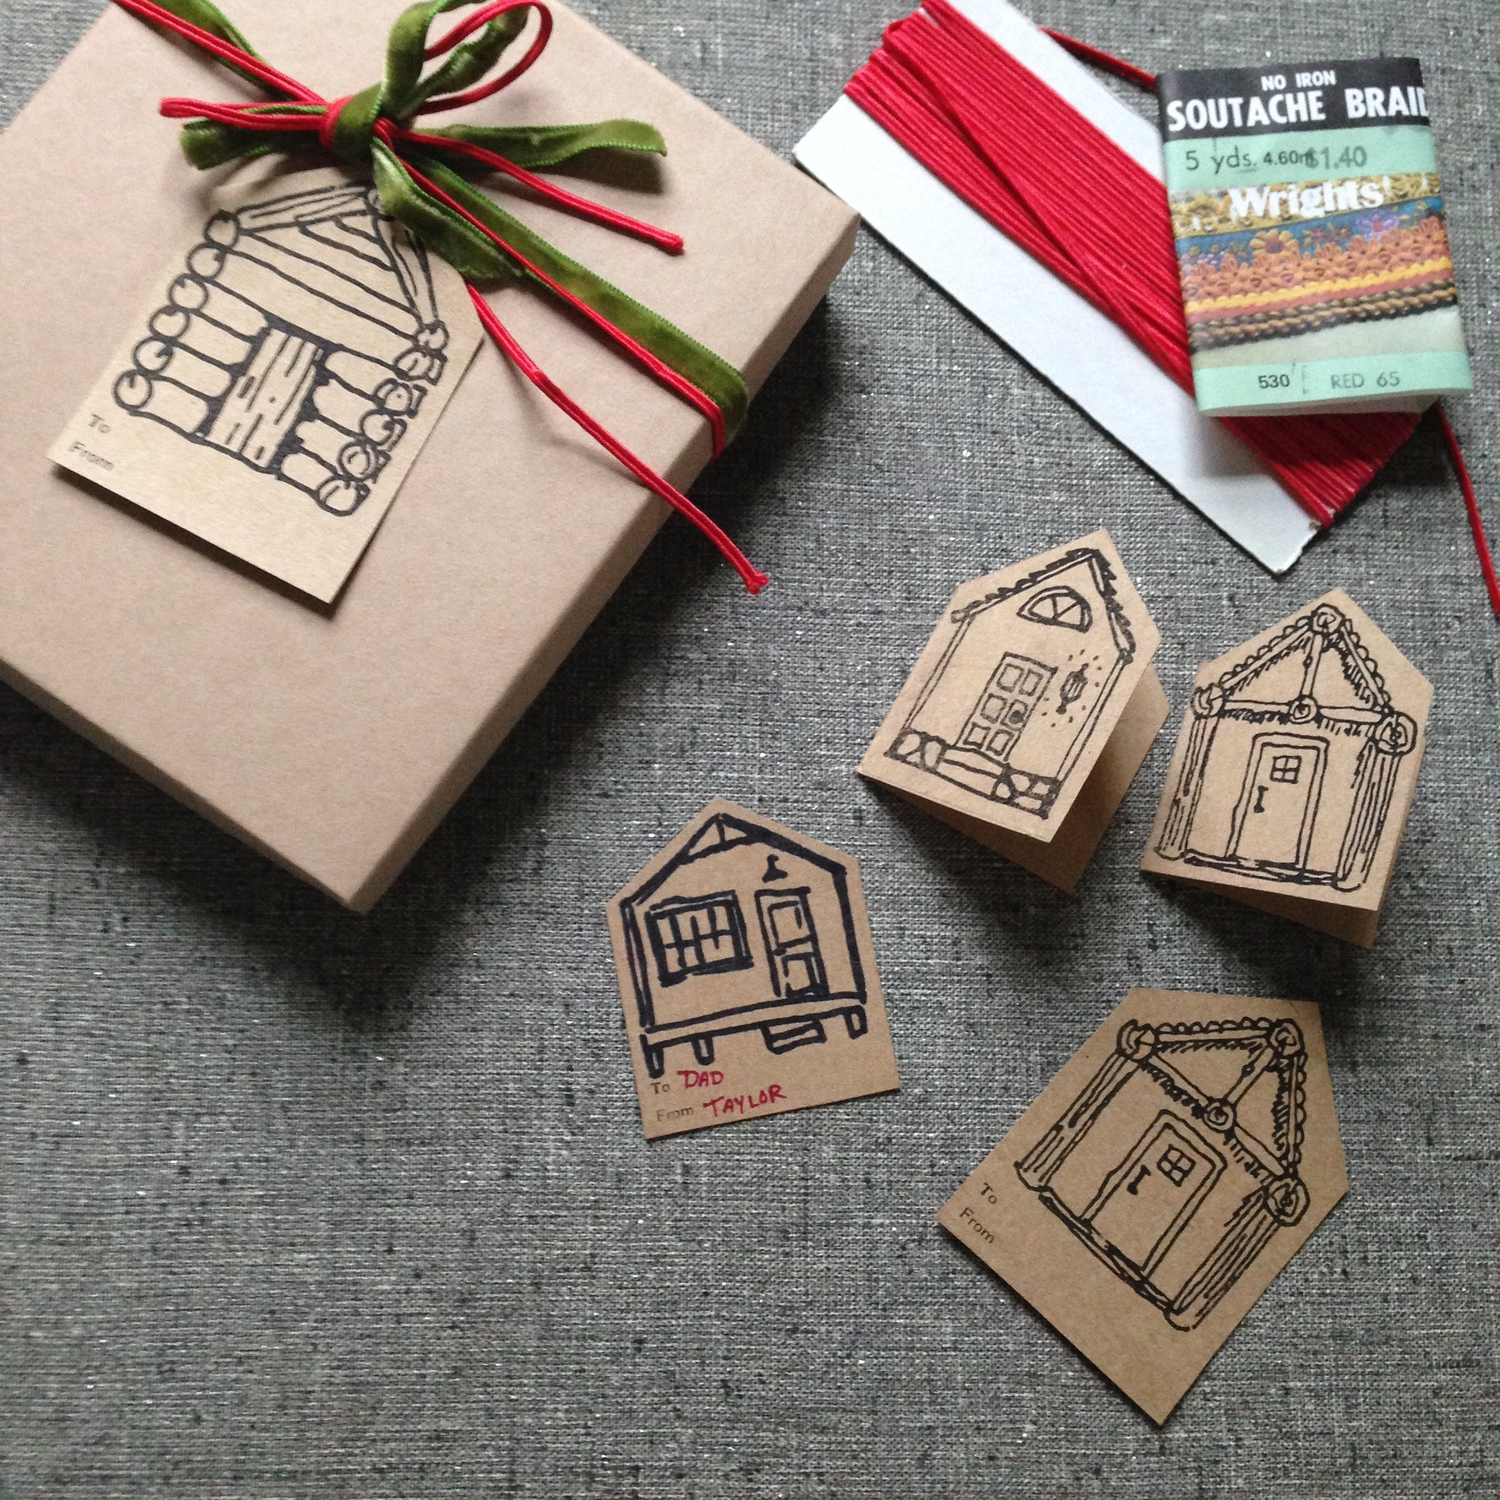
I printed my tags on kraft paper card stock, which looks particularly nice. Keep in mind, if you have a laser printer, sometimes the toner doesn't stick well to heavier paper, so be sure to test first. The printout includes a few different sizes and a few blank tags for you to draw your own cabins if you like!
You can download the Cabin inspired gift tags here!