
My Top 5 Sewing Tips
I'm very excited to say that I'm hard at work on the next Blueprints pattern, set for release in Spring 2015. I'm hoping it will be a great spring & summer wardrobe addition.
Keep an eye out for sneak peaks by signing up for our newsletter (on the right) or following us on Instagram.
In the mean time, as I get my studio into working order now that it's a habitable temperature, I'd love to share a small collection of sewing tips with you all. These are things many often overlook, but I find that they're key to happy, successful sewing.

1. Get a new seam ripper and learn how to use it.
Do you sharpen your kitchen knives? Do you replace the blade on your razor (semi) frequently? We know in other areas of life that implements for cutting work best when they're sharp. You know that seam ripper from your grandmother's sewing kit you've been using? It's likely as effective as using a dull knife from 1979.
Do yourself a favor and buy a handful of little seam rippers, or if you prefer the fancy kind, find one with replaceable blades. If you can figure out a way to sharpen them, more power to you! When you use a new seam ripper, you'll notice a difference instantly if you've otherwise been using one that may be older than you. Ripping seams will go more quickly and smoothly. Just be careful, cutting tight seams with tiny stitches can cut into your fabric if you're not careful!

Here's a tip for ripping seams quickly. Using the pointy end of your ripper, break a stitch every 1/2" or so along one side of the seam. Then, flip your fabric over and pull on the thread. The whole line of stitches should pop out quickly and easily. I learned this from a 1950's sewing text book.

2. Mark everything and embrace the notch
"Little triangle notches? Whatever! I'll just match up the sides of my pieces, " you say, defiantly. Now, I'm not one to observe convention or follow rules in many other areas of my life. But notches...they're important. So are the other markings you often find on patterns. Here's why:
Notches
Notches are clues the pattern maker has given you about how to put everything together. Ever noticed how an armhole & sleeve have a single notch on one side and a double on the other? This is to indicate the front and back of the armhole and help you get your sleeve into the right place. Sometimes there will be a notch at the top of the sleeve to help you match sleeve cap to shoulder seam. Sometimes a panelled garment will have single, double, or triple notches to aid in sewing the right pieces together.
Notches also help you correct your sewing or cutting errors. Ever sewn a seam together only to find one piece extended longer than the other? Trim it even it out, right? Well, perhaps the opposite end of the seam is where the error is. Now you've got problems at both ends! If you match your notches, you'll know where the discrepancy comes from and you can trim or re-sew accordingly. Perhaps one of the fabric pieces has stretched or bunched or your seam allowance was off
Center Front(CF) / Center Back (CB) lines
When making a garment with a closure like a jacket, shirt or wrap dress, the CF and CB lines help you overlap (and in the case of a shirt/jacket, add buttons and buttonholes) and see how the garment will fit once closed. Without those lines, our tendency is to close it so it fits, which is not always on this line. This can cause fit problems in other areas too. It also helps a lot in preventing wavy button plackets.
Other Markings
If you notice a variety of circle marking around the perimeter of your pattern, these might be points to indicate your seam allowance. Often found at corners, they'll tell you where to turn when you're stitching, as with a collar. This is especially helpful with unusual construction.
Sometimes these circles indicate pleat placement or the end of a zipper or where a pocket gets sewn on. Missing these points is a typical source of confusion for the new sewist. When in doubt, your pattern should give you the information you need to decipher these marks.
My suggestions? Mark everything you think you might need. More questions about marking? Check out my tutorial on Marking & Cutting
3. Develop a good work flow
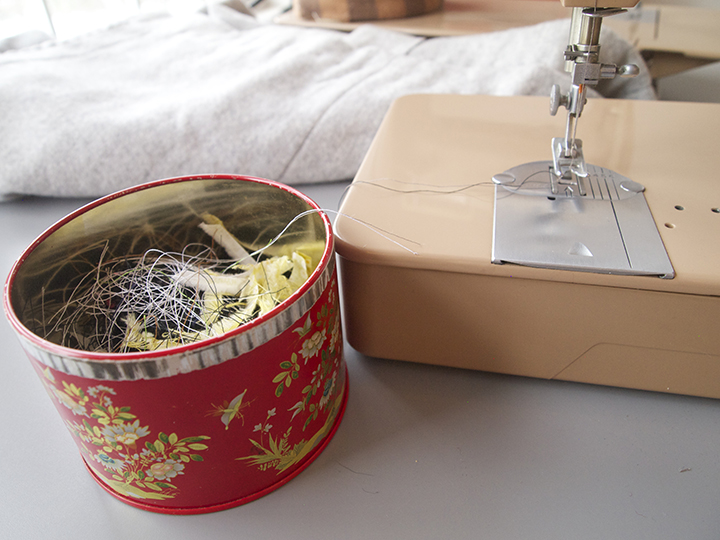
Set up your sewing space so that you can keep it tidy, find all your tools, and practice good habits. On of my favorite things to keep my space tidy is to have little tin thread 'trashcans' around the workspace. This encourages me to trim my threads and put them somewhere. In the past, they've wound up stuck to my pants or in the cat's grip (thread can be dangerous to animals if they ingest it!)
I keep a small pair of scissors at the sewing machine, ironing board, and cutting table so I don't keep looking for the same pair of scissors that have migrated.
I sew all seams that don't have another seam intersect. Then I trim threads on all pieces and press them. Then repeat with each 'group' of seams.
I try to take stretch breaks (super important) and drink lots of water (something I always forget to do)
If you work in a shared space, try keeping all of your essentials in a tackle box, an old silverware tray or a cool caddy.

4. Use pins sparingly
I'm a minimal pinner. On any given straight seam, I don't even use pins. I think to be a confident sewist, you need to develop a real tactile relationship to the fabric and feel comfortable guiding it.
Additionally, so much time is spent pinning, only to take all those pins out as the seam is sewn (and often find that you've pinned unevenly and the seam doesn't line up!)
Not pinning at all may sound crazy to some, so I suggest following these guidlines:
- On all seams, pin only at the beginning, end, and any notches.
- Use less pins for stable fabrics, but feel free to use more pins to help keep slippery fabrics that are hard to align by hand at bay.
- Pin at key points where you're matching an intersecting seam - like waistlines or panels.
- At places where you require a lot of pins to keep difficult sewing steps aligned (waistbands, zippers, etc) try thread or glue basting instead, which will prove much more effective.
One thing to note is that if you don't use many pins (or any at all) you much take care to match your seam allowances carefully. Since you don't have pins in place, you are responsible for keeping your seam allowance in check! This is a totally worthwhile skill to hone.
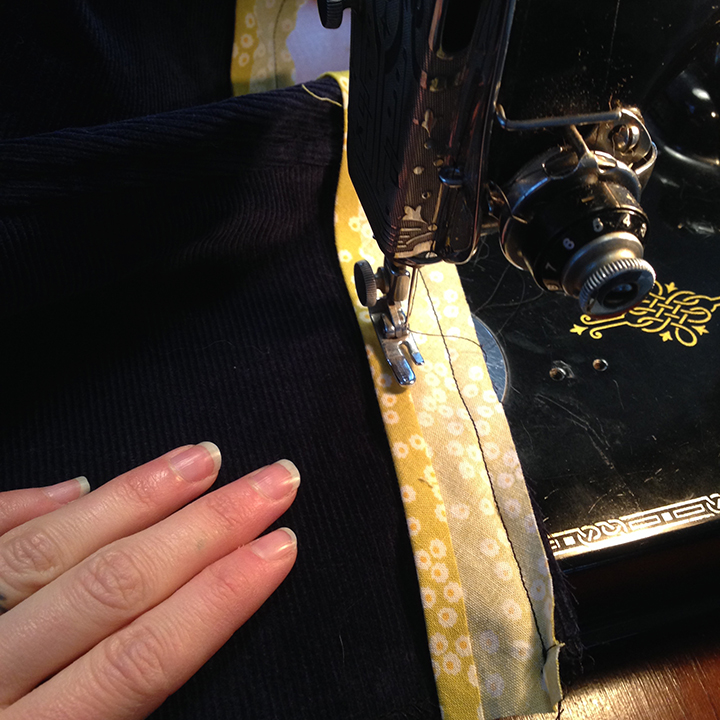
One area where you might think pins are essential is the area where I find pins to be the most hindering...curves! Any time you sew a curved seam, pinning this seam will often feel awkward and yield less than ideal results. Try pining beginning, end, and any notches for the sake of alignment, then work slowly, matching the seam allowances a few inches at a time. I like to keep one curve flat (in its natural curved position) and align the other curved piece to it (as in the case of the bias binding, pictured above)
The main reason I champion less pinning is that it encourages the sewist to have a more hands on relationship with the fabric. The more you can feel the seams and know how to make your hands do what your brain wants, the more you'll be able to sew with ease and make your fabric behave.

5. Steer your fabric, don't drive it
I often tell students that the way you should hold your fabric when sewing is like the way you use a Ouiji board. Rest your hands on it and let the sewing machine do the work.
The Ouiji analogy falls a bit short because you do need to 'steer' your fabric, but the point is to do it with a gentle hand: don't push or pull (except in rare circumstances).
Sewing machines are designed to move the fabric for you and to guide it straight. Often, the trick to keeping an even seam allowance is taking an almost 'hands off' approach. Many folks grab the fabric in front and back of the machine, which probably does more to throw the fabric off than to guide it.
Try keeping your hands in front of the needle, holding the fabric lightly, and guiding it when necessary, such as around curves or to correct a narrowing seam allowance. Sometimes, when working on a large object, the weight of the fabric will throw off the alignment on the machine. This is a bit like driving a car who's tires are out of alignment. A slight pull in one direction or the other tends to do the trick.