
Ironing Board Shirt

Lately I have been making easy, comfortable shirts to wear for the day-to-day. I'm not a big t-shirt wearer, so my wardrobe has had some gaps in terms of more casual shirts that suit my style. This is one of them.
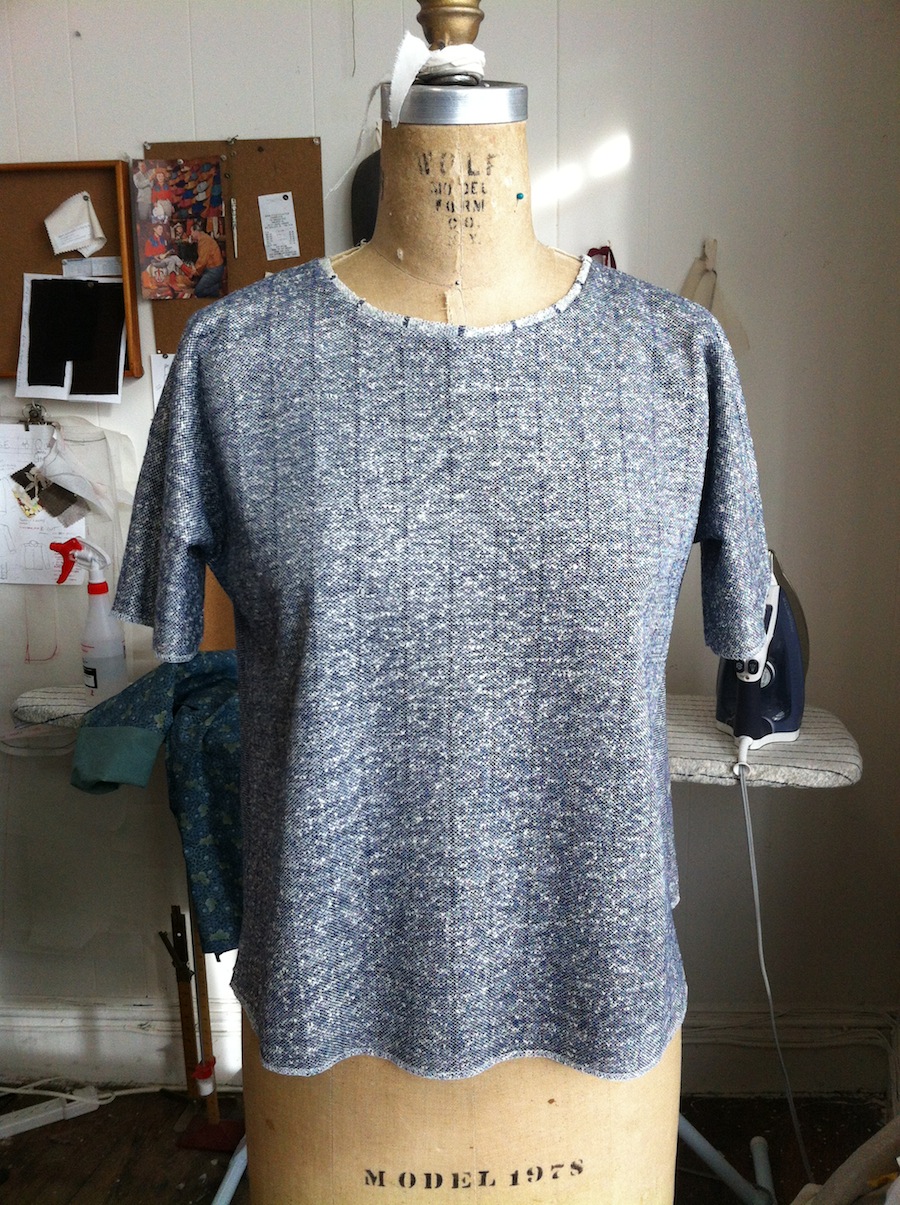
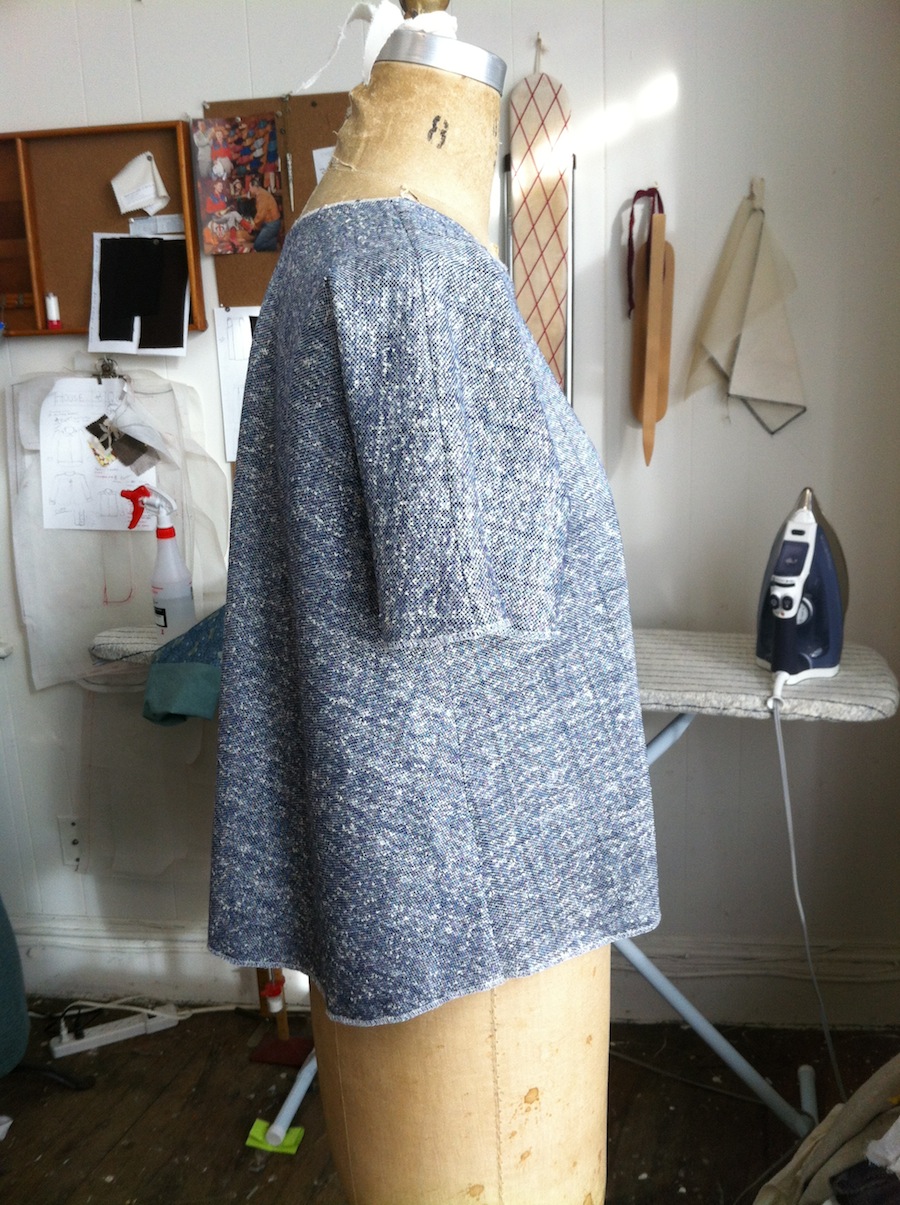
I drafted the shirt from my sloper, adding extra ease for a relaxed fit. The kimono sleeve is pretty close fitting, drafted with the help of my sleeve sloper.
The fabric I used started its life as an ironing board cover. Actually, it still is an ironing board cover. I'd been using a piece of tubular knit jersey to cover a tall ironing table. At the time, it seemed like a good fit as I liked the fabric but was not crazy about the pinstripe. I recently acquired a conventional ironing board and the covers they come with are TERRIBLE; bad colors, thin, and reeking of all kinds of chemical finishes. I decided to re-cover it with the jersey fabric (it had proven itself as a worthy ironing surface cover). When I cut open the tubular jersey to get a single layer, I discovered that I was smitten with the wrong side of the fabric! Has this ever happened to you?
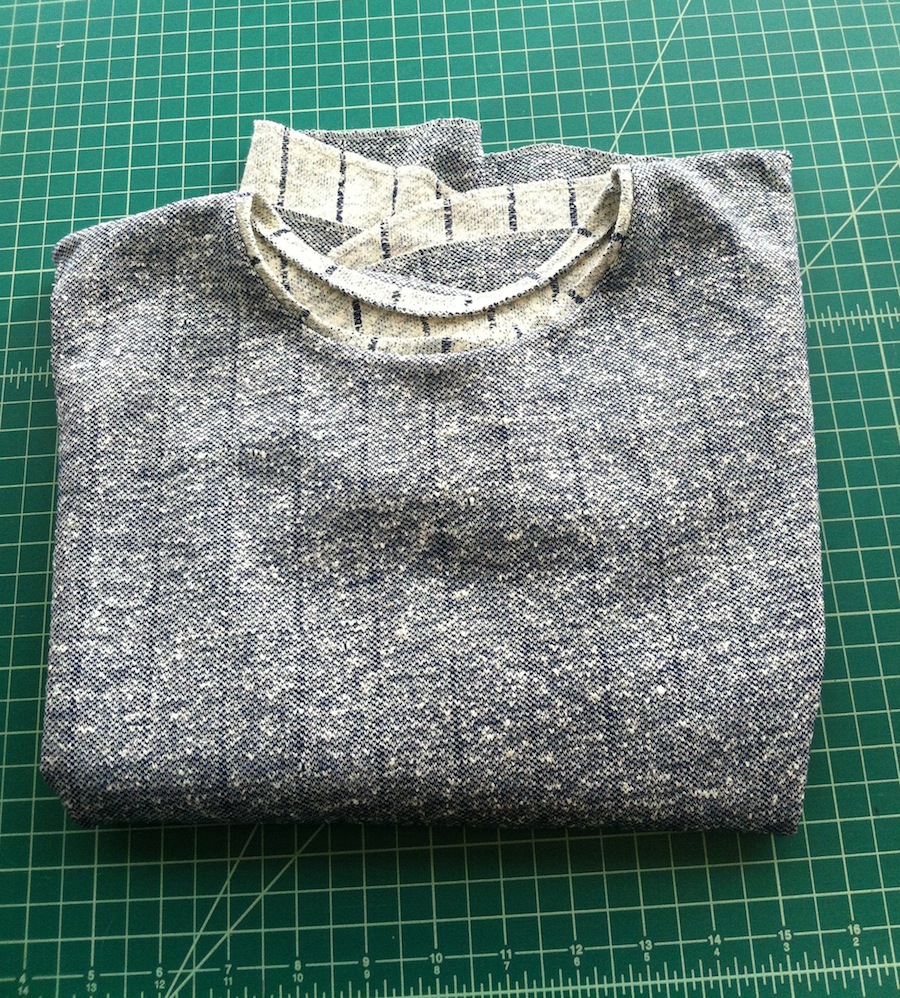
I had to cut around some small stains and holes - the fabric was second hand after all - but this one was pretty quick to sew up. It's a very stable knit and the edges are finished with a simple overlock stitch, something I can't stand on RTW but for some reason felt was appropriate for this garment. The neckline band features the RS of the fabric.
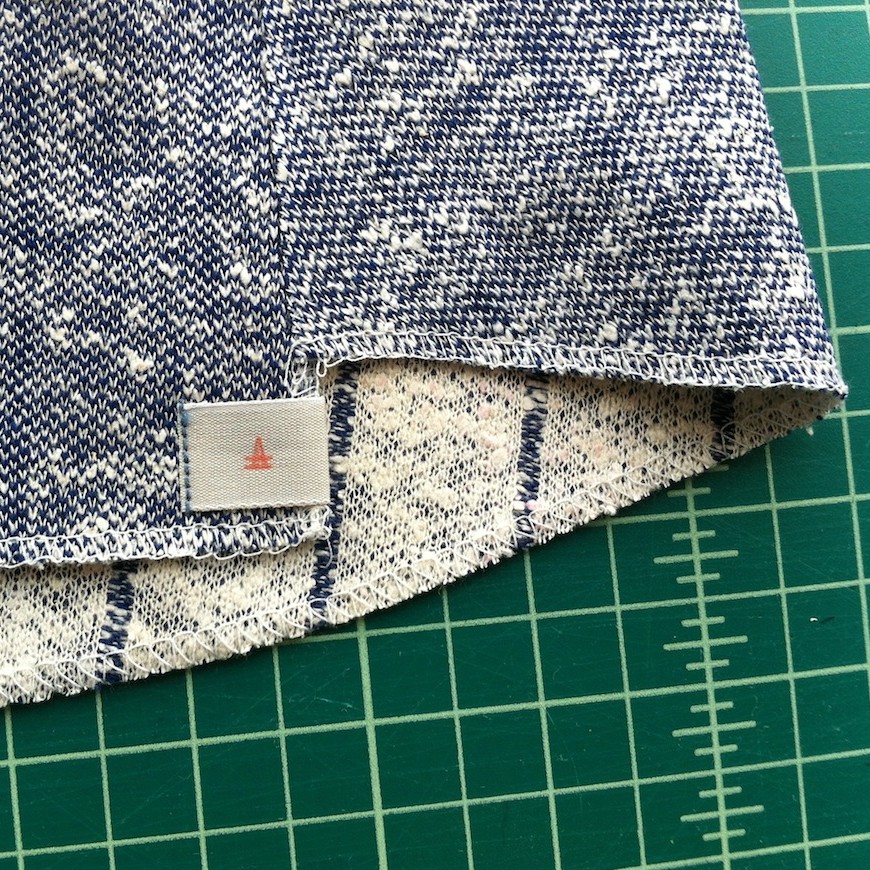
Shh, don't tell...the 'design detail' tag at the hem is actually the result of a mis-calculation in trimming after I decided to finish the hem this way. But I actually quite liked it and figured it would be a nice place to feature some 'branding' (I actually abhor this term...) with a little HOQ tag. A lesson in how to make mistakes look intentional...