
A-Frame Renovation: Flex-fit waistband for A-Frame
Want a comfier high waisted skirt? Add an elastic waist to your A-Frame!

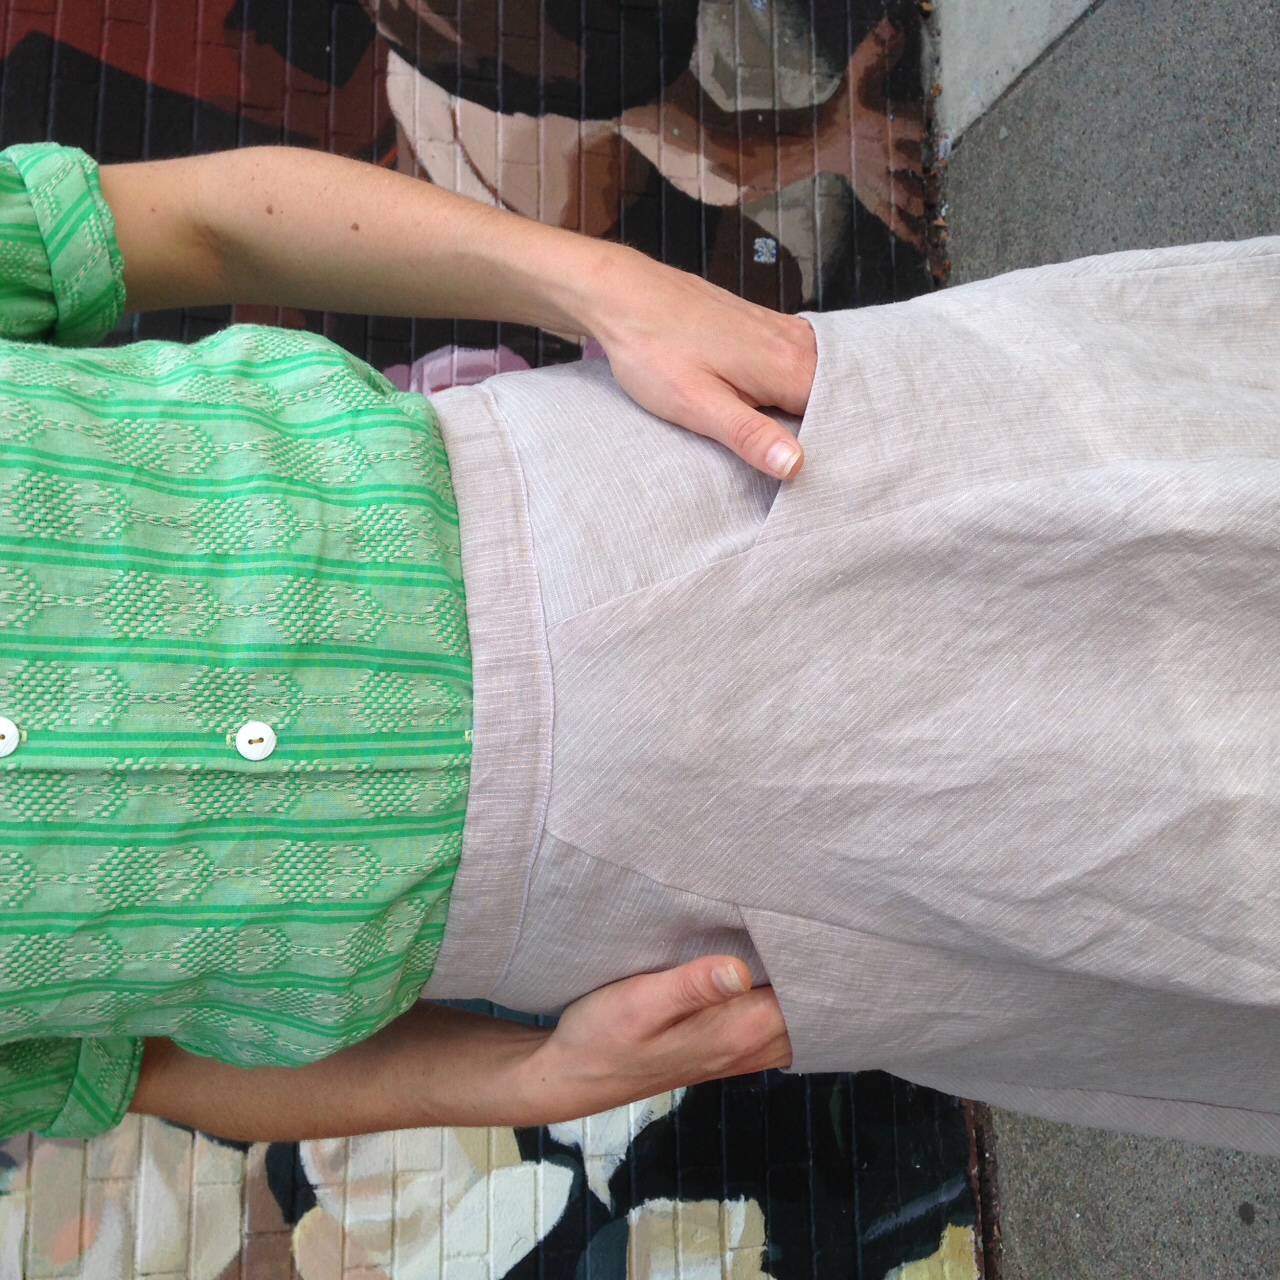
A-Frame skirt Version 2 here in a fine pinstripe linen from my stash, nice and drapey. Shown with an Aster blouse by Colette Patterns in some Anna Maria Horner "Loominous"
I love a high-waisted skirt. There was a time in my life where the more fitted at the waist something was, the more I liked it. I liked being squeezed a bit around the natural waist. (This was, not coincidentally, the time in my life where I wore the most vintage clothing, which is notorious for waist-squeezing)
There came a point where this changed, perhaps when I re-discovered pants and wore them a lot for the first time since I was 13. Or maybe when I started to move away from vintage and towards more abstract and "body unconscious"* silhouettes. I think this time had reached its pinacle when I released Cabin, and A-Frame is definitely a swing in the opposite direction in terms of waistlines. And who doesn't like being comfortable?
*this term came from a great interview with Sonya Philip on the While She Naps Podcast, which I highly recommend
Something I often do with my high-waisted, waistband having skirts is to add a bit of elastic. Not enough to created a pronounced gather at the waistline, but just enough to give you that extra inch you might need while sitting for long periods of time or after an awesome meal.
The nice thing about this technique is it also adds some structure to the waistband without using interfacing.
Start with a slightly larger pattern size
If you're making A-Frame V1 (the pencil skirt), you'll want to follow the instructions for blending between two sizes and go one size up at the waistline only. If you like a more relaxed, less wiggly pencil skirt, you could go one straight size up. If your measurements are different than the pattern (aka, your waist is smaller than the pattern for the size that fits your hips) then lucky you, you don't have to do a thing. In fact, this alteration came about as a way for me to work with patterns & even RTW skirts where I had this same problem.
If you're making A-Frame V2 (the a-line), simply go a size up. Already cut out your size and don't fancy tracing/printing/cutting again? Just add 1/4" to the waistband and skirt side seams as you cut your fabric. Definitely works in a pinch.
Gather Supplies
The waistband itself is 1 1/8" tall. For this tutorial, you'll want to use 3/4" non-roll waistband elastic. This gives the elastic a bit of breathing room in your waistband. Some of the difference is eaten up by the thickness of the elastic as well. And it makes it easier to sew down your waistband without elastic getting in the way (and for this tutorial, you don't want to sew down your elastic as you sew the waistband).
Skip the interfacing. Since there will be a nice piece of elastic in that waistband, it wont collapse. You may want to fuse a small square of interfacing under the spot where your buttonhole goes if your fabric is thin or loosely woven.
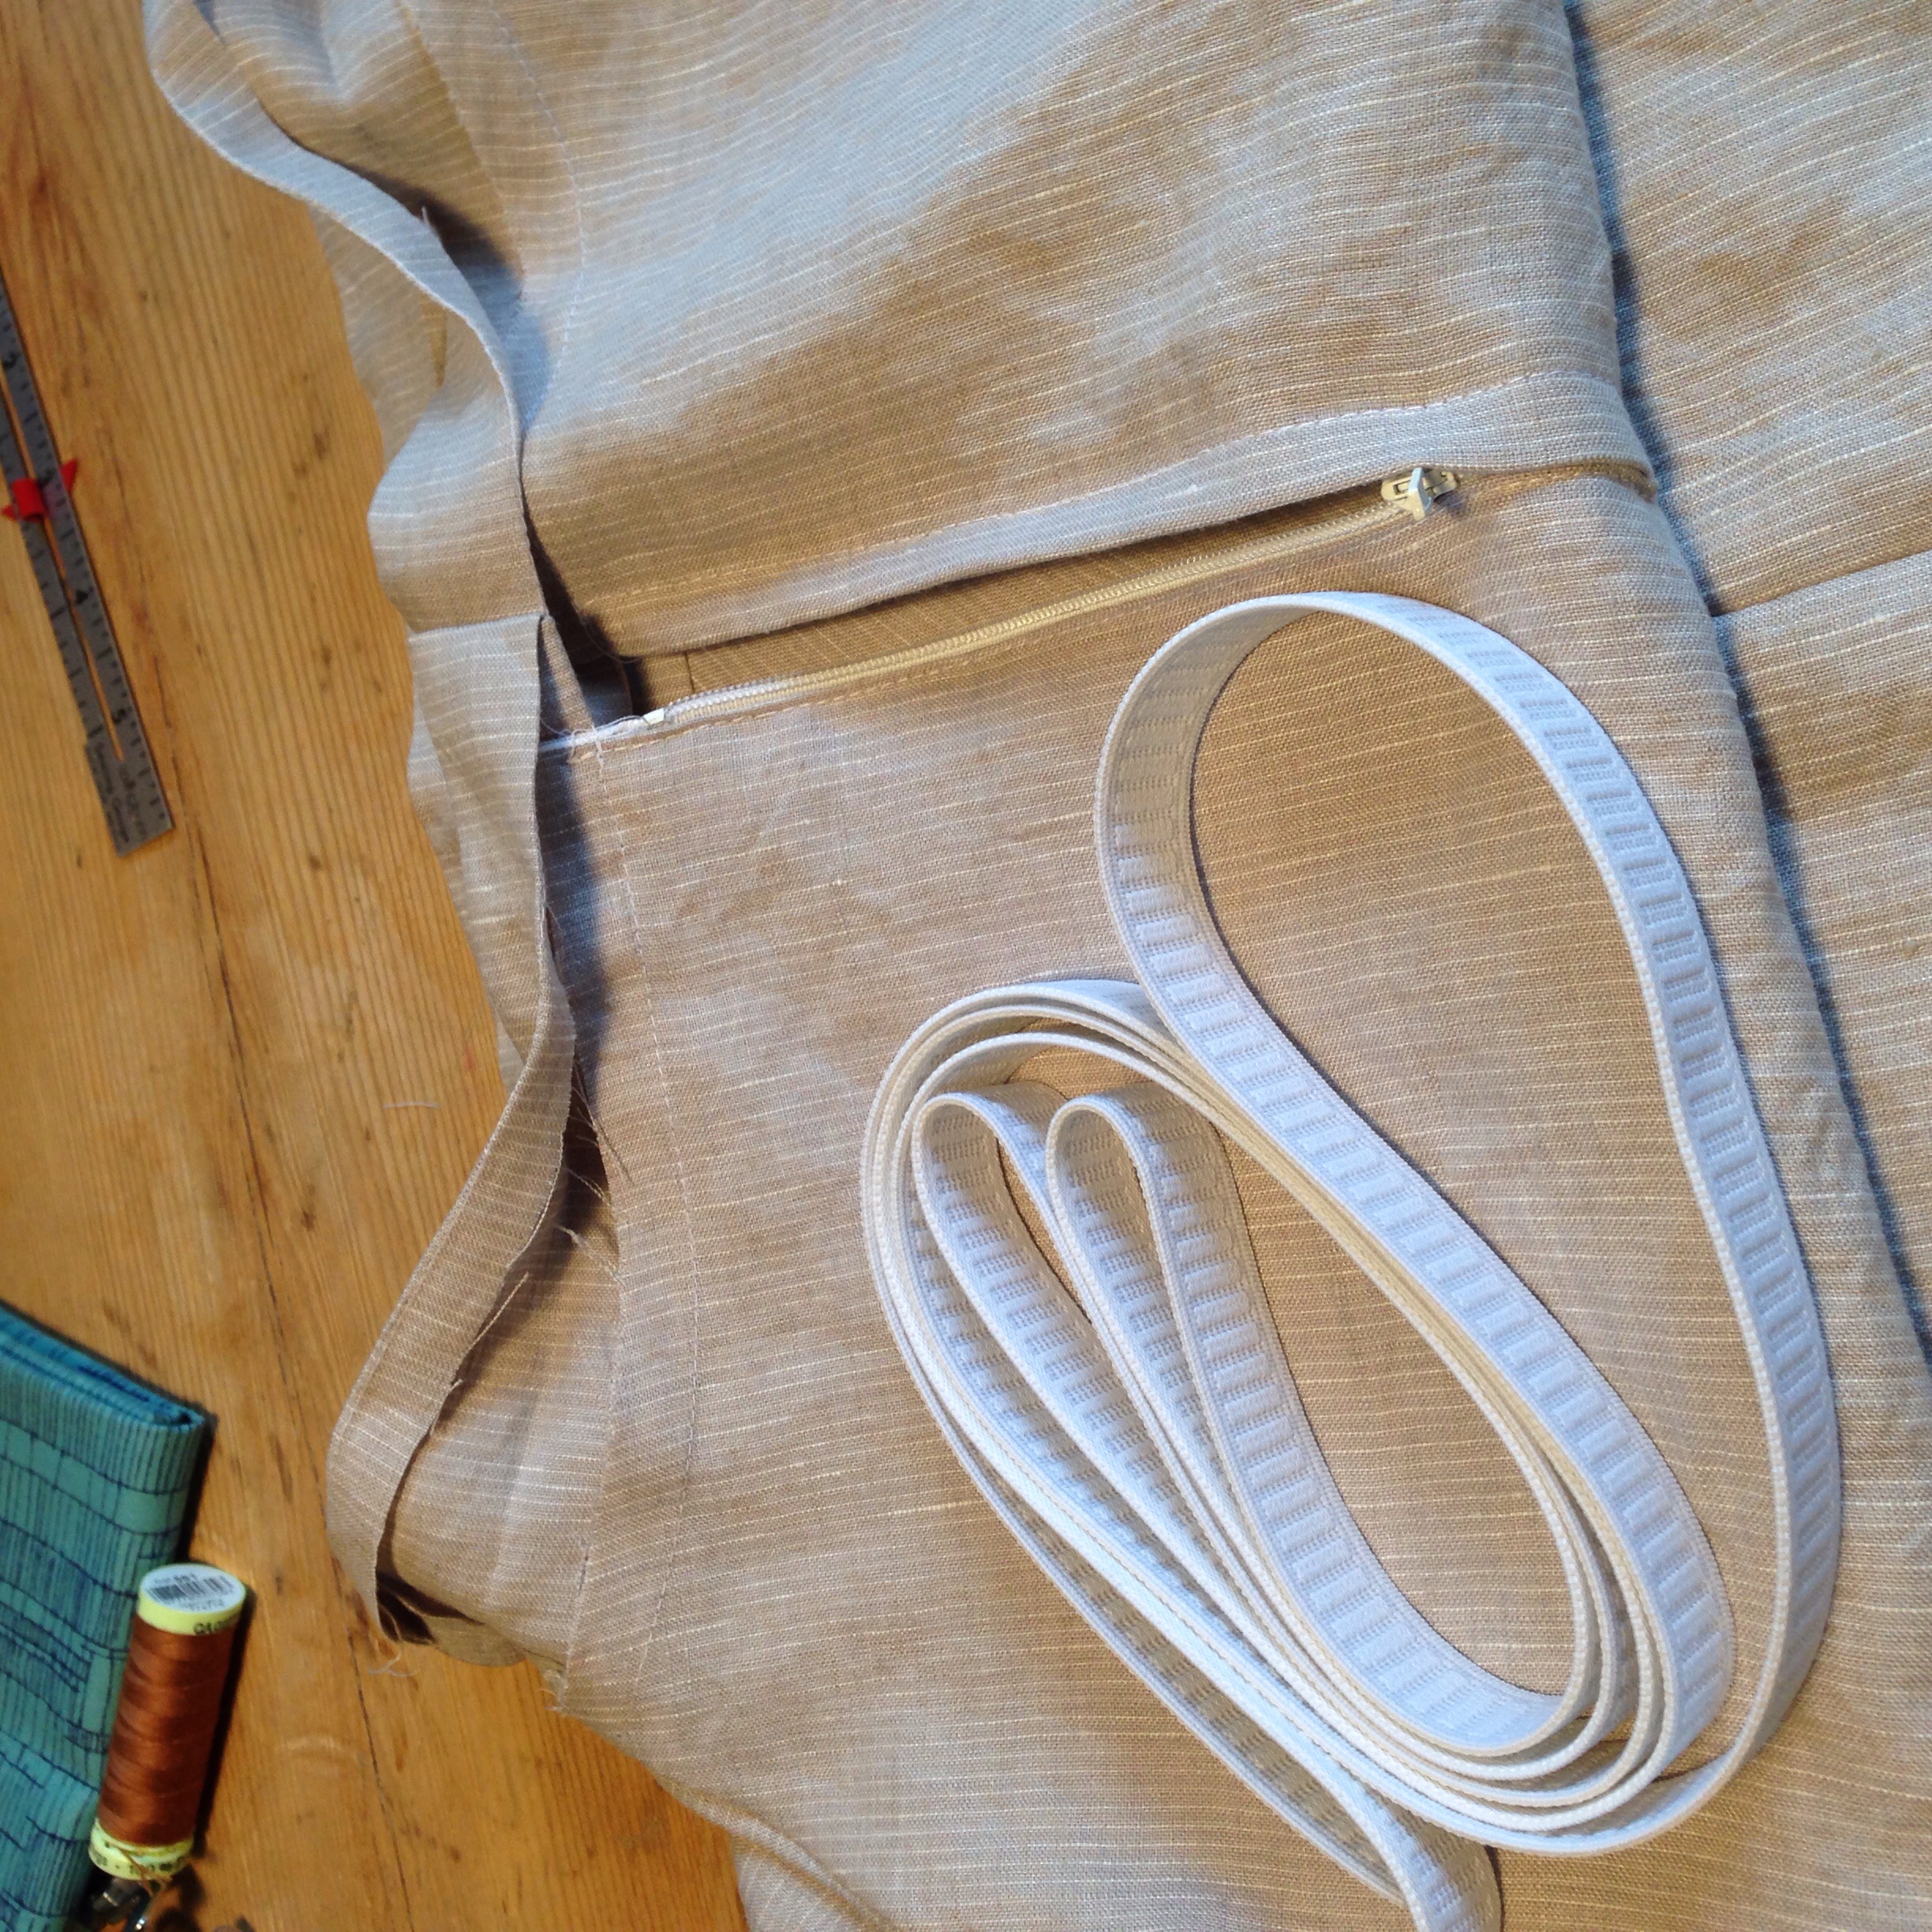
Assemble your skirt
Sew your skirt following the pattern direction until you reach the waistband steps. Sew on the first part of your waistband and press, but leave the 2nd part unsewn.
1. Cut a piece of elastic equal to your waist measurement - 2". I like my waist elastic to be essentially unstretched until I need it to stretch, but if you like your waistband a bit more snug all the time, subtract 3".
2. Pin one end of the elastic into your waistband, lining up the top of the elastic right below the fold on the waistline piece and 1" away from your center back seam (where the circle mark on your waistband pattern piece is).

3. Wrap the elastic around the waistband to the other side. It should be smaller than the waistband itself. Be sure not to twist the elastic! Pin the opposite side in place as you did for the first.
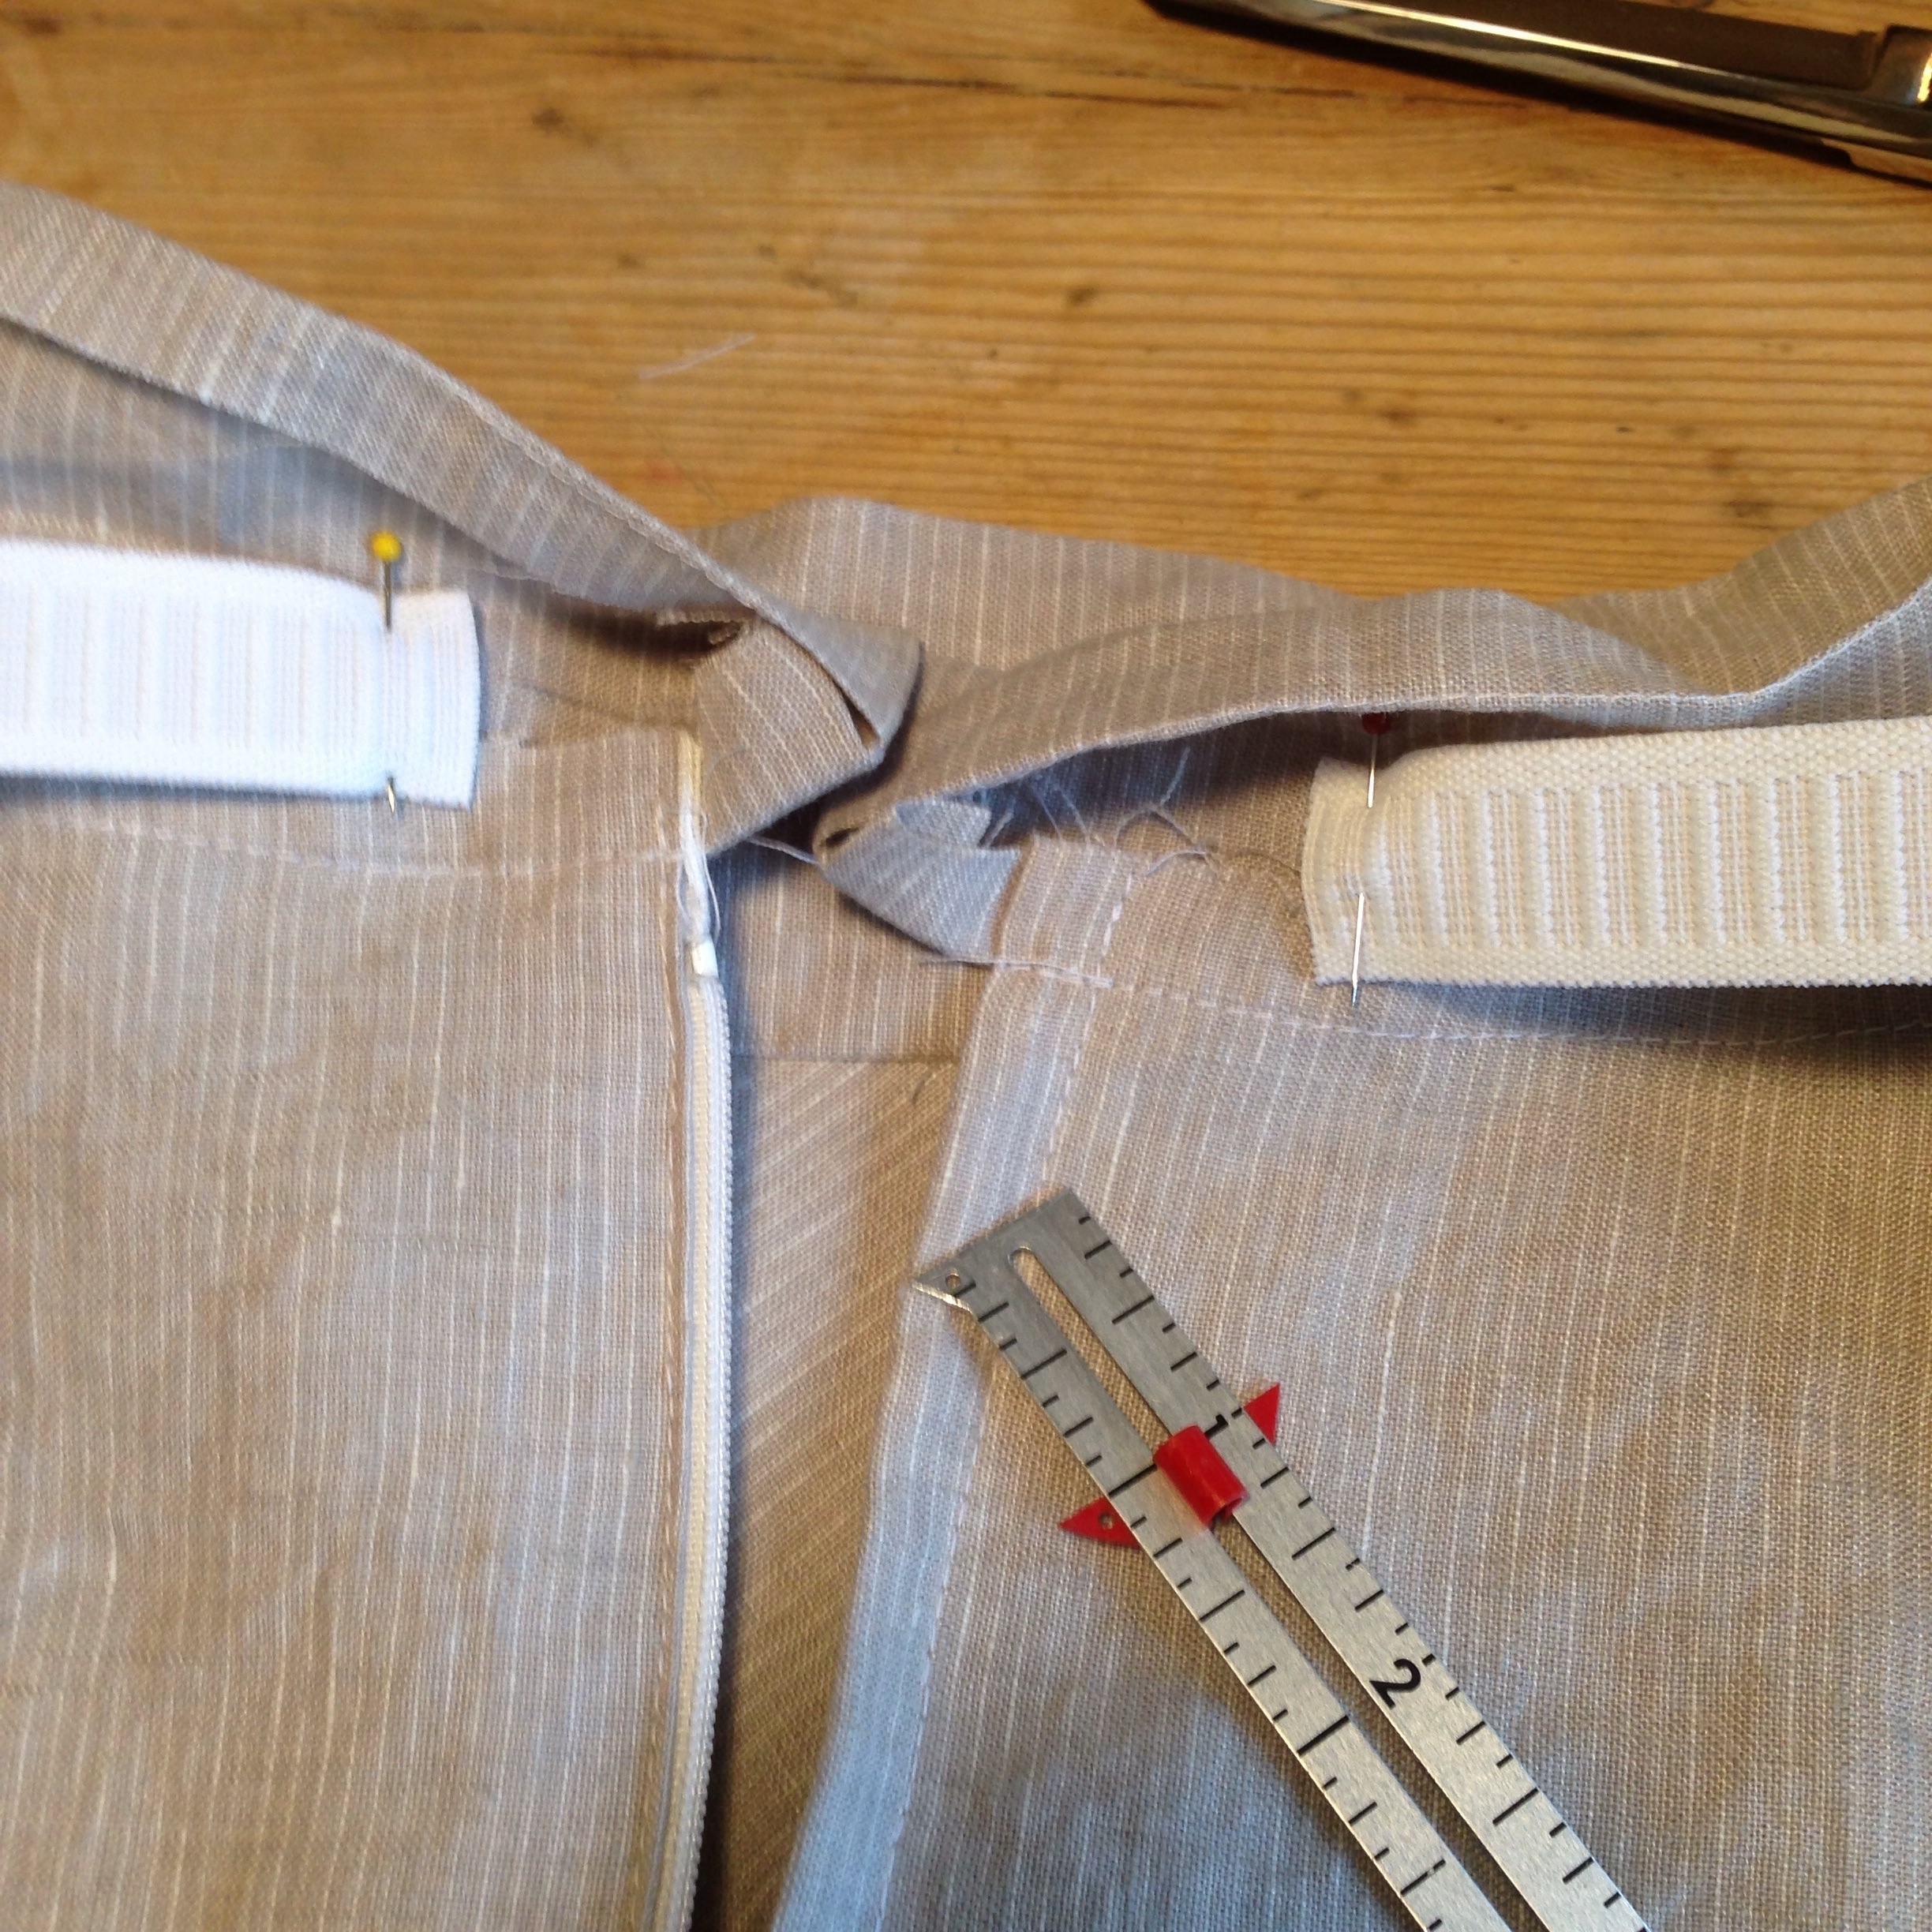
4. About 1/4" in from the edge of the elastic, sew it to the waistband. I started at one end, sewed to the other end and reversed stitched back to my starting point. The elastic should be positioned close to the waistband fold, not where the waistband is sewn on.
Repeat this step for the other side of the elastic.


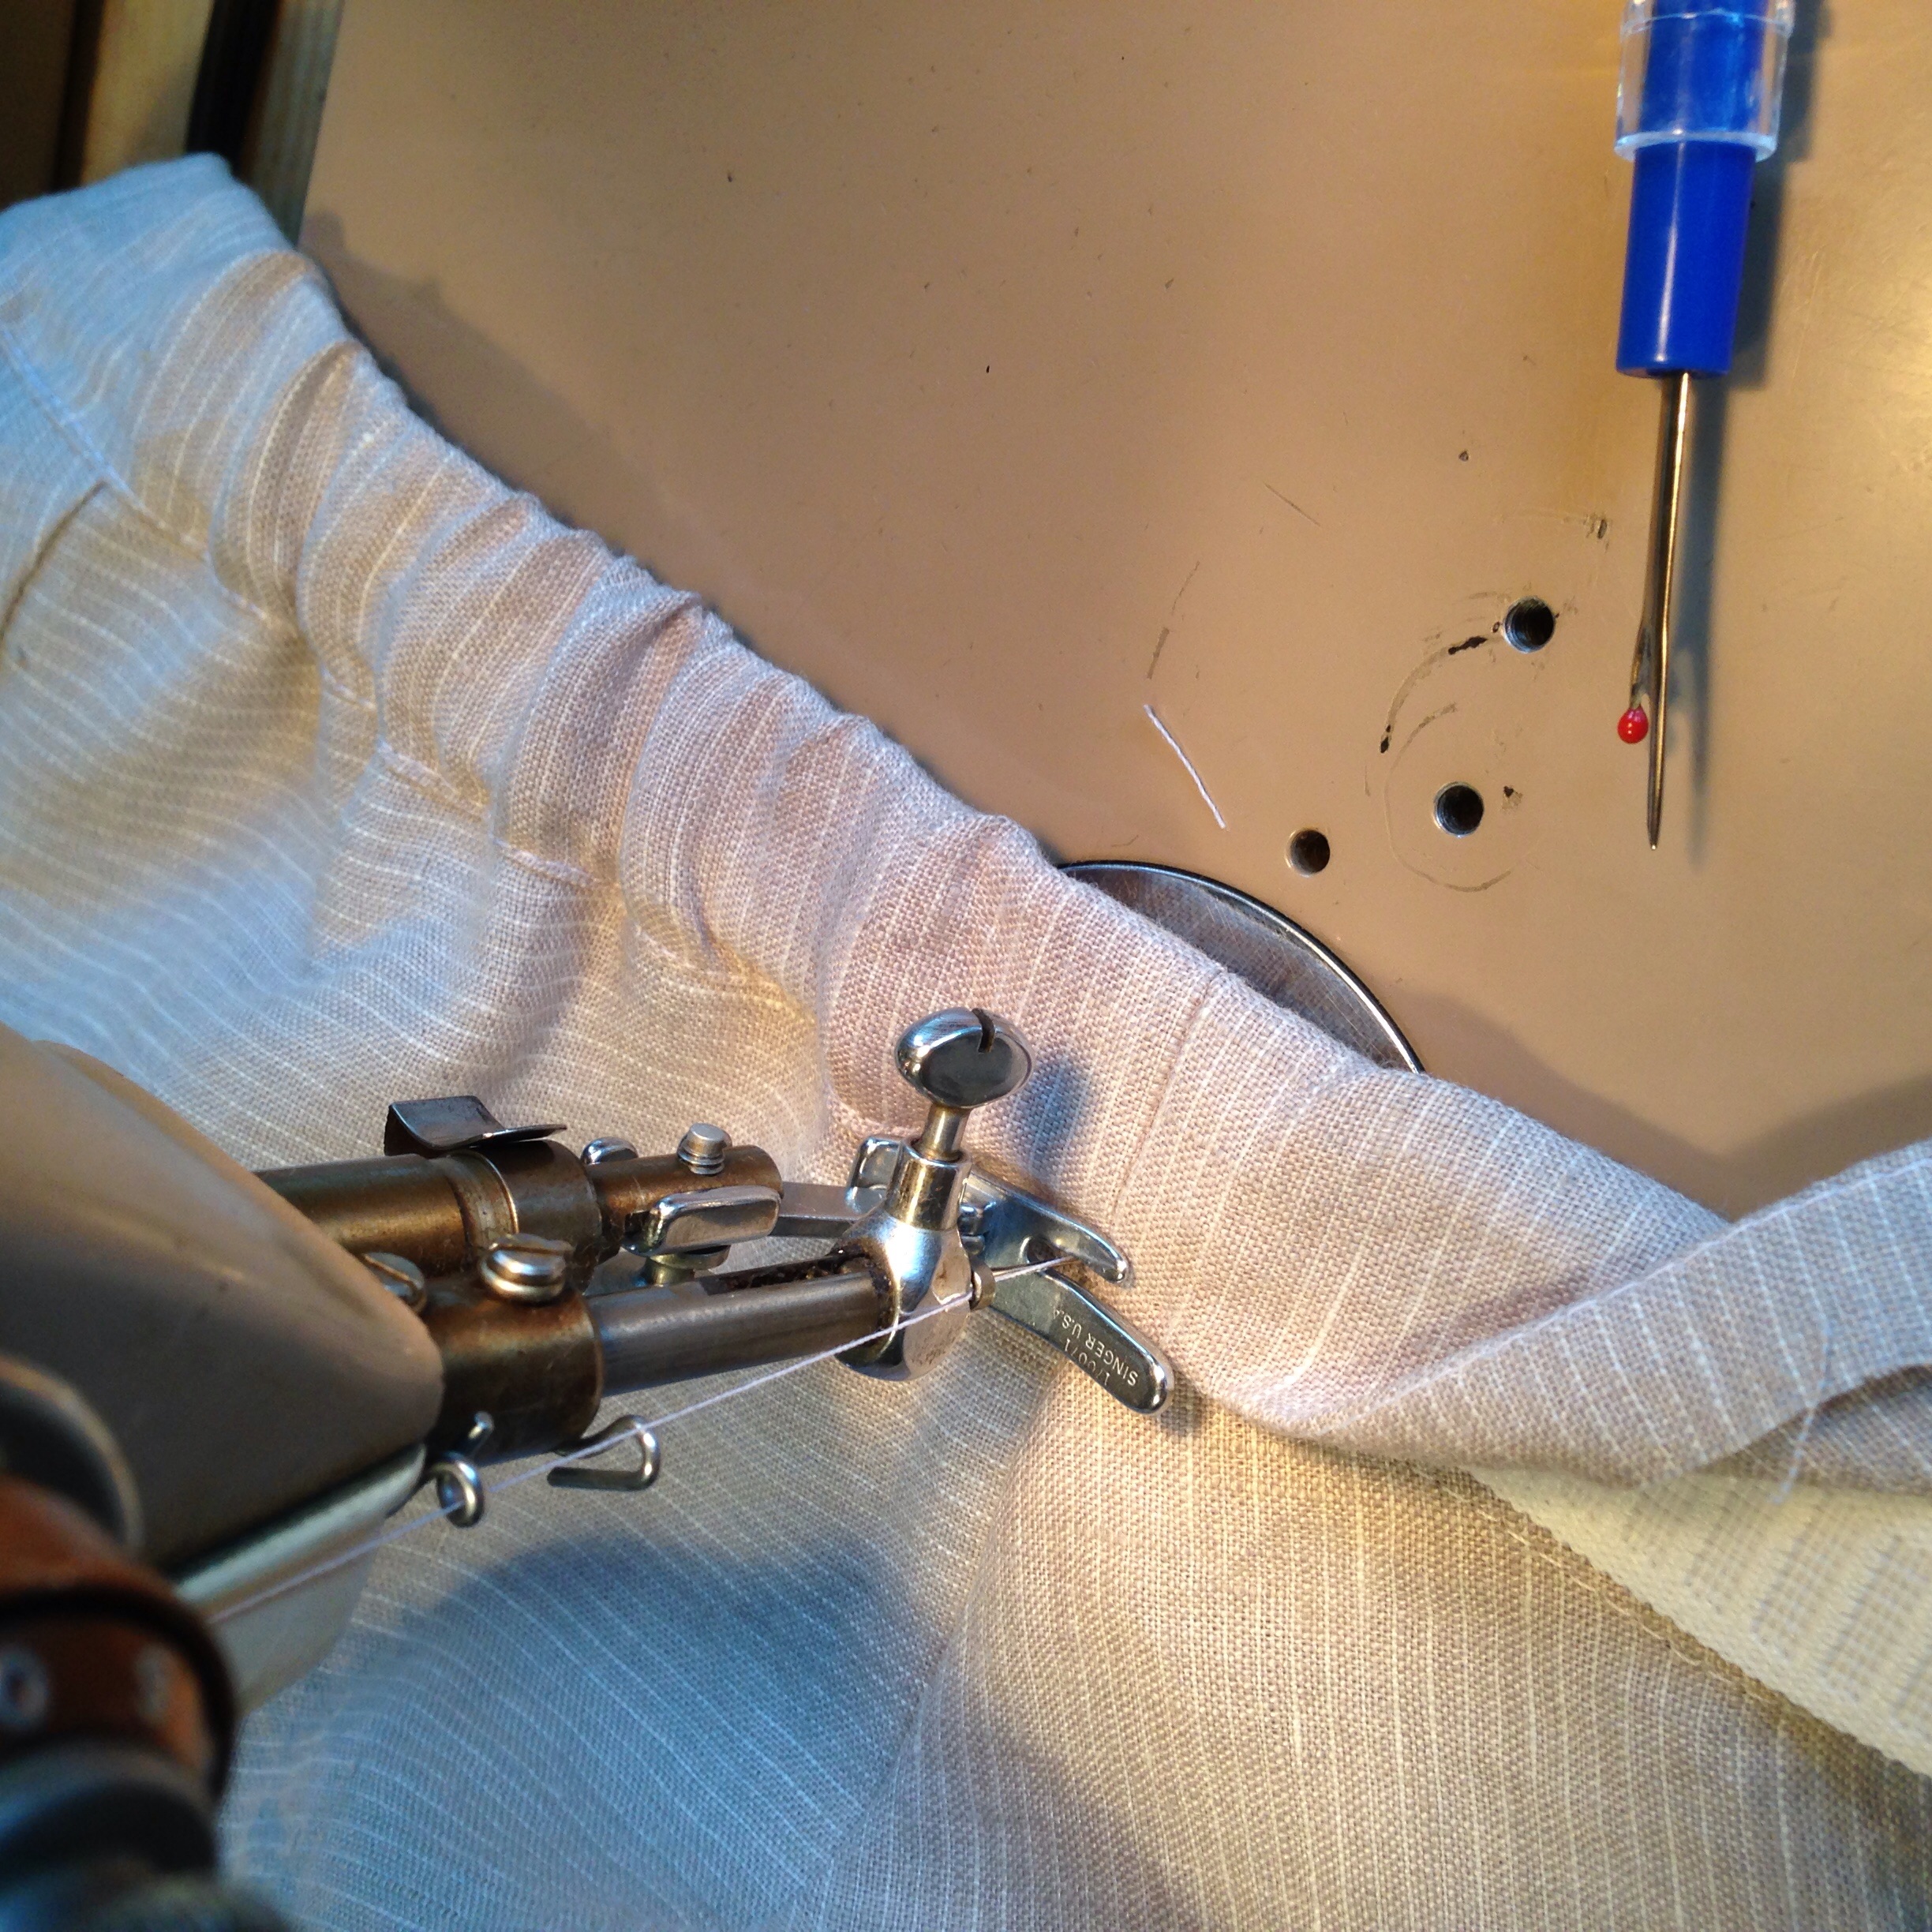
5. Sew your waistband closed as shown in the instructions. Slide the elastic up against the waistband fold so that you don't sew through it.

When you approach the end of your waistband seam, give the elastic a bit of a tug, scrunching up the fabric past the sewing machine foot, so that you can lay the waistband flat to sew.


Once you'd sewn your waistband shut, you can redistribute those gathers around the waistline. Since you're only really reducing the waistline by 1-2", you might not even see an obvious scrunch. When the skirt is on, it is barely noticeable...very different looking than an actual elastic waist skirt (which is why you still need the zipper!

Be careful when you sew your buttonhole. The extra raised elastic might throw off your groove. It certainly did for me. Check out the first time I did the buttonhole. Yikes! I'll give myself a little credit...I was definitely rushing. The 2nd time, the buttonhole was great (see the image on the right for evidence!)


If you're somebody who likes being comfy, but it looking for a "gateway" high waisted skirt, this could be a very nice option.

