
Sewing Darts
Darts are used to form a piece of 2D fabric (your pattern piece) to a 3D shape (your body). Darts help shape the fabric around our curvy parts (breasts, butt, shoulders, stomach, and more) and they do this by closing a wedge of fabric following the shape of your body.
Here are some tips for marking, sewing and pressing darts, as well as tips for handling darts on a curvy figure, including contouring.
Dart Anatomy
A dart, before being sewn, is a big triangle. The tip of the triangle is often called the dart point. The sides are called the dart legs.
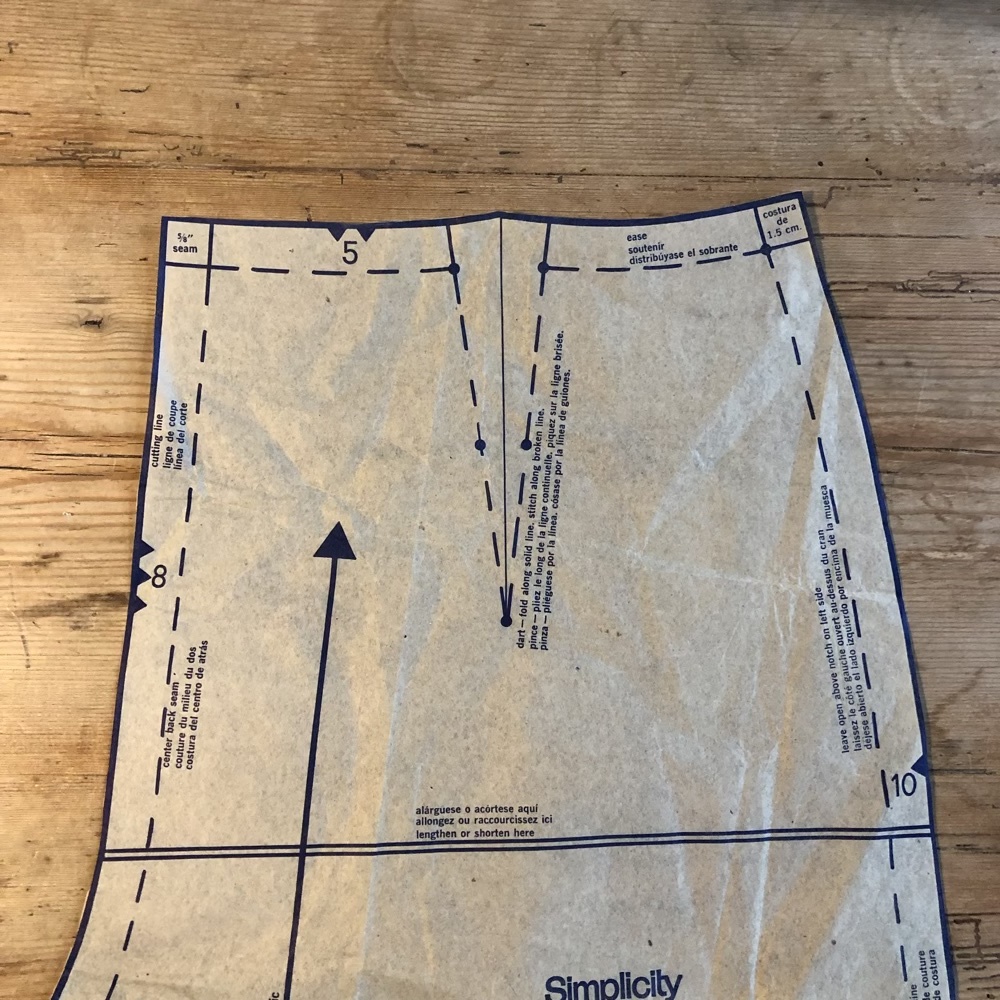
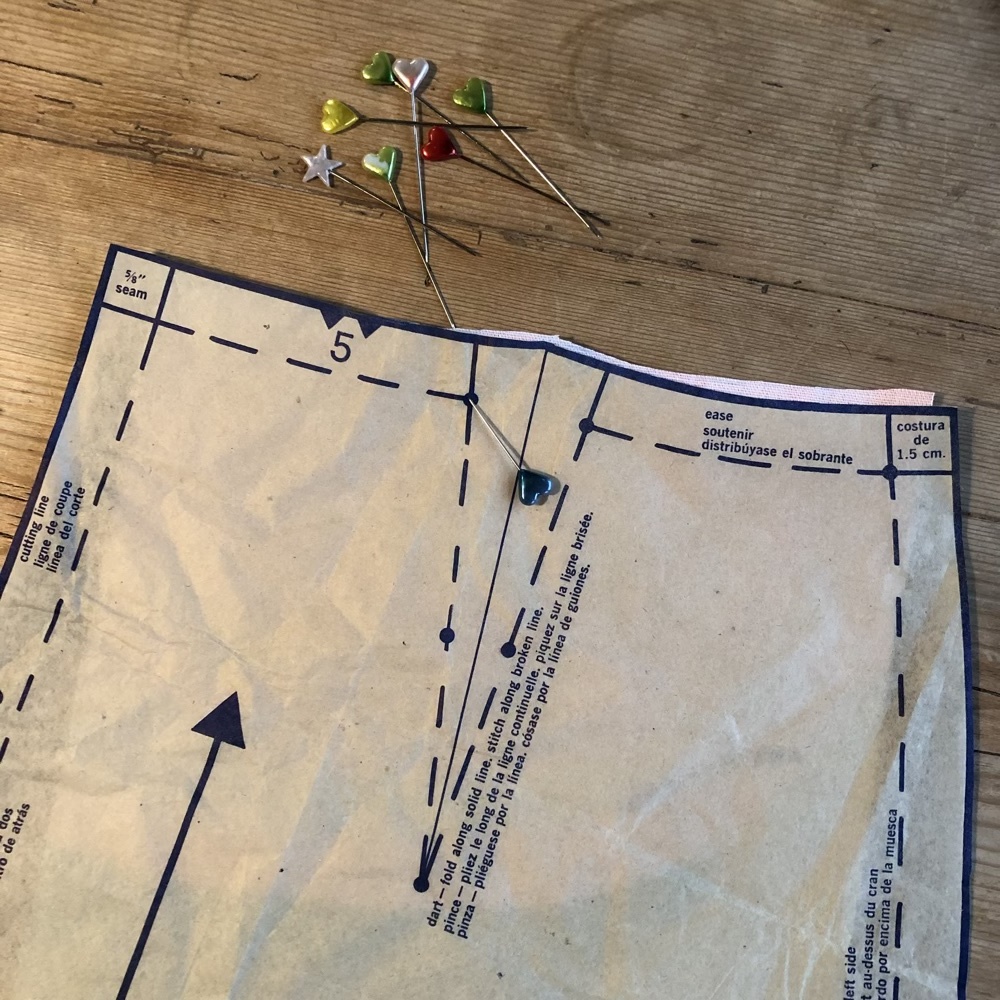
Before sewing, you want to clearly mark your dart onto the wrong side of your fabric. An easy way to do this is by sticking pins through your tissue at the dart point and the end of the dart legs at the seam allowance, then folding back the tissue to mark the point on the fabric.
Marking Darts

Some patterns will include a circle at the end of the dart that you can use to easily mark your dart point. Occasionally, patterns will have additional circles along the legs of the dart at various spots. This is often done for darts who’s legs aren’t in a perfectly straight line, like a contoured dart or a dart that is at the end of a seam. Mark these circles in the same way you mark the ends and point of the dart.
Once you’ve marked the key points of your dart, use a ruler to draw the entire dart shape on your fabric.

Drawing the whole dart onto the fabric makes it easier to pin the dart accurately. I like to fold the dart legs together and pin along the dart leg marking, flipping my fabric over to be sure that the pin crosses through the dart line on the opposite side as well.


I also like to place one pin horizontally through the dart point, to make it easier to spot while I’m sewing the dart on the machine.
Sewing Darts
When it’s time to sew your darts, start from the edge of the fabric and sew towards the dart point along the dart line, pulling out the pins as you go.
When you reach the end of the dart point, try to skim the edge of the fabric with the needle before stitching off the edge completely. This helps to achieve a smooth dart point that doesn’t pucker.
While you’ll start your dart with a backstitch to secure, backstitching isn’t always the best way to secure a dart point. It can often make the dart pucker or bunch at the point. Here are three other ways to secure your dart point:
Leave long tails and tie a knot at the end of your dart.
Switch to a short stitch length 1/4” from the dart point and gradually decrease it to nearly zero at the end.
Sew to the end of the dart, then turn your fabric around and stitch along the fold within the dart.
Pressing Darts
Always press darts on a rounded or pointed surface to get a smooth point that doesn’t pucker. I like to use a tailors ham, but you can also use a tennis ball or place the point of your dart at the end of your ironing board, with the dart lying flat.

You have a few options when it comes to pressing darts as well!
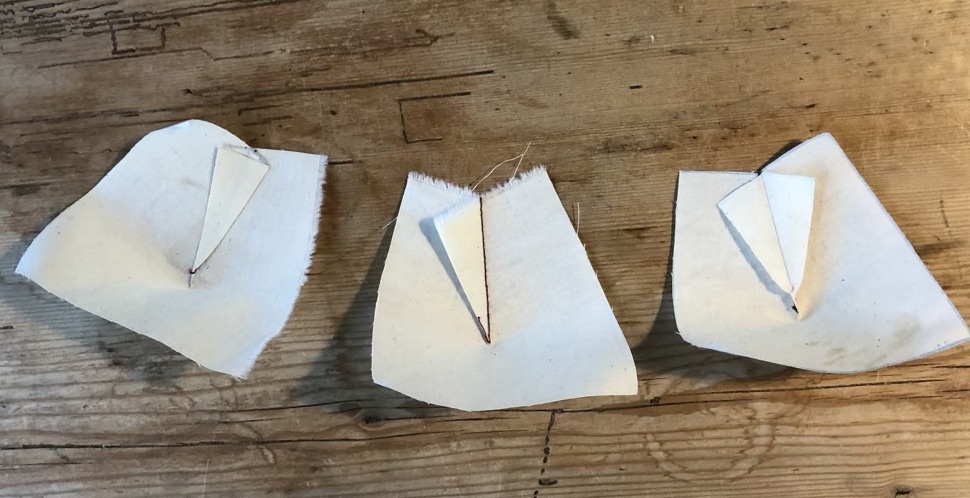

From L - R:
Pressing open - stick your finger into a the dart and flatten it out on either side of the seam. This helps the dart appear more balanced from the outside and is good for darts with large intake.
Pressing to one side - this is usually how darts are pressed. As a rule, always press horizontal darts down and vertical darts to either the Center Front or Center Back.
Clipping and pressing open - On thick, bulky fabrics or fabrics that show pressing marks from the outside, clipping the dart open helps it to lie flatter and disappear into the fabric. You’ll also often need to do this on darts that are at the end of a seam. If going this route, be sure to reinforce the raw edges of the dart seam once it’s cut. This method is not recommended for sheer fabrics.
Contour Darts
One thing that is important to note about darts: They add shaping to a body with a straight seam. Do those curvy parts of your body happen in a straight line? Usually not. Most of the time, darts cinch in fabric to fit your shape, but the length of the dart still stands away from the curves of your body. In most cases, this is perfectly sufficient. When you get into more fitted silhouettes where the more curvy areas aren’t covered with fabric OR your curves are very prominent, this theory doesn’t always work out.
This, my friends, is where contouring comes in handy. In pattern making, contouring is the process by which the sections of your garment that don’t lie flat against the body are altered to do so, usually because the part that did lie next to the body is removed. For example, a deeply cut neckline or armhole, where the ease from the original garment may leave the neckline or armhole to gape.
In the case of those who are simply curvier, in such a way that the size and straightness of the dart doesn’t quite fit right on the body, contouring can be used to create a dart with a better fit. The main thing this technique accomplishes is to make the angle at which the dart meets the edge of the fabric less severe, resulting in a smoother dart point.
You’ll contour by sewing along a slightly different line than what you drew. Start by measure about 2.5” from the end of your dart along the dart legs. Mark this point. Then, redraw the dart line so that it curves away from the dart line as it approaches the dart point. (Pictured below, the red seam is the original dart, while the blue line represents the contour.)
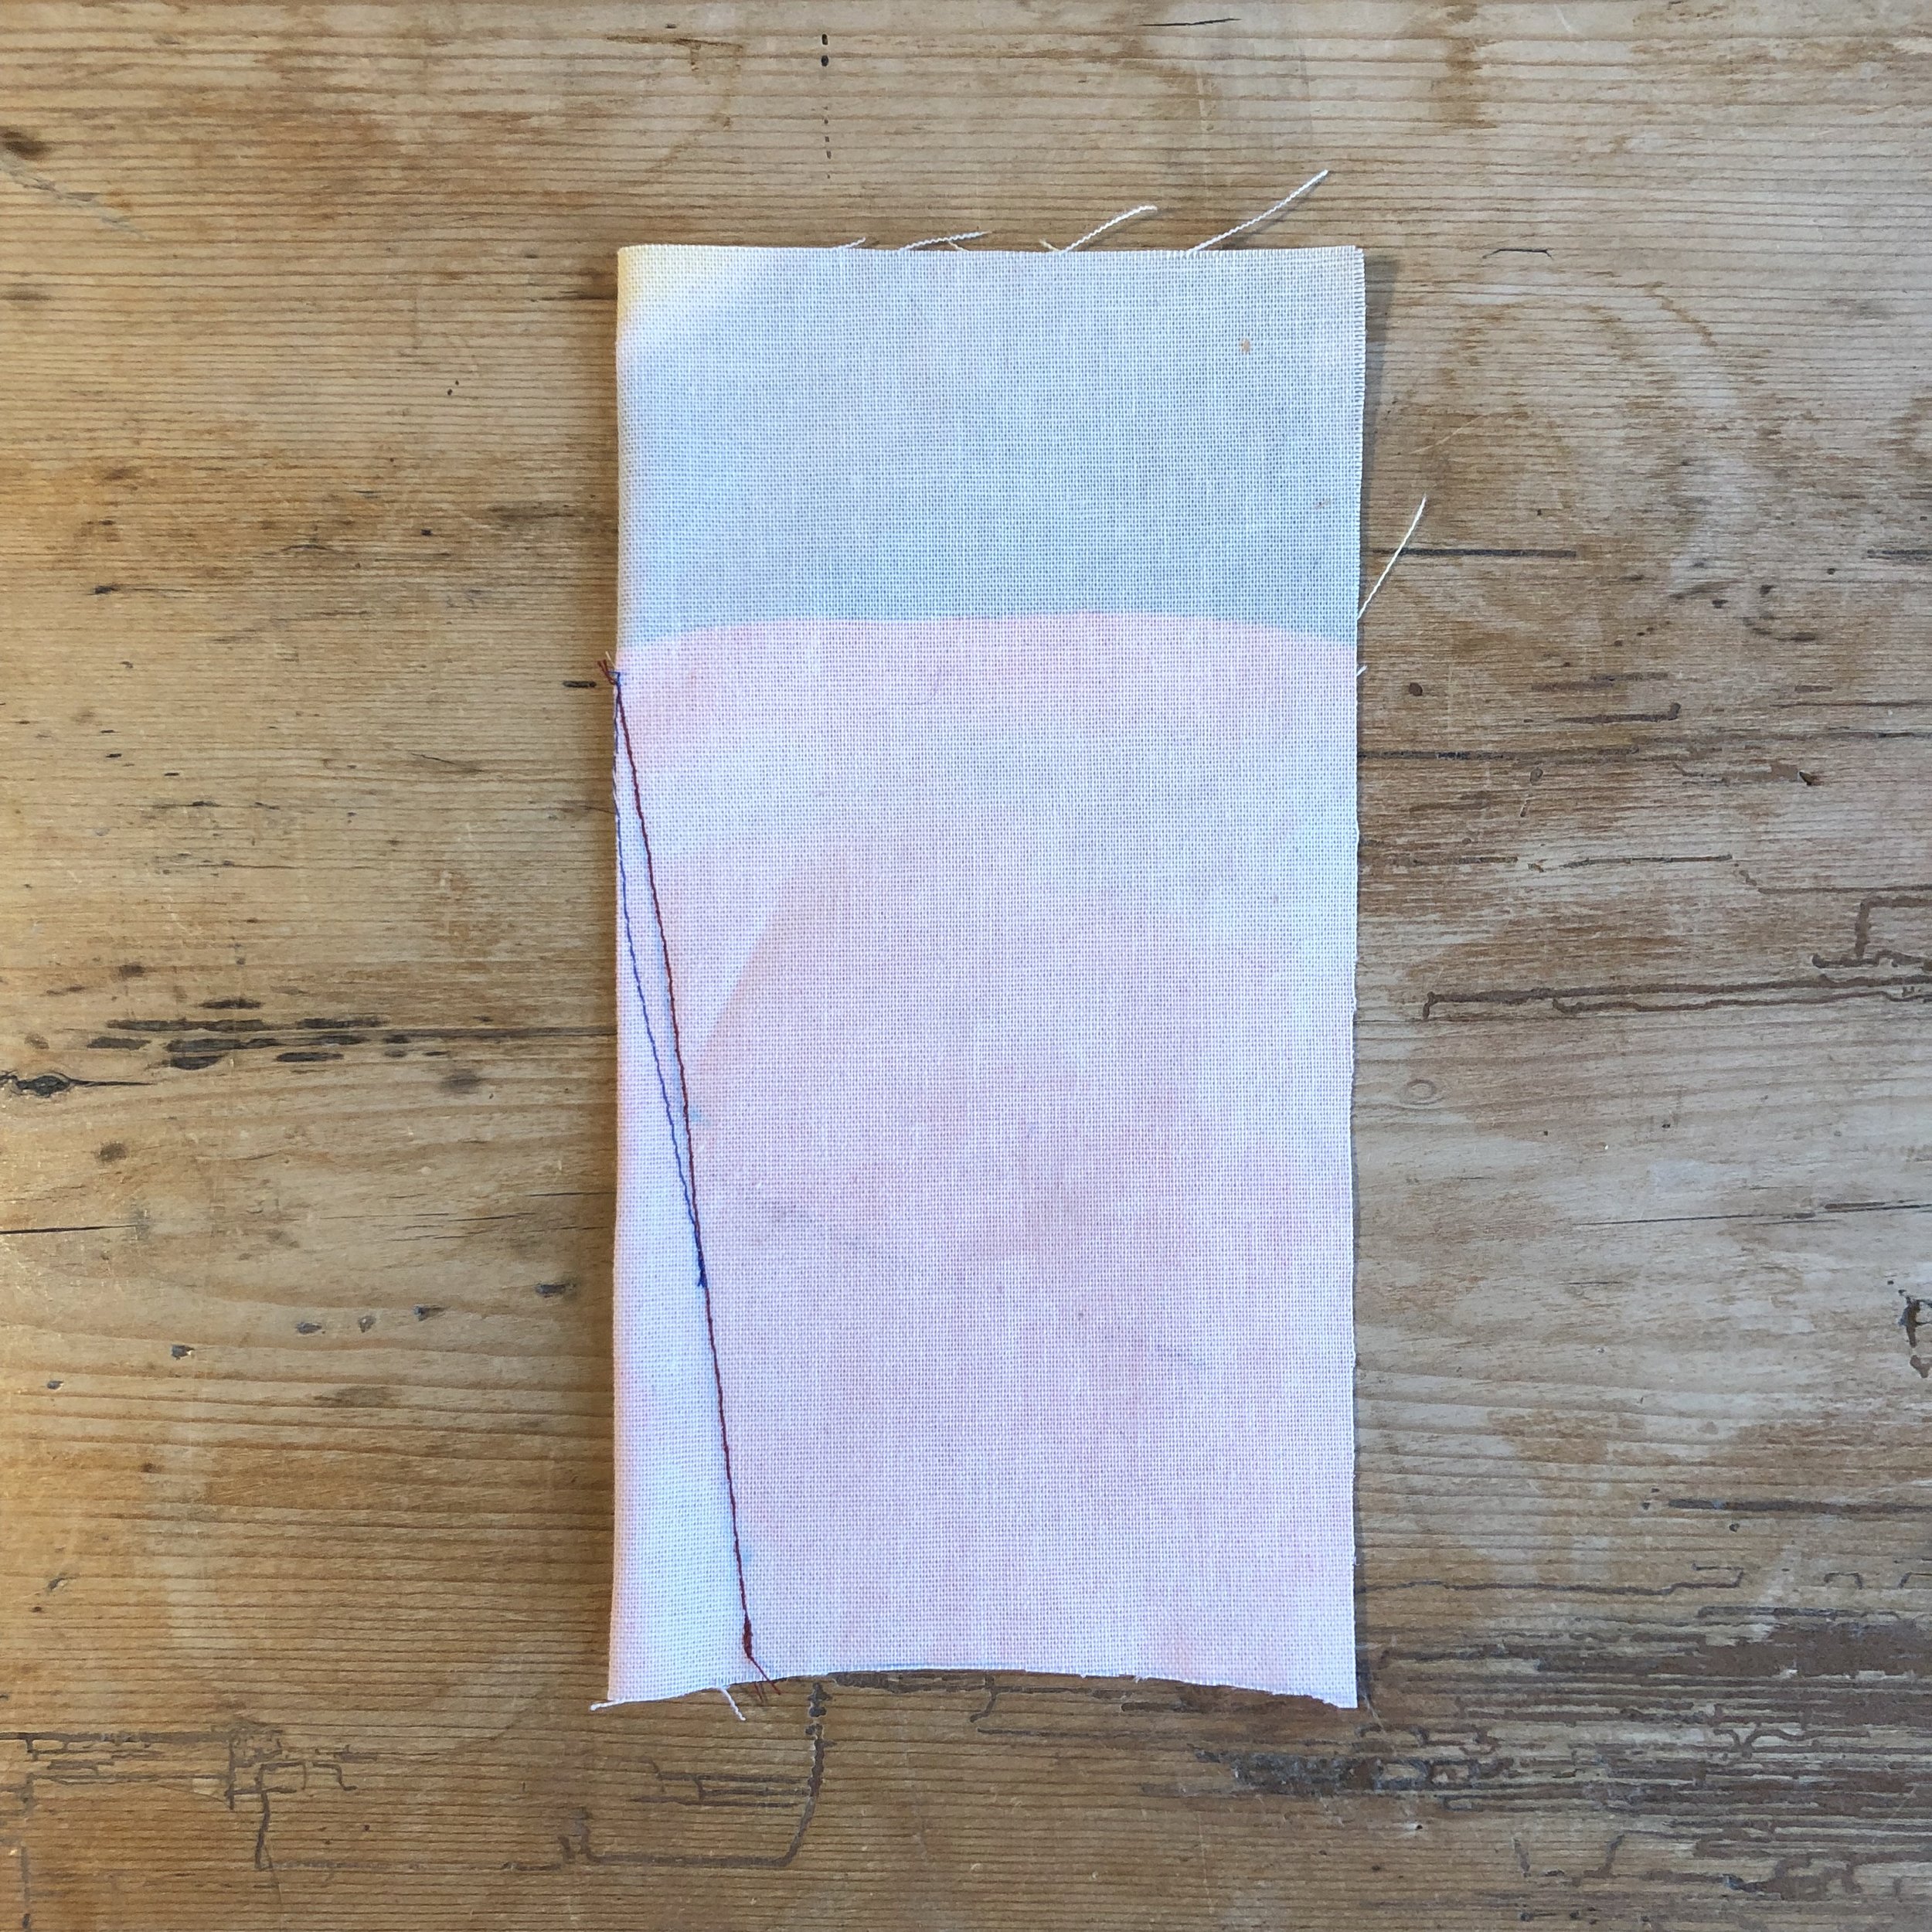
This makes it so that the dart point contours to the bust curve, rather than just a straight line. It also keeps darts from appearing too pointy. The larger your bust or dart, the more you might want to contour it.
Contour darts will often need to be clipped in order to lie properly as they have become more of a seam than a proper dart. I often slice the dart open and clip while pressing, to see how much is necessary.