
Fabric Cutting Tips: Alignment
There's a woodworking adage that goes, 'measure twice, cut once'. The same is definitely true of sewing. Cutting is arguably the most difficult and crucial of steps in any sewing project. While seams can be ripped and re-sewn many times, cutting is forever.
There are three main things to consider when cutting your fabric:
1. Alignment
2. Marking
3. Cutting
Alignment
Even wonder why after sewing something the final garment doesn't hang or sit quite right or a sleeve hem or edge becomes uneven? Or perhaps you notice that the print on your fabric is going in different directions on each piece?
Aligning your fabric properly for cutting will save you time and frustration and help you create a better looking and fitting garment.
In order to better understand why alignment is so important, let's talk a bit about fabric grain.

Woven fabric refers to fabric that is woven on a loom. (When we talk about grain, we're talking primarily about woven fabric. Knit fabric has a different set of parameters. We'll cover that in a future tutorial!) Many fabrics you encounter in stores are woven. In weaving, fabric is created by setting up long vertical threads (called the Warp) and then weaving horizontally through these threads (called the Weft). When we talk about fabric grain, we are referring to the lengthwise threads (the warp) of the fabric. The lengthwise grain is stable, with a little bit of stretch on the cross grain (the weft) and a bit more stretch on the bias (diagonal grain).
When laying out your pattern, it is important to line up pieces properly with the grain. Your pattern will indicate where its 'grainline' is. Easy right? Well, there's more...
Most patterns have you fold your fabric in half before you lay out your pieces. Now imagine you cut out your pieces through two layers of fabric. The top layer seems properly aligned, but perhaps the bottom layer is slightly askew. This will result in uneven pattern pieces which can throw off the fit or distort your fabric print (especially for stripes or plaids!) Even worse, sometimes pattern cut on fabric where the grain is distorted will return to the natural grain alignment after washing, resulting in wonky looking garment.
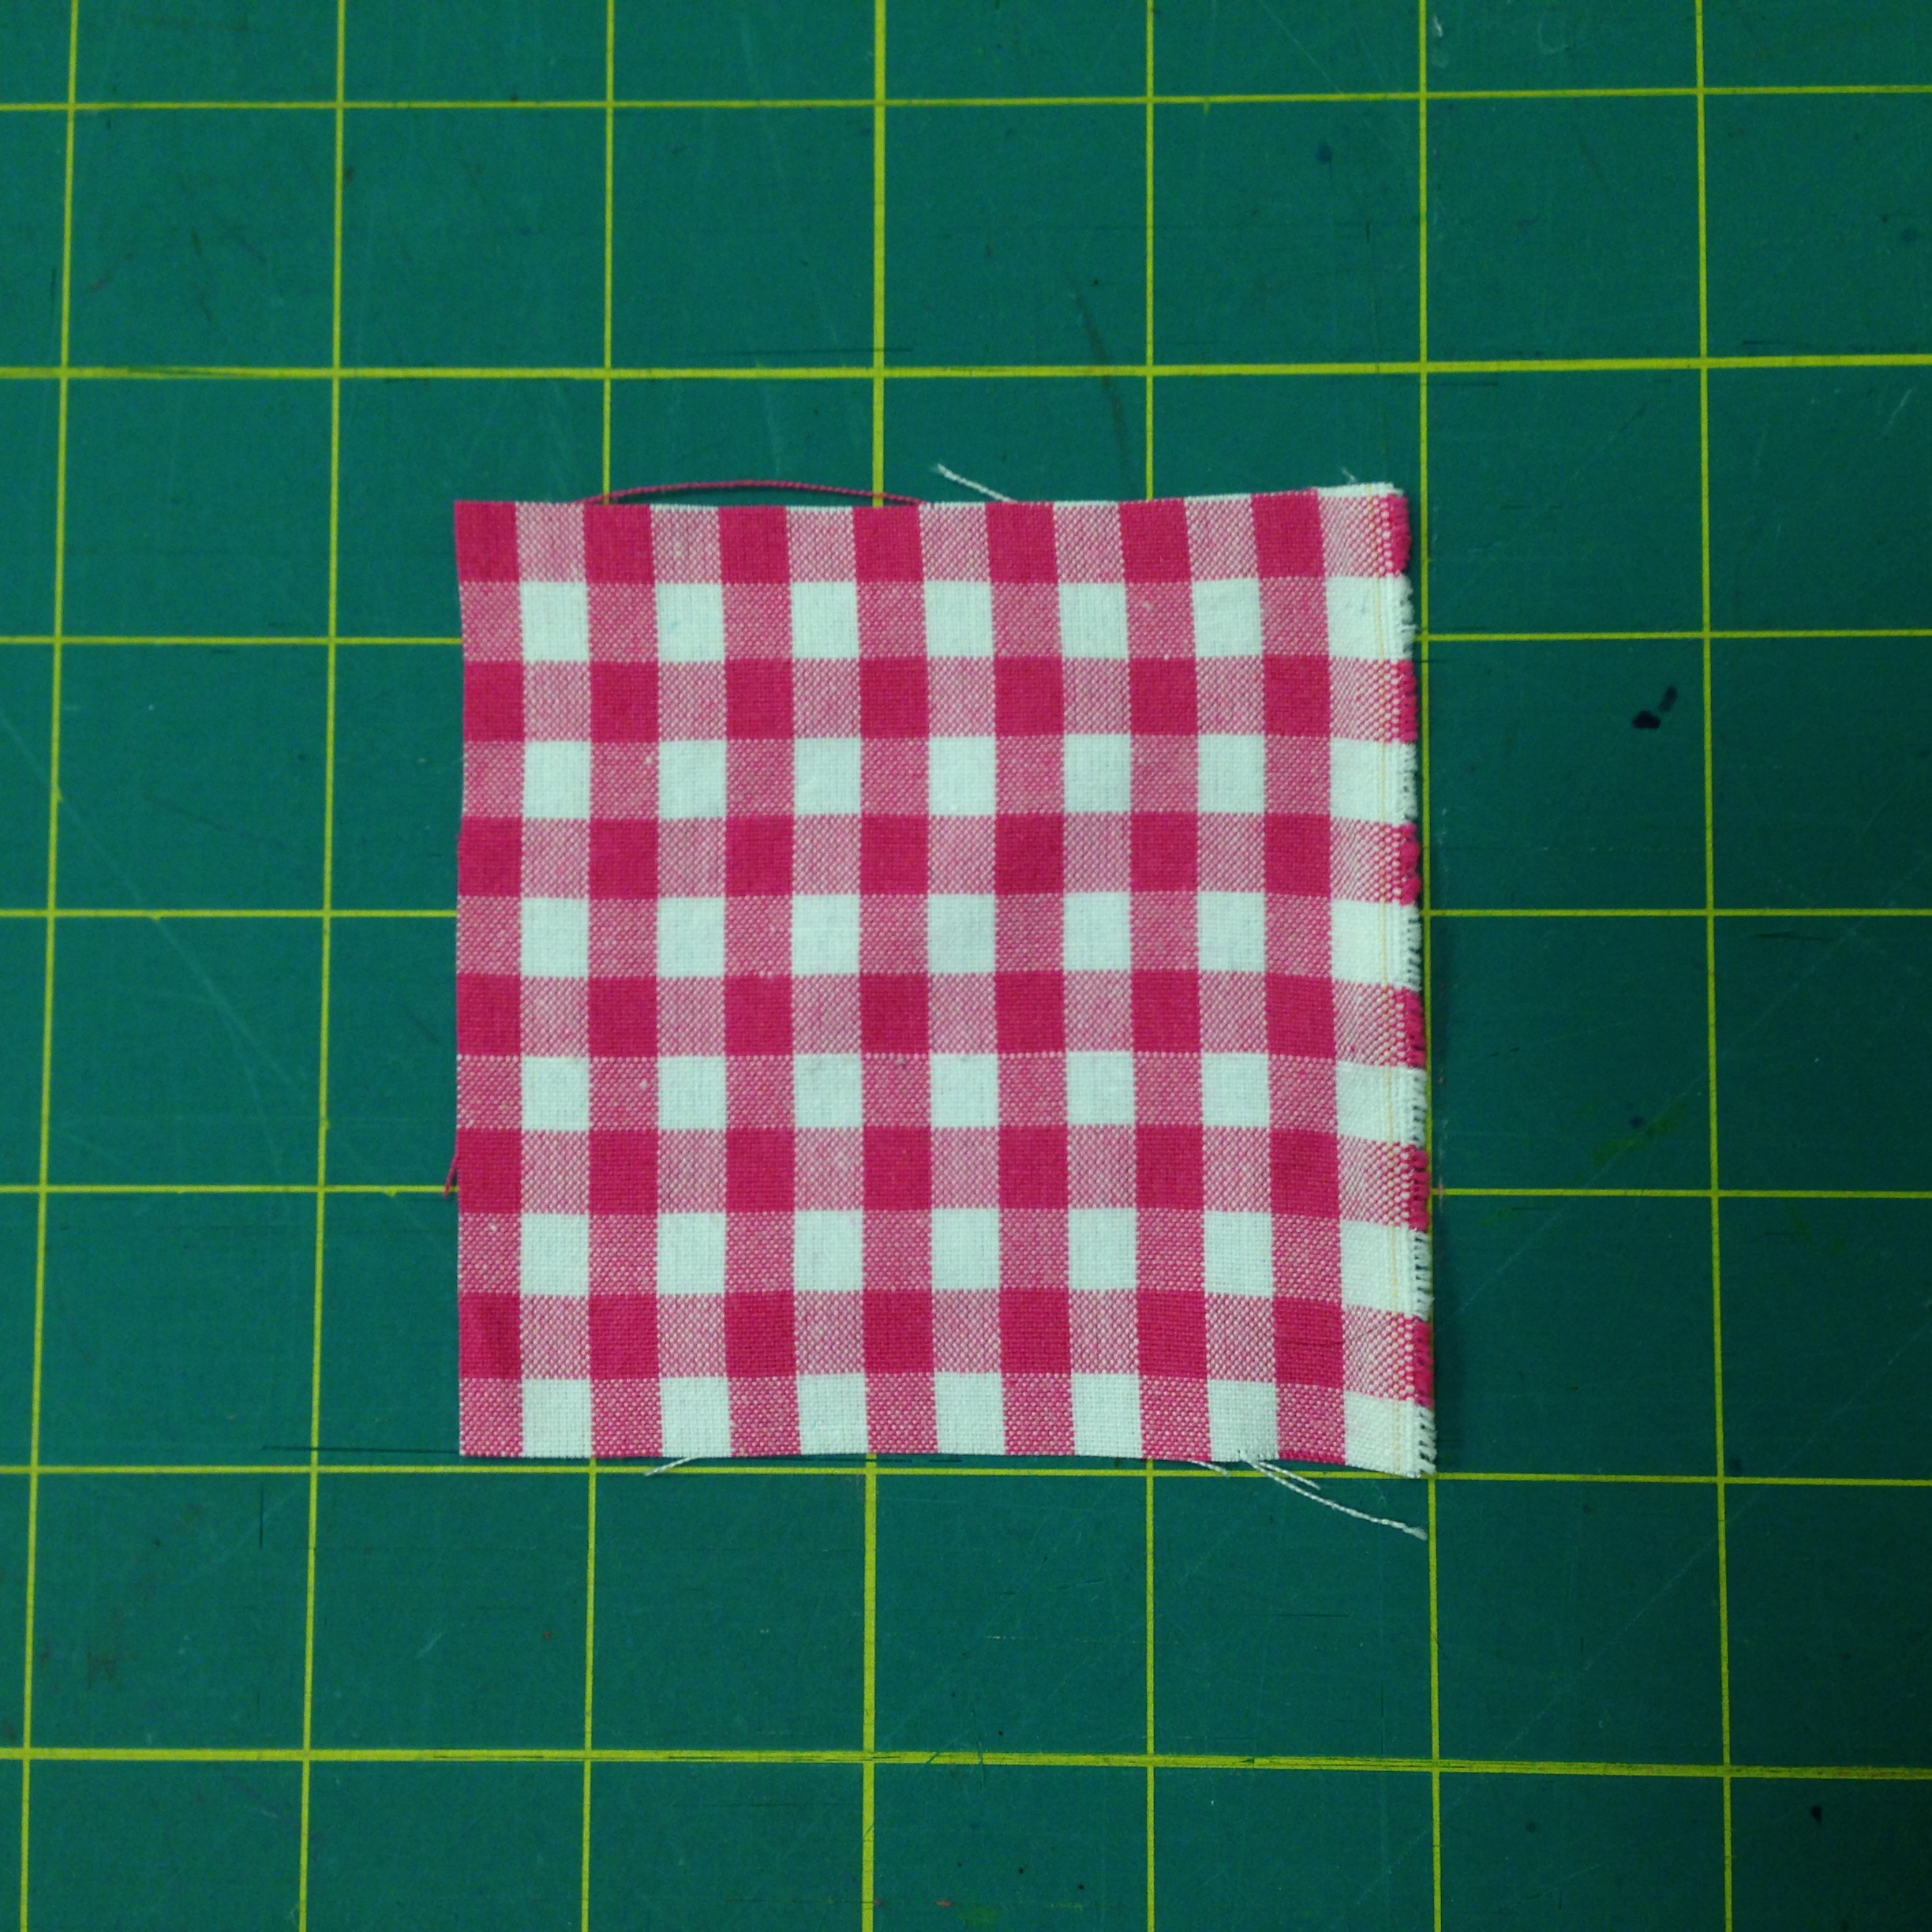
In gingham (a 'yarn dyed' fabric, meaning that the stripes are made from weaving different color yarns, not printed) it is easy to see if the grain is in alignment.

The same fabric, but 'off grain', meaning that the grain has skewed or shifted, throwing the pattern, and the fabric, out of alignment.
Some fabric that your bring home from the store may have a grain that is slightly out of wack - often a result of the process used to wind the fabric onto the bolt. Additionally, sometimes the fabric is cut unevenly at the store. This can cause the nice new fabric to be out of alignment from the get go.

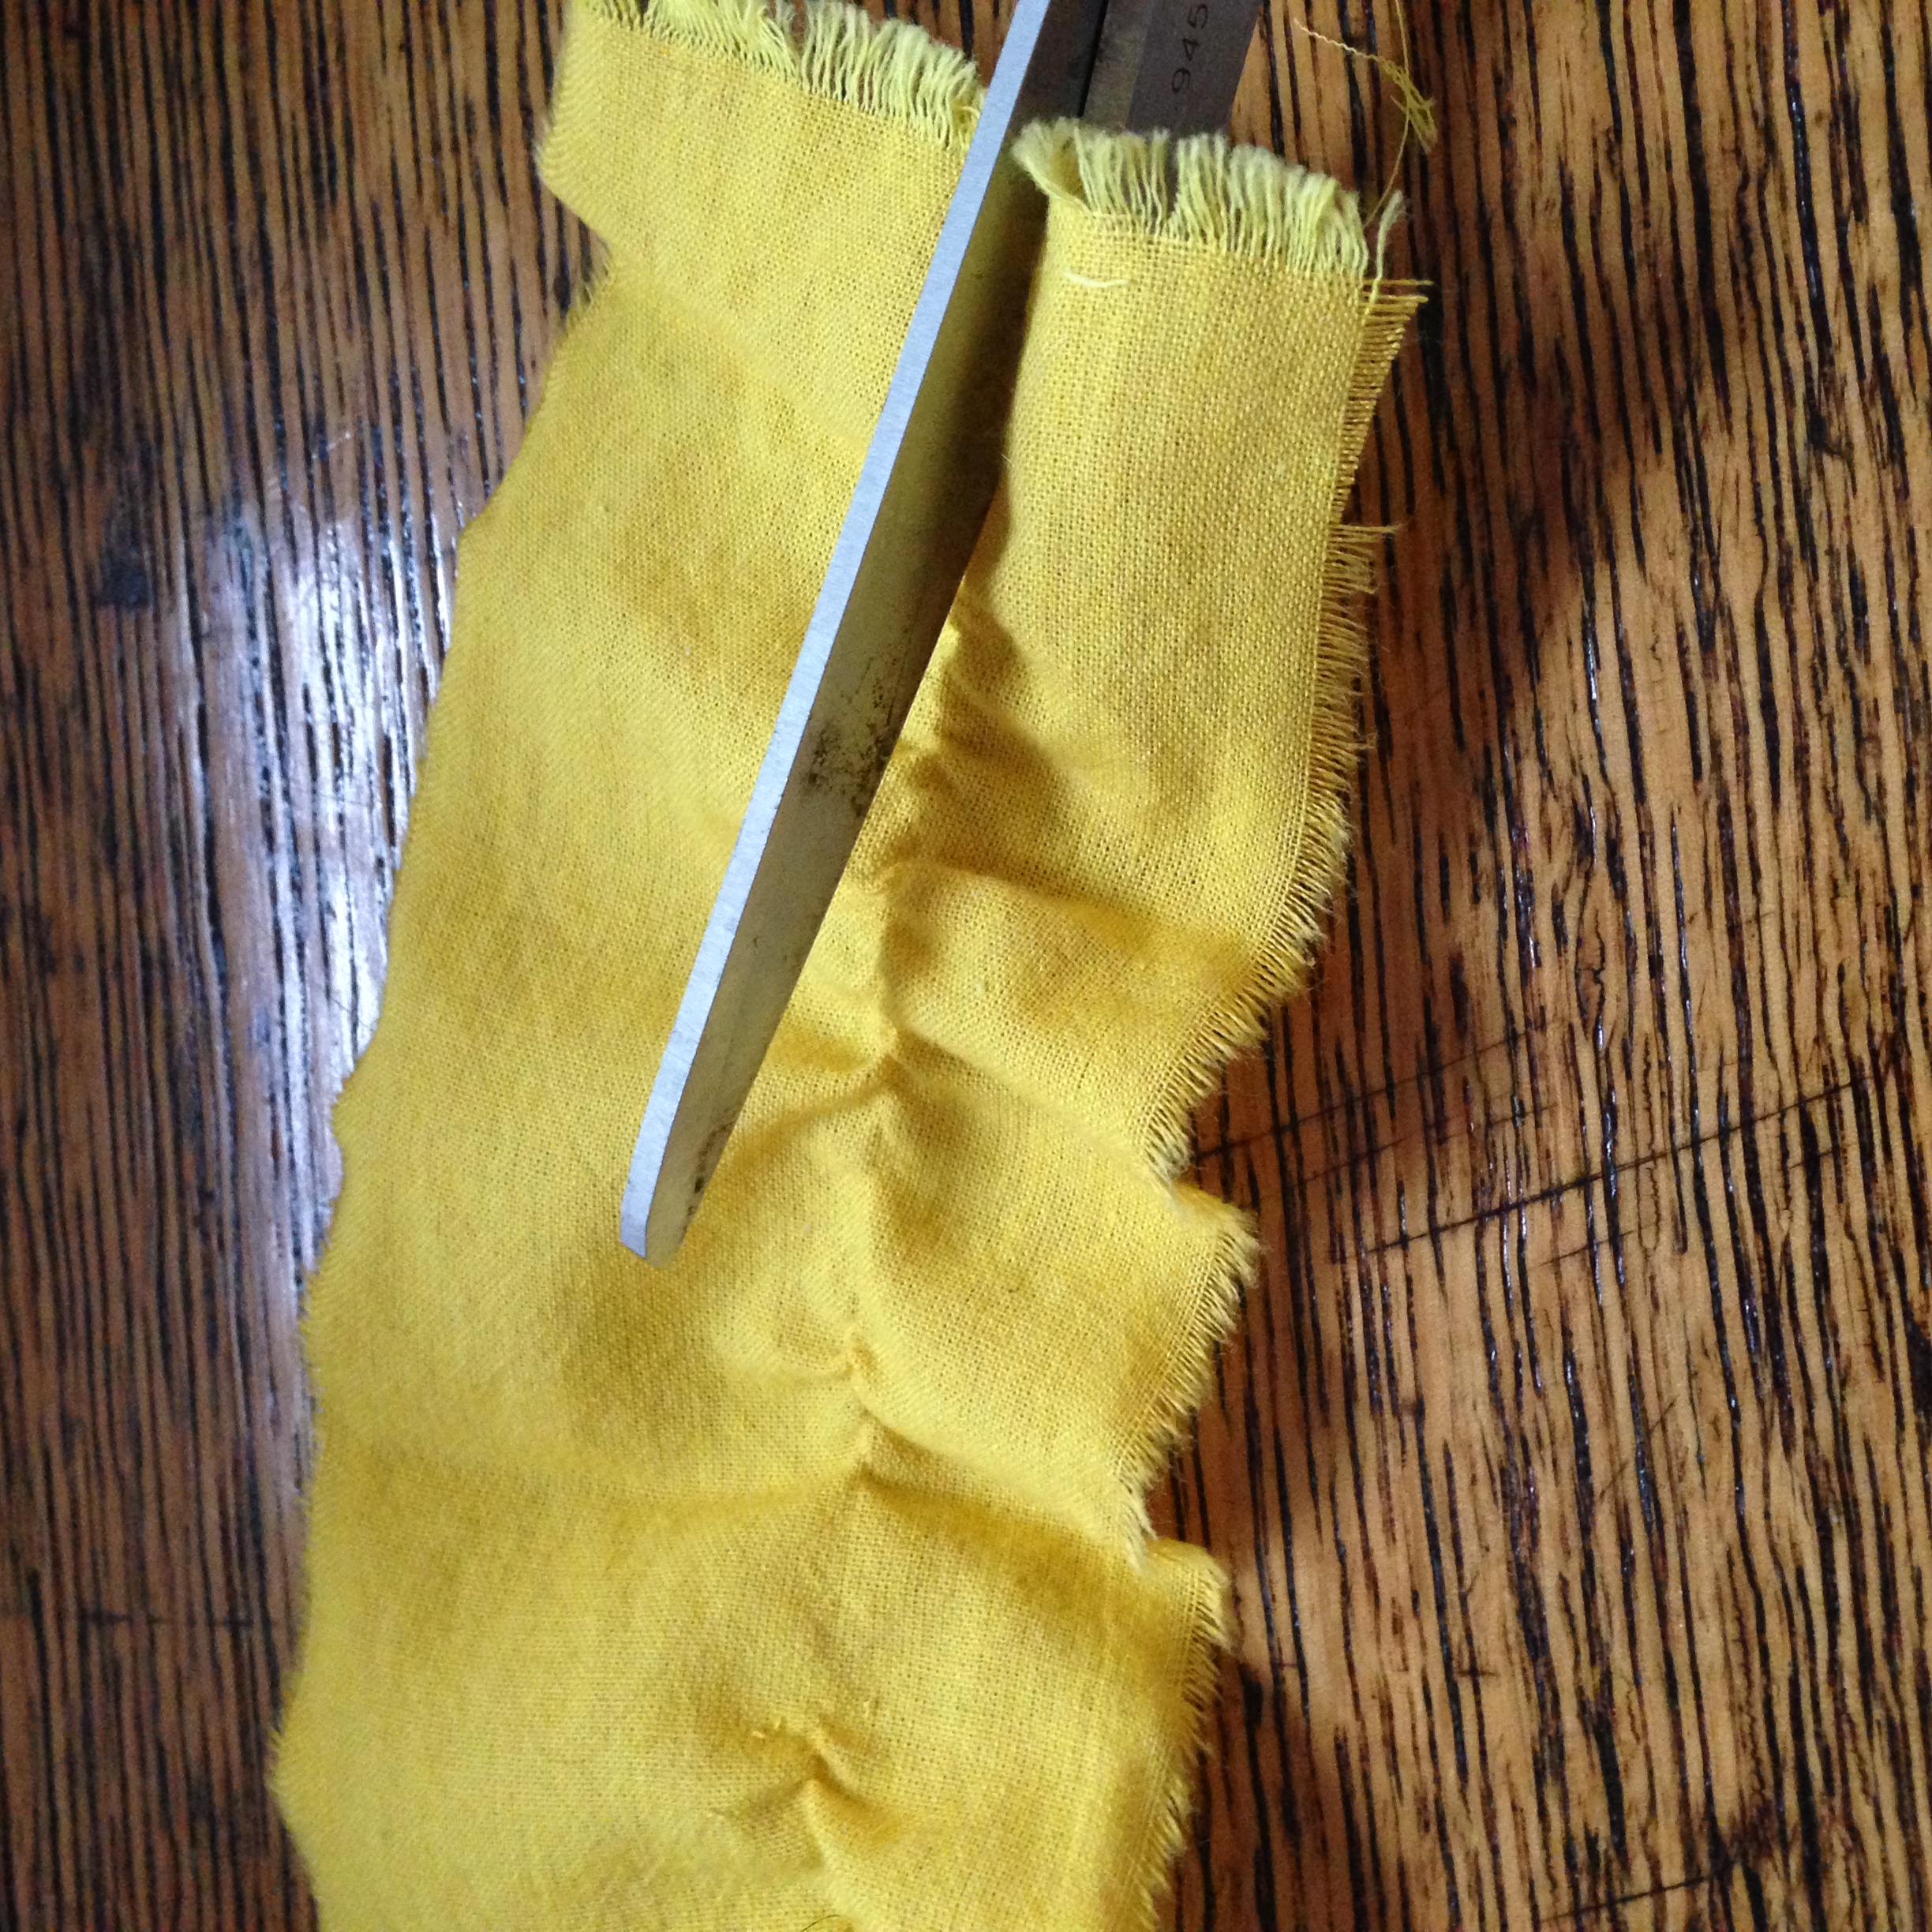
On the plaid above, also 'yarn dyed', it is easy to see when the fabric is cut unevenly. It can be trickier to tell if the edge is evenly cut on solid and printed fabrics.
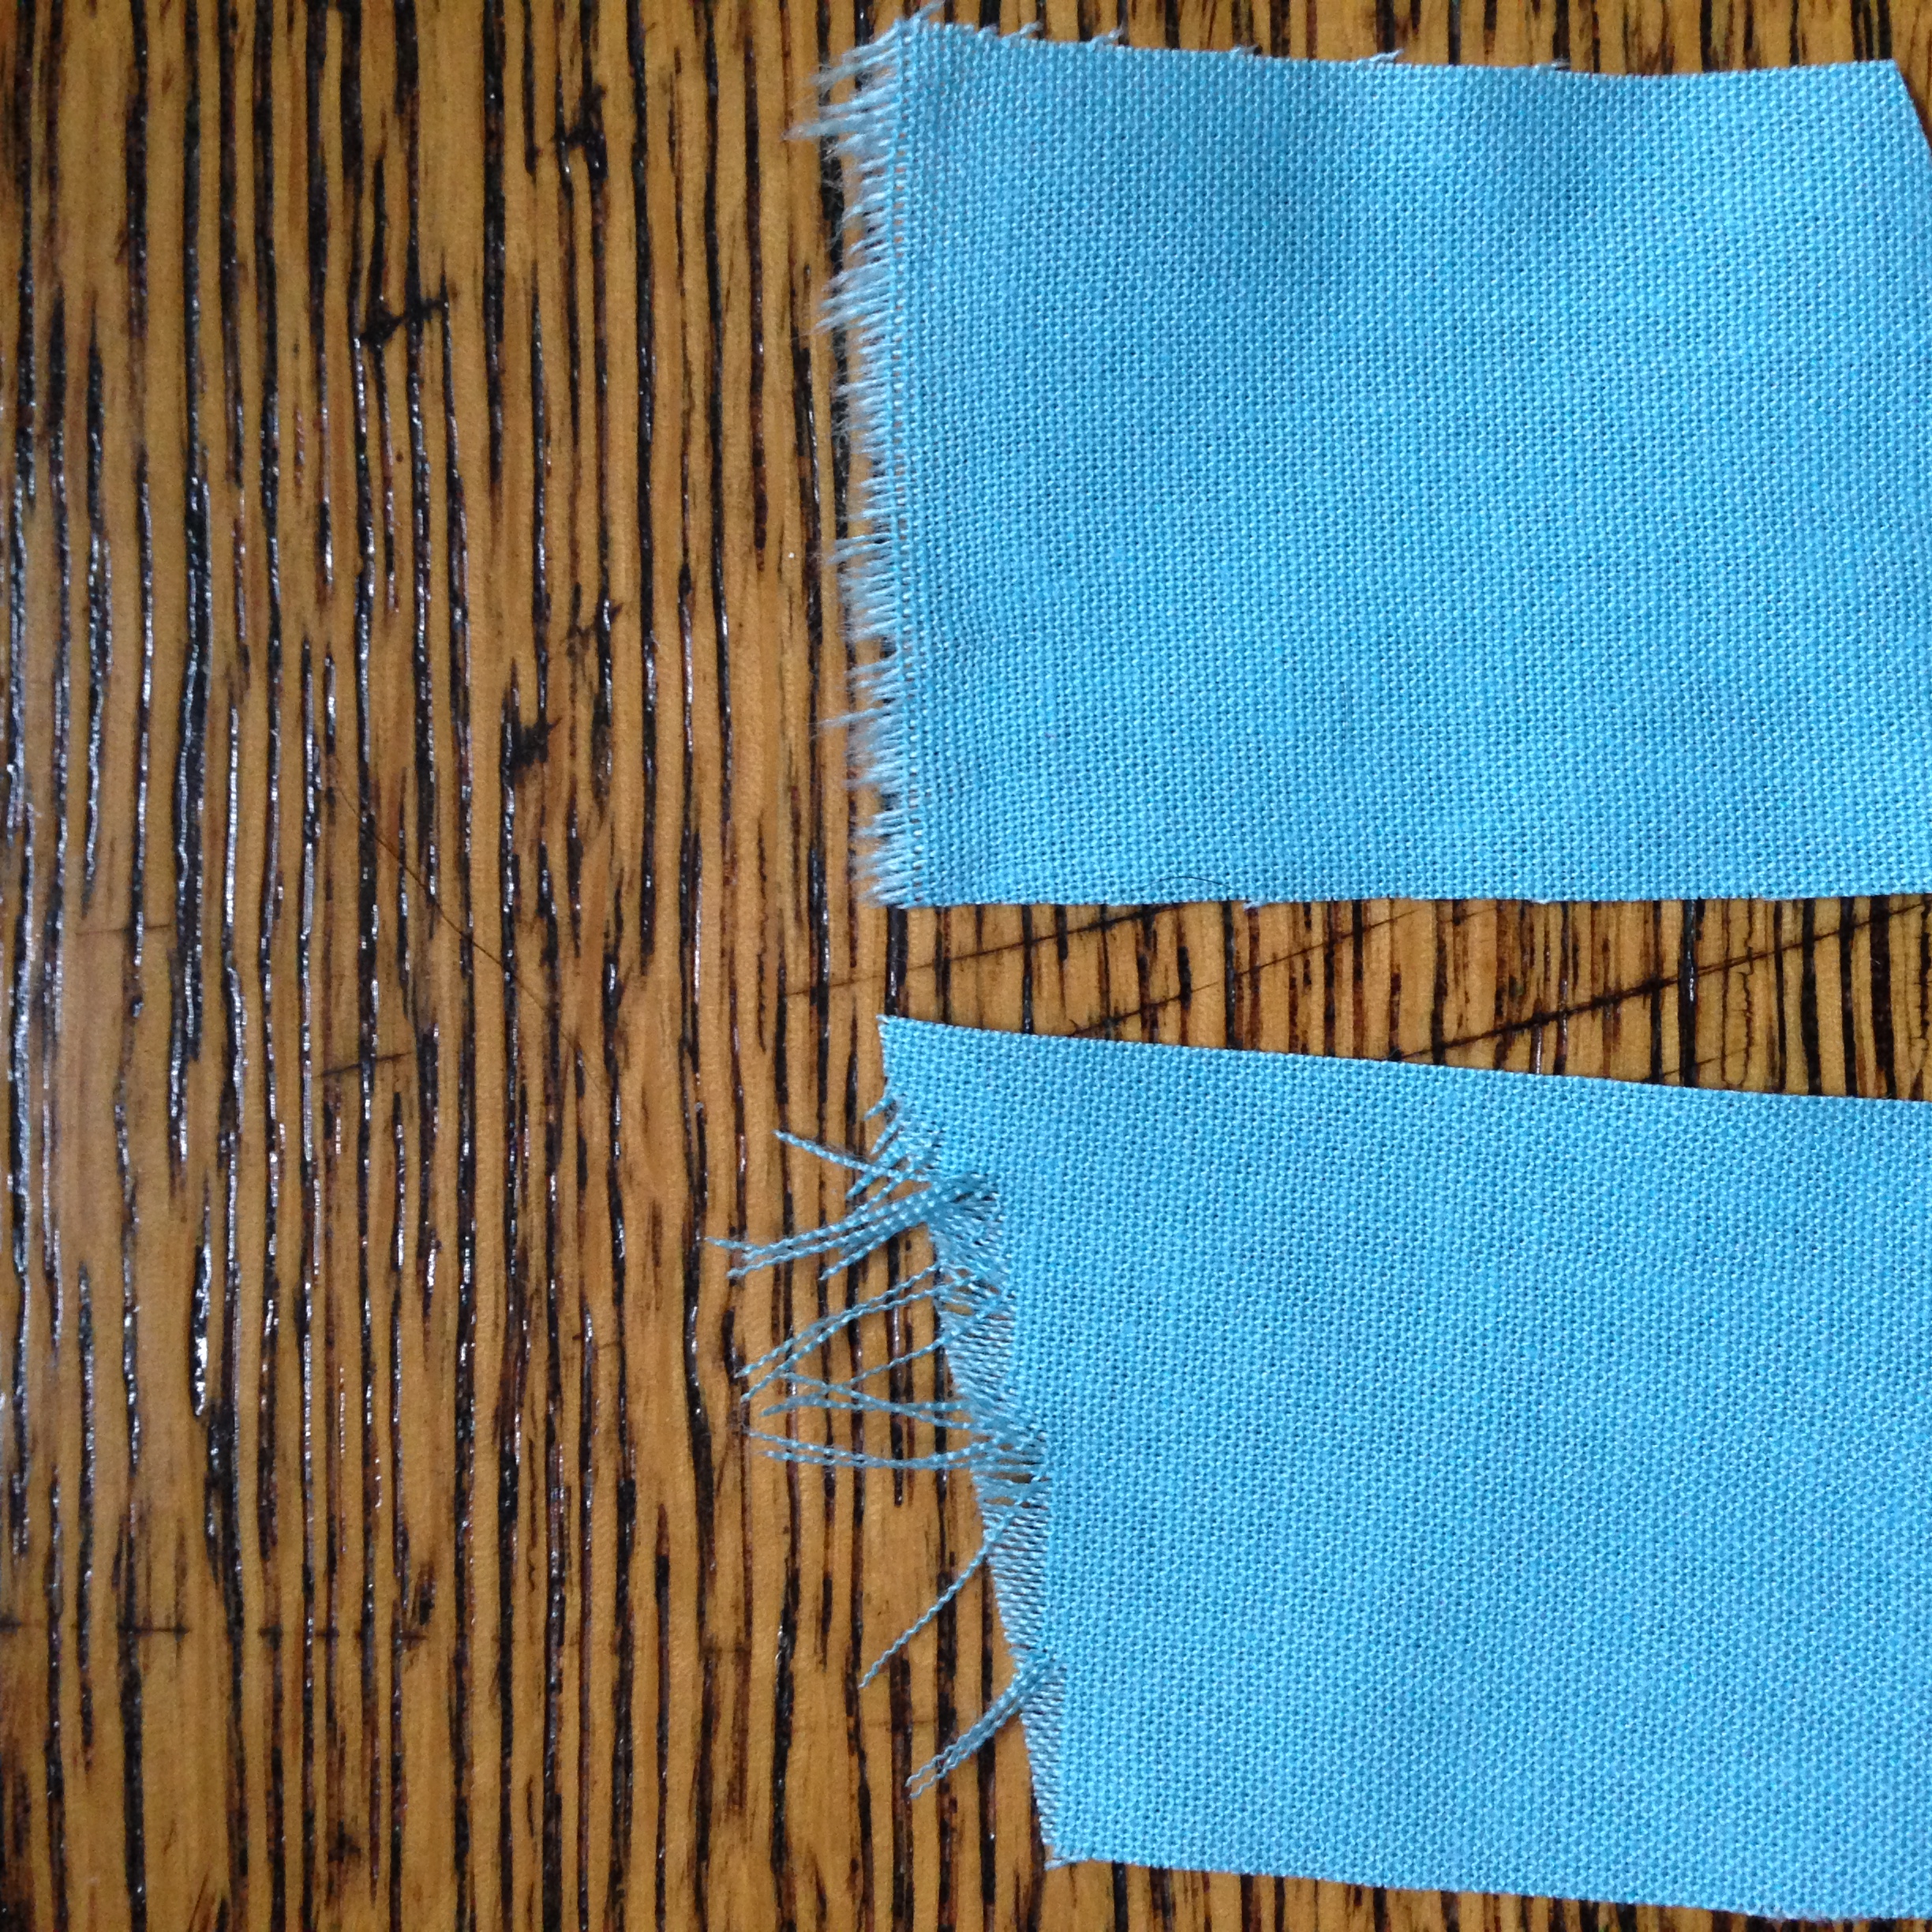
On the left, you can see threads of the fabric fraying. On the right, since the fabric is cut along the grain, the fabric 'frays' evenly without any stray threads, though you could pull away one single thread of the weft.
If you notice there are a lot of loose threads coming off of your cut edge, this could be an indicator of an uneven cut. Fabric cut on the grain will have minimum fraying, since the weft threads run all the way across.
To remedy this, it is best to align your fabric before laying out your pieces and cutting. It's easy, here's how...
Fixing your fabric grain:
Pre-wash your fabric. This is a great rule of thumb with every project. It takes care of potential shrinkage, dye bleeding, or fading and will often 'reset' a weird grain. Wash and dry your fabric however you plan to wash and dry the final item.
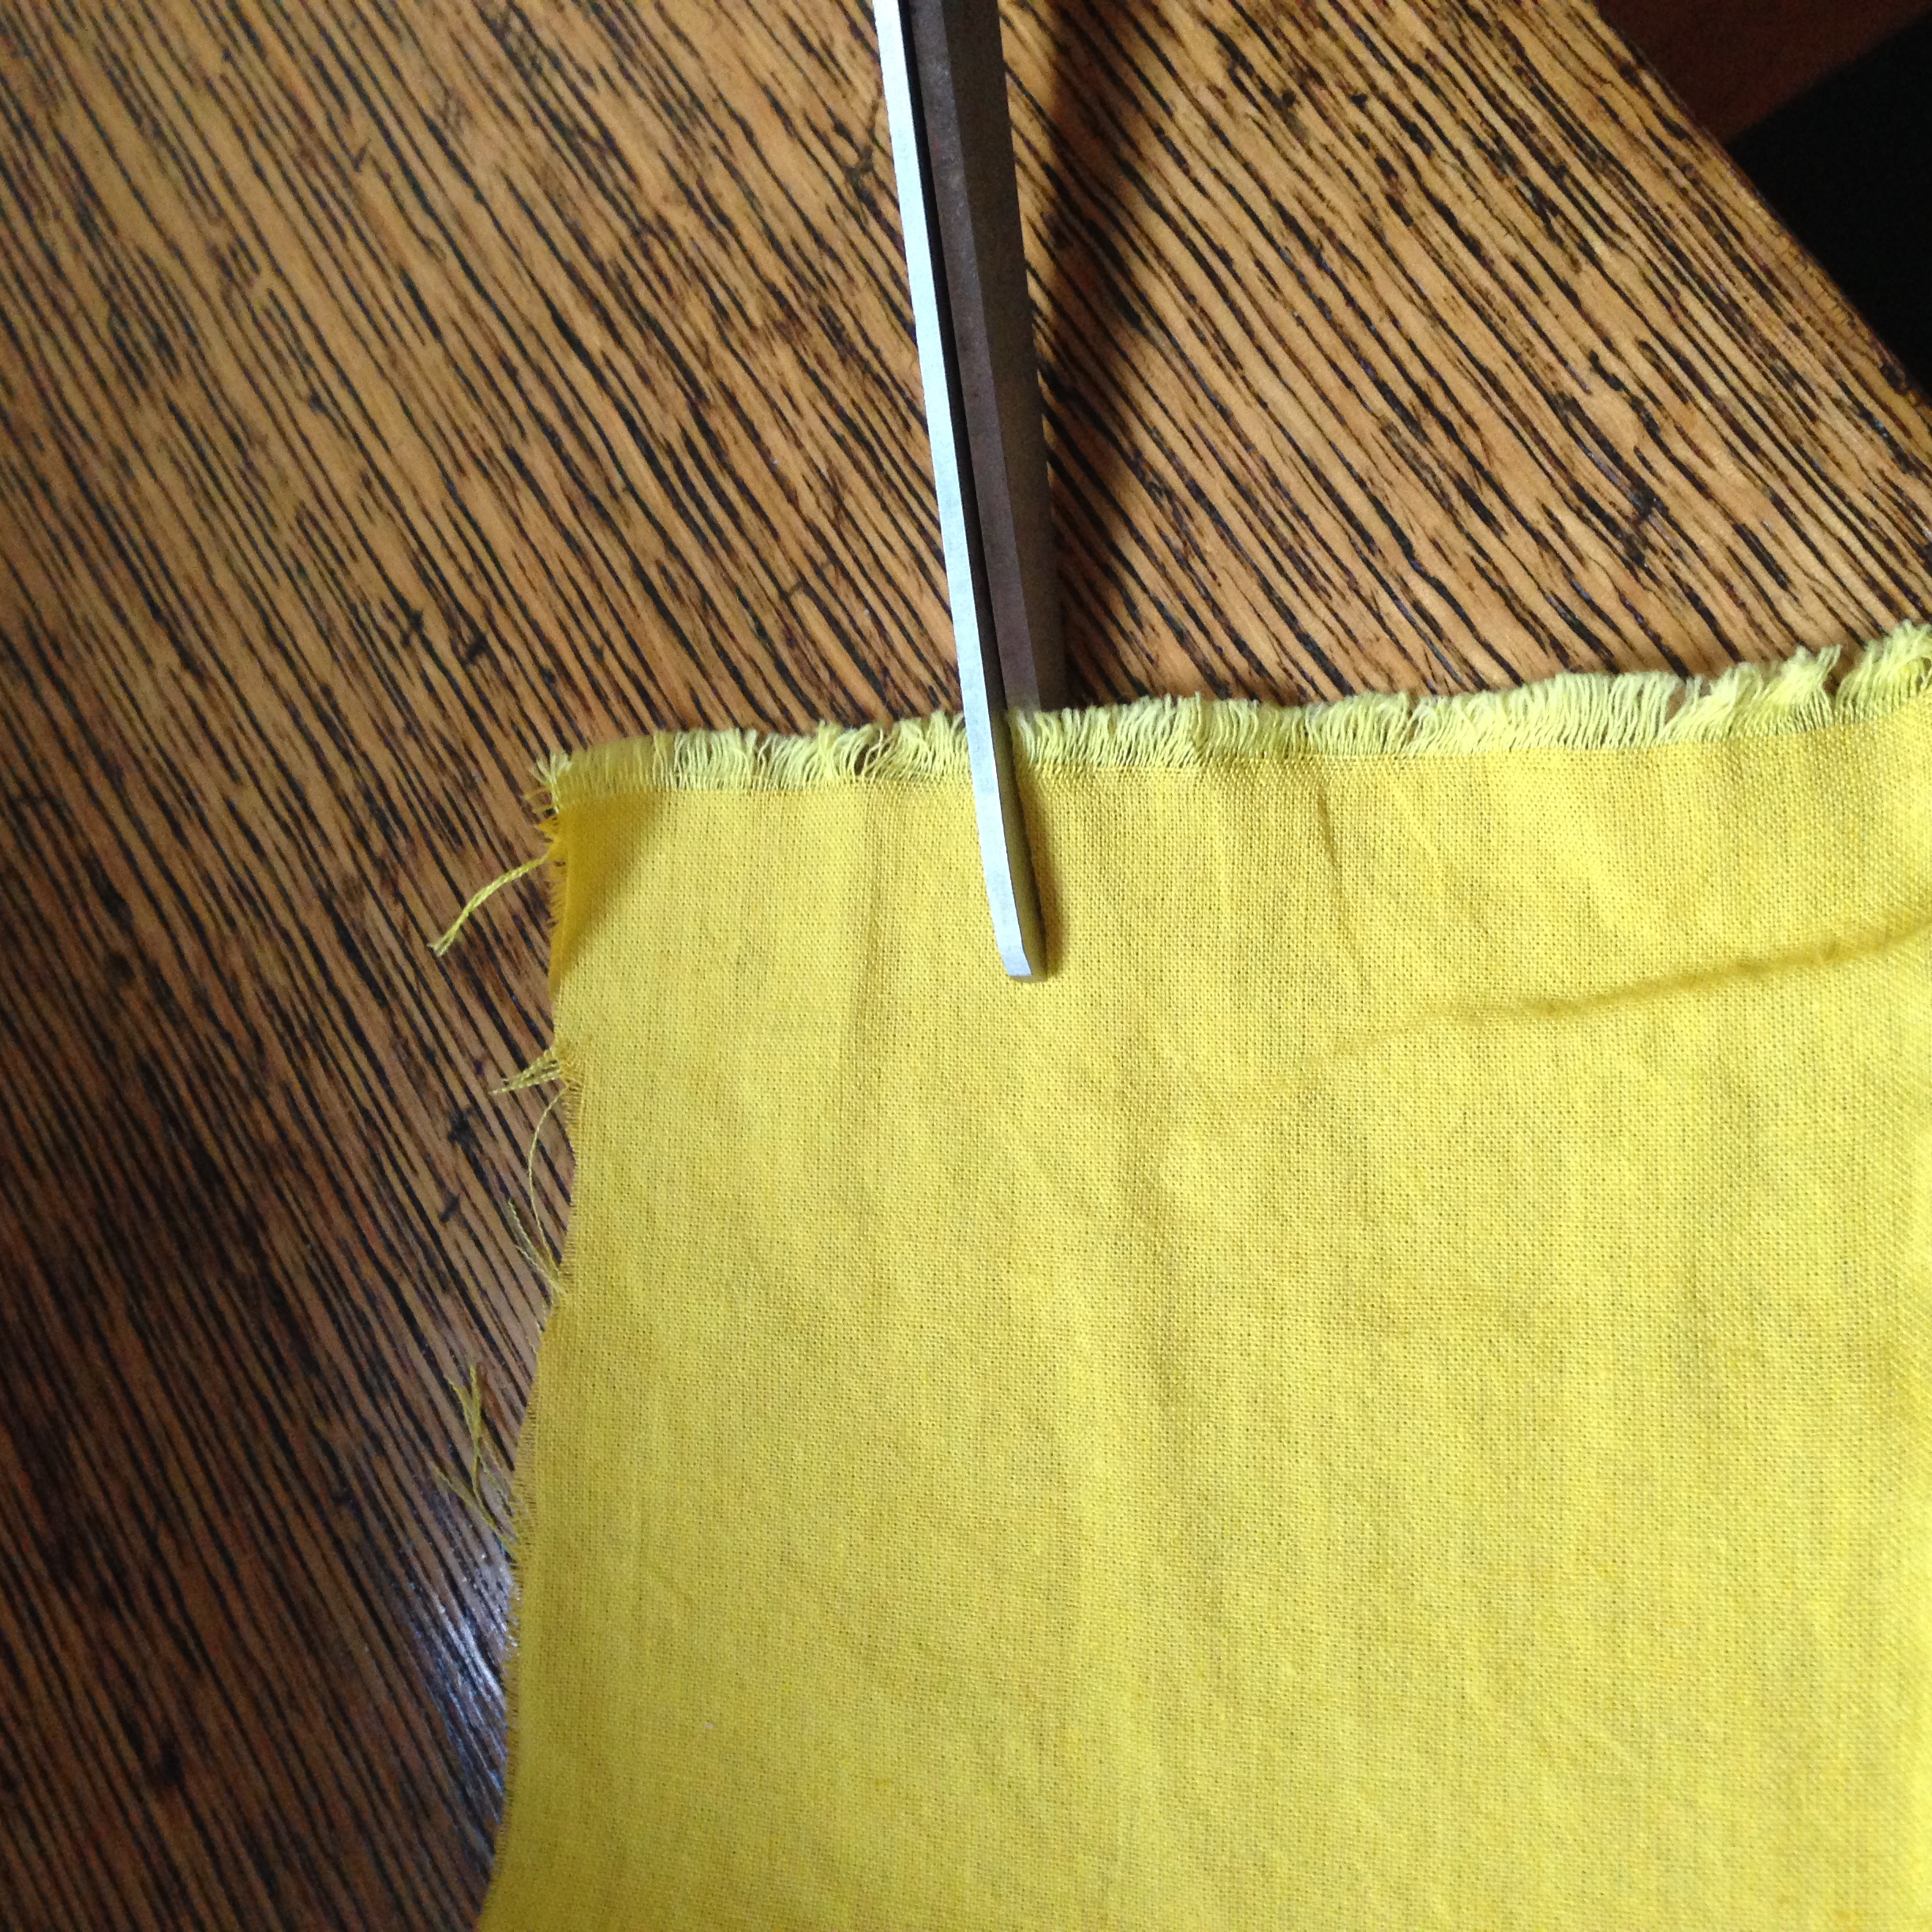
After pre-washing, you'll want to re-cut one raw edge of your fabric along the cross grain. If you are using a plain woven fabric that is not too loosely woven, you can rip your fabric right along the grain line! Sounds crazy but it works. (It is always best to test the rip before you try it for real. Some fabrics don't respond to this technique. If in doubt, skip to the next option!)
To rip along the grain:
1. Snip your fabric at the selvedge about 2" from the cut line.

2. Holding both sides firmly, rip your fabric in a quick, consistent motion. Each time you rip, hold on near each side of the end of the last ripped section.
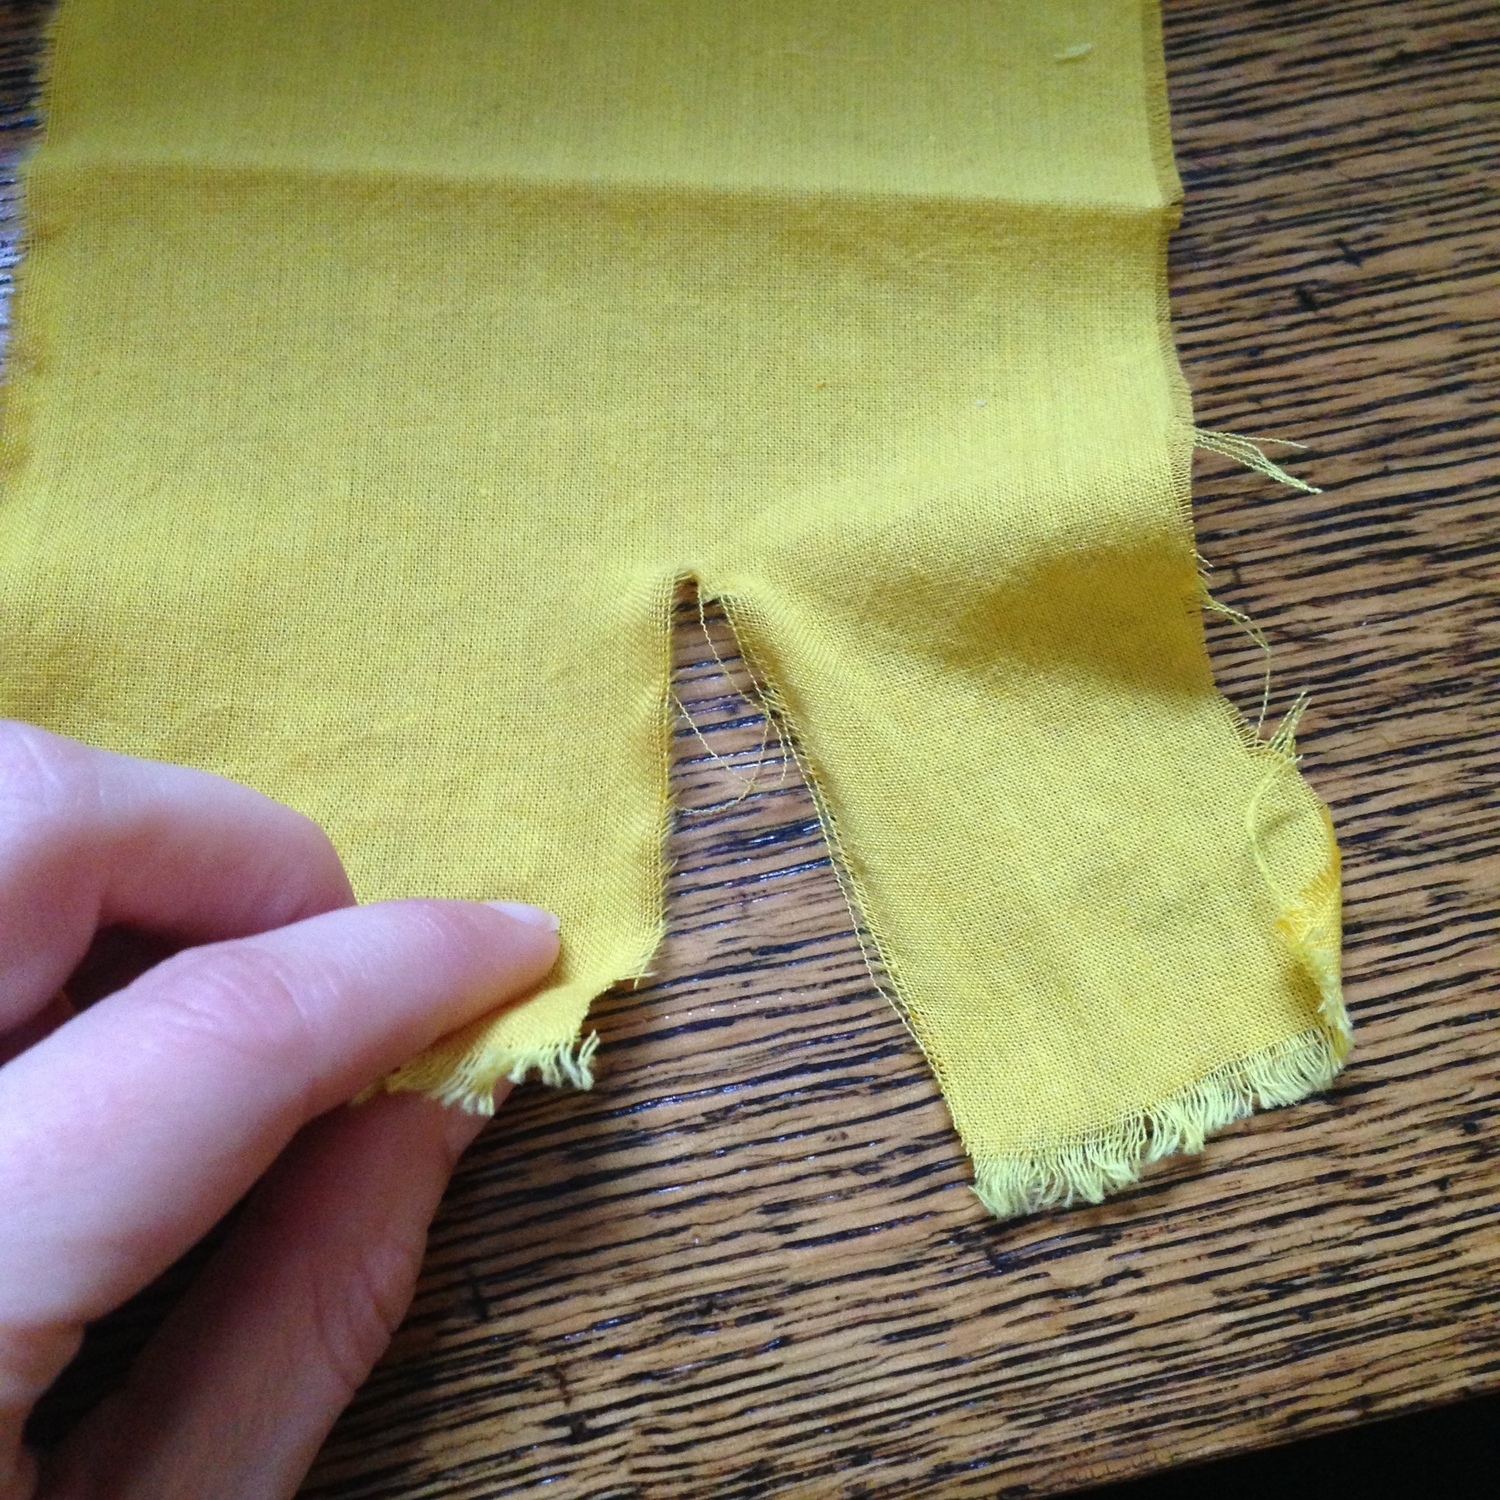
Rip in short, quick tugs. It should rip cleanly along one thread of the fabric.

Once you've ripped all the way through, you may have some long, loose threads. These are the weft threads on either side, and can be pulled away for a clean edge.
If your fabric is not a good candidate for ripping, here's another trick:
1. Snip into your selvedge. Pull apart the fabric to reveal a few little loose threads.


2. Holding onto one thread firmly, pull it and scrunch the fabric along the thread. This should create a ripple along the cross grain of your fabric. With printed fabrics, you can often see a line created by this pull.


3. Cut along this ripple across the fabric. With tightly woven fabric, or if the thread you are pulling breaks, you may have to repeat this a few times, scrunching, cutting, and finding the loose thread.

4. You may result with a slightly uneven edge, but the overall cut will be true to your grainline. Pull back a few threads and the grain will be revealed!

Slightly uneven edge

Pull away the loose threads to reveal the fabric grain! Trim if necessary.
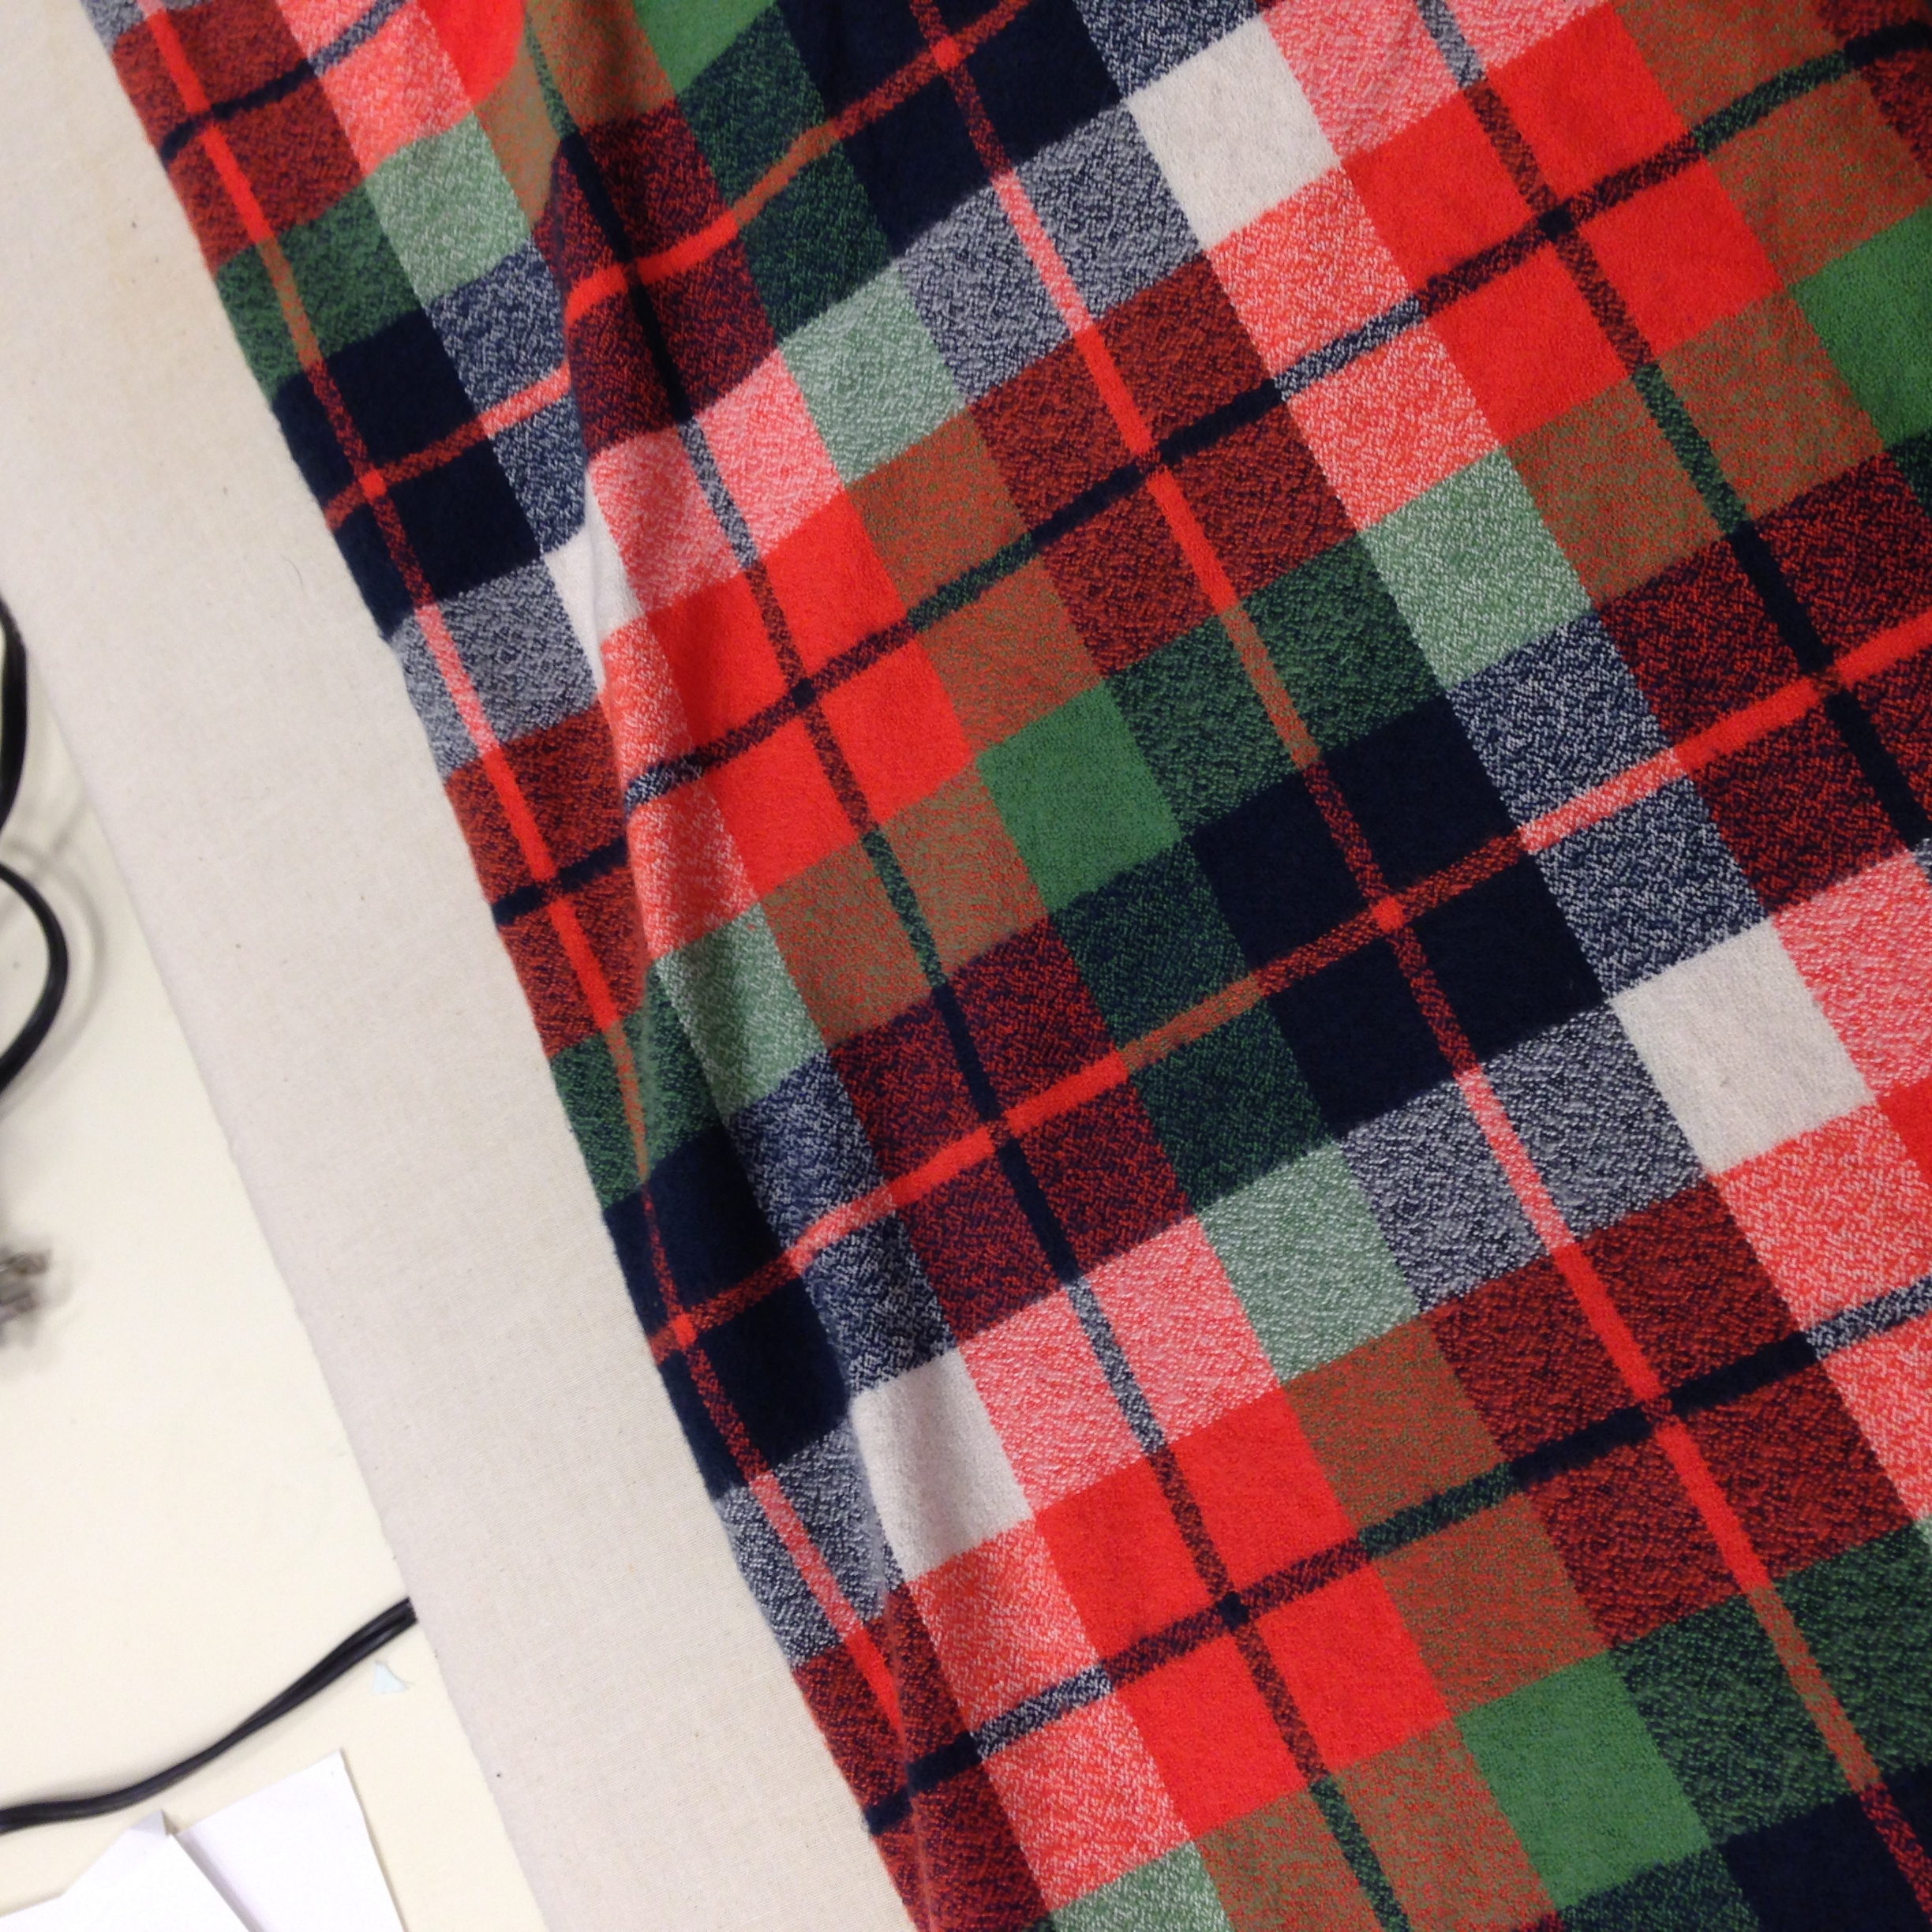
Or, if your fabric is a yarn dyed stripe or plaid, simply cut along the pattern.

Cutting along the edge of the green stripe of the fabric to find the grain.
Finally, fold your fabric in half, matching up this new on-the-grain cut edge as well as the selvedge.

Using a gridded cutting mat or table is a great way to check if your fabric is aligned. Once folded, it should match up with the lines on the table, just like in the pink gingham swatch shown in the beginning.
If your fabric folds up perfectly into an even little rectangle, you're in luck! You should have nice smooth fabric at the fold without any wrinkles.
If the fold of your fabric has big wrinkles or folds, even once the cut edge and selvedge are matched up, your fabric is off-grain. Here's how to fix it:
- Make a note of which direction the wrinkles are 'pointing'. Place a safety pin in the corner that the wrinkles point to.
- Unfold your fabric and grab opposite corners without the safety pin, and give them a nice hard tug. You may need to do this across the bias (diagonal) grain in a few places if you have a big fabric piece.
- Realign your fabric to check if the grain has been fixed.
- If not, try folding in half again and steaming with your iron above the fabric. Smooth the fabric into the desired position and let dry.
Once aligned, your fabric should look like the folded fabric in the first pictue. If your fabric looks like this, move on to the next section!
To line up your pattern pieces with the grain:
1. Identify the grain lines on your pattern. The 'fold line' represents the grain on pieces cut on the fold. This is because, ideally, your fabric fold should be right on the grain.
2. Position your pieces as indicated on the pattern.

3. Going piece by piece, measure from one end of your grainline to either the selvedge or the fold of the fabric.

4. Measure from the other end of the grainline to the selvedge/fold. If it is not equal to the 1st measurement, adjust it so it is.
OR
1. Take a square, clear ruler (like those used for quilting) and align one side with the grain.

Not lined up with grain

Lined up with grain.
2. Line the opposite side, or a measurement along the ruler, with either the selvedge or fold line.
3. Secure your pieces with pins or pattern weights.
Now you are ready to mark and cut!
See our next tutorial for marking and cutting...