
Sewing a Lapped Zipper
As I find myself in the throws of working on a new pattern, I am brimming with excitement and anticipation. However, at this stage, that means lots of days on the computer. Unfortunately, the blog and instagram have been feeling a bit empty and that excitement doesn't really show. I didn't want to leave you hanging in February, so I thought a nice tutorial might be in order.
Last night, I taught a zipper & buttonhole class and while preparing some web resources for my students today, I was unable to find a tutorial that uses the zipper insertion method I teach. I thought, why not put together a lapped zipper tutorial? The lapped zipper is used on my A-Frame pattern and is my go-to zipper finish. I love its ease of insertion and vintage look. I took lots of photographs during A-Frame sample construction to aid in illustrating, but I know that some folks do better with photo tutorials. So without further ado...
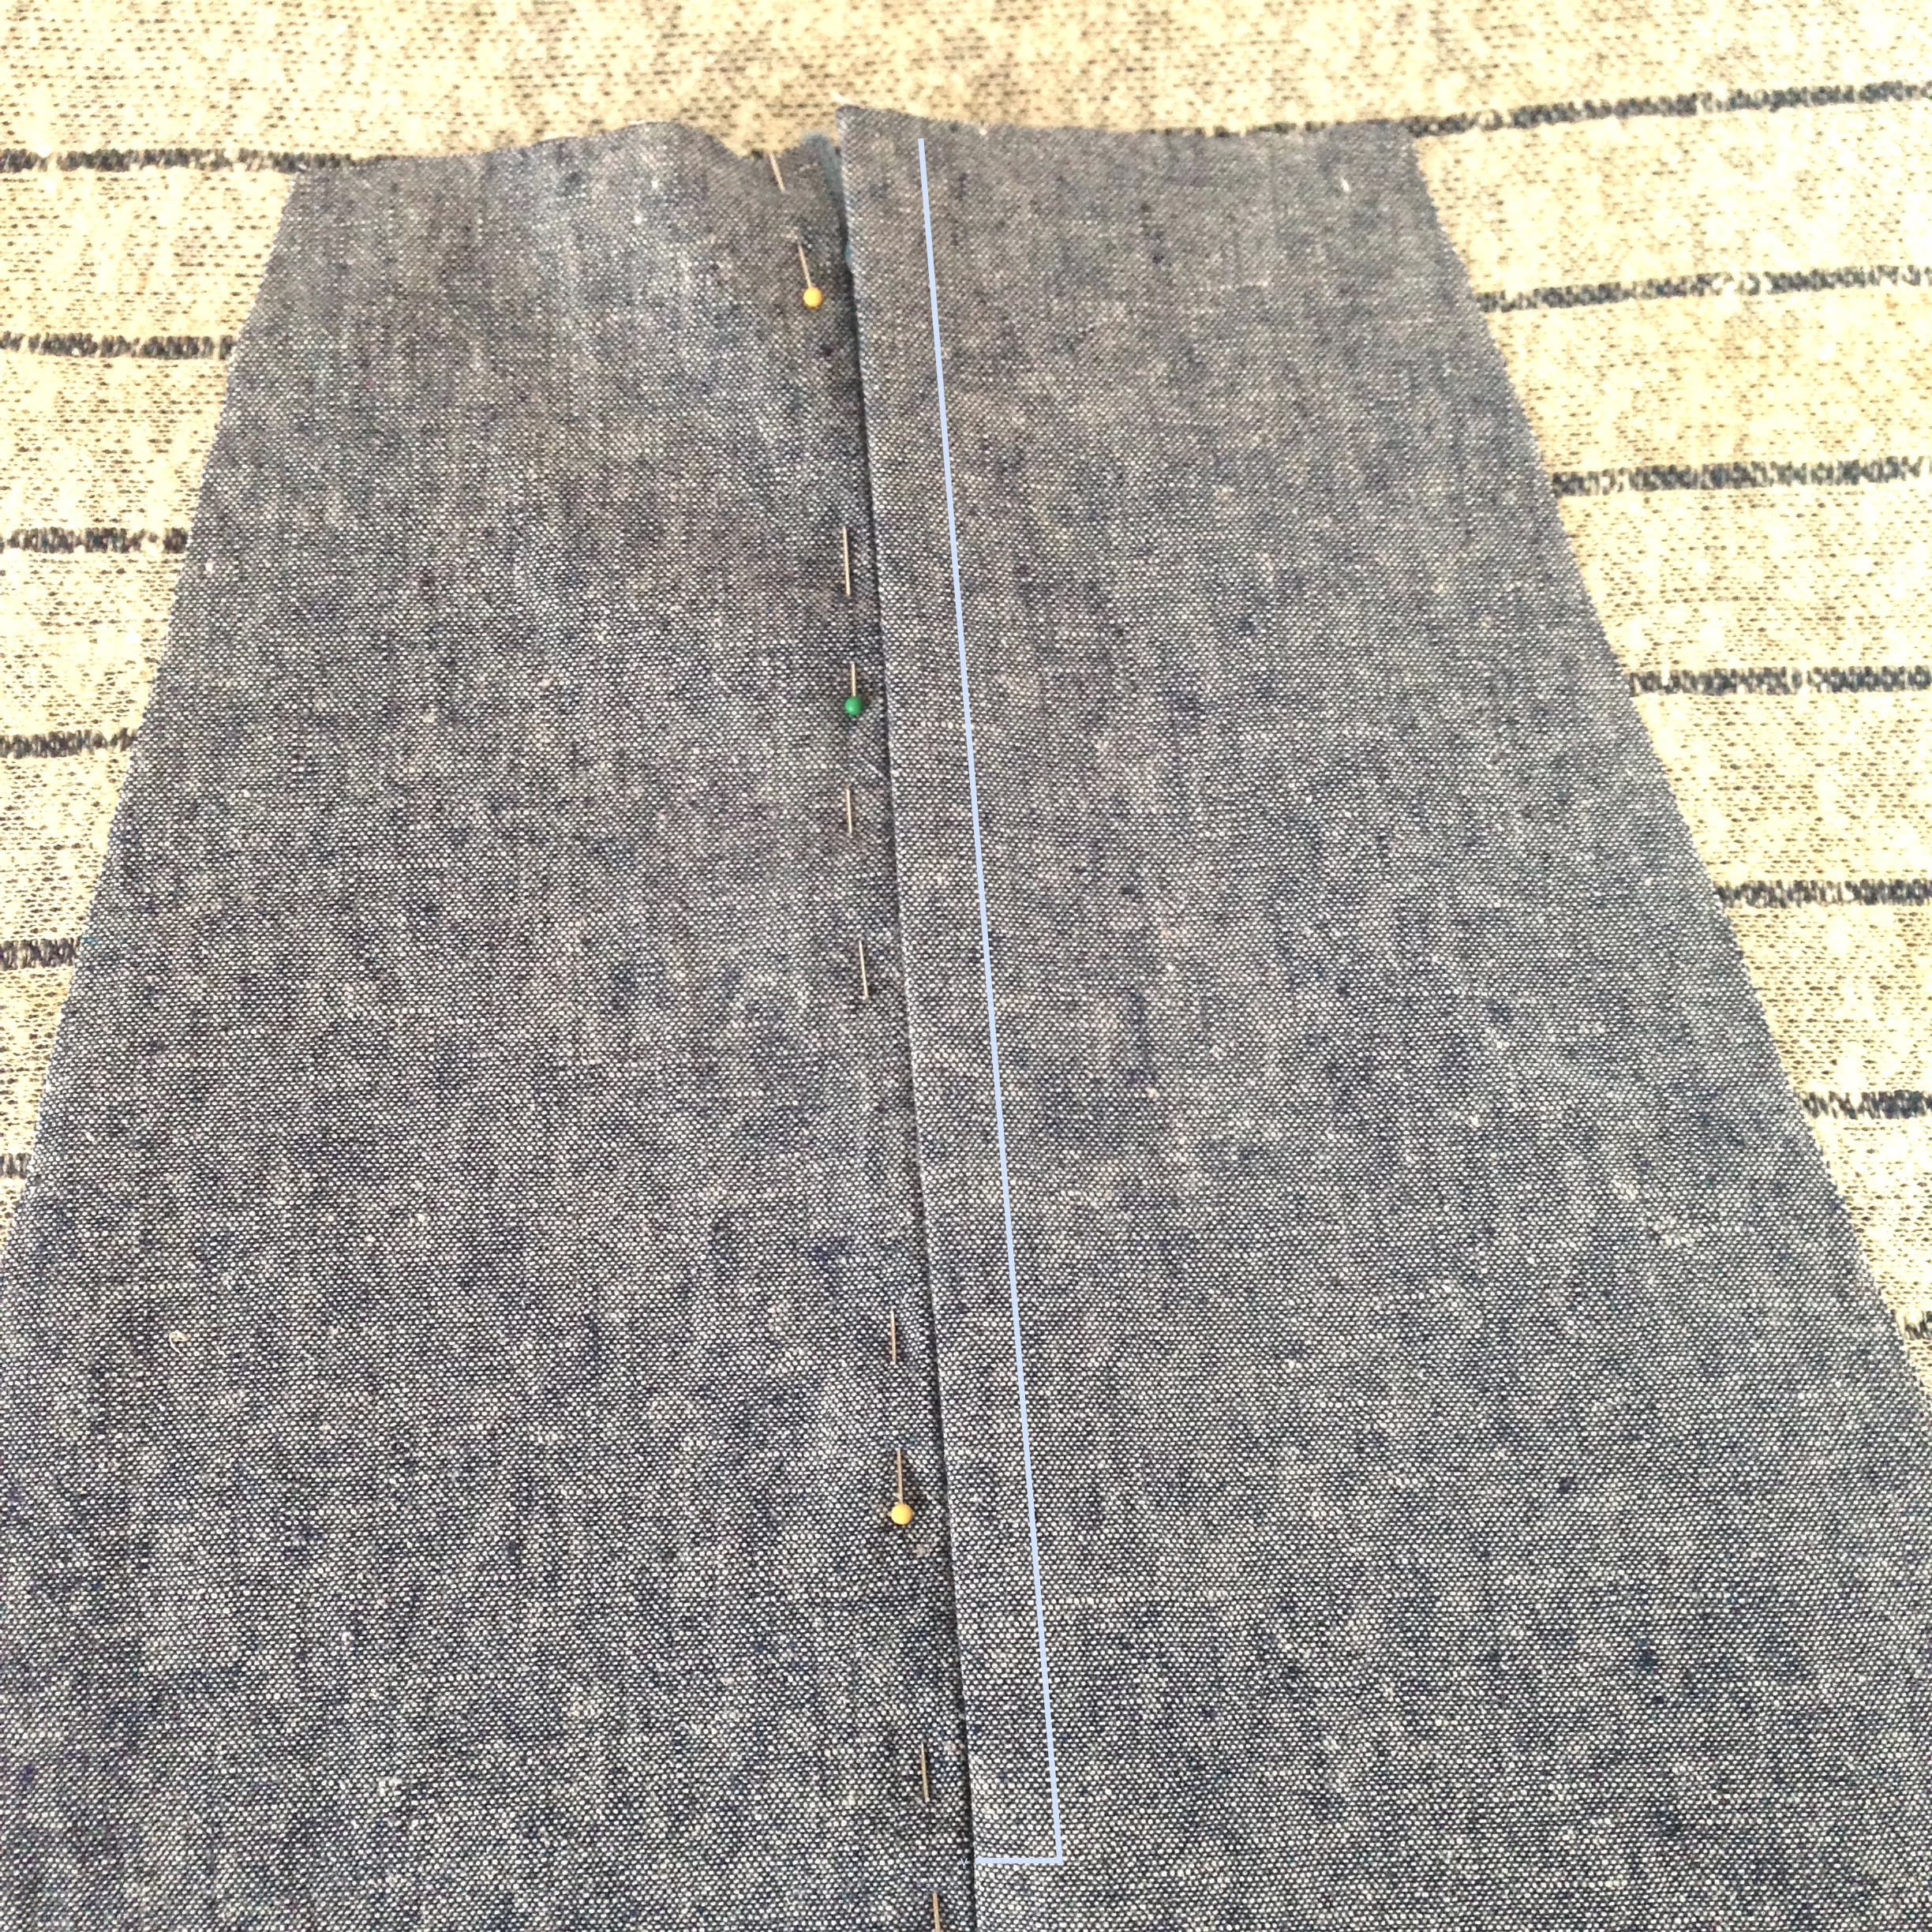
To start, press the seam where your zipper will go open. Press the open end of the seam as well, folding back the seam allowance.

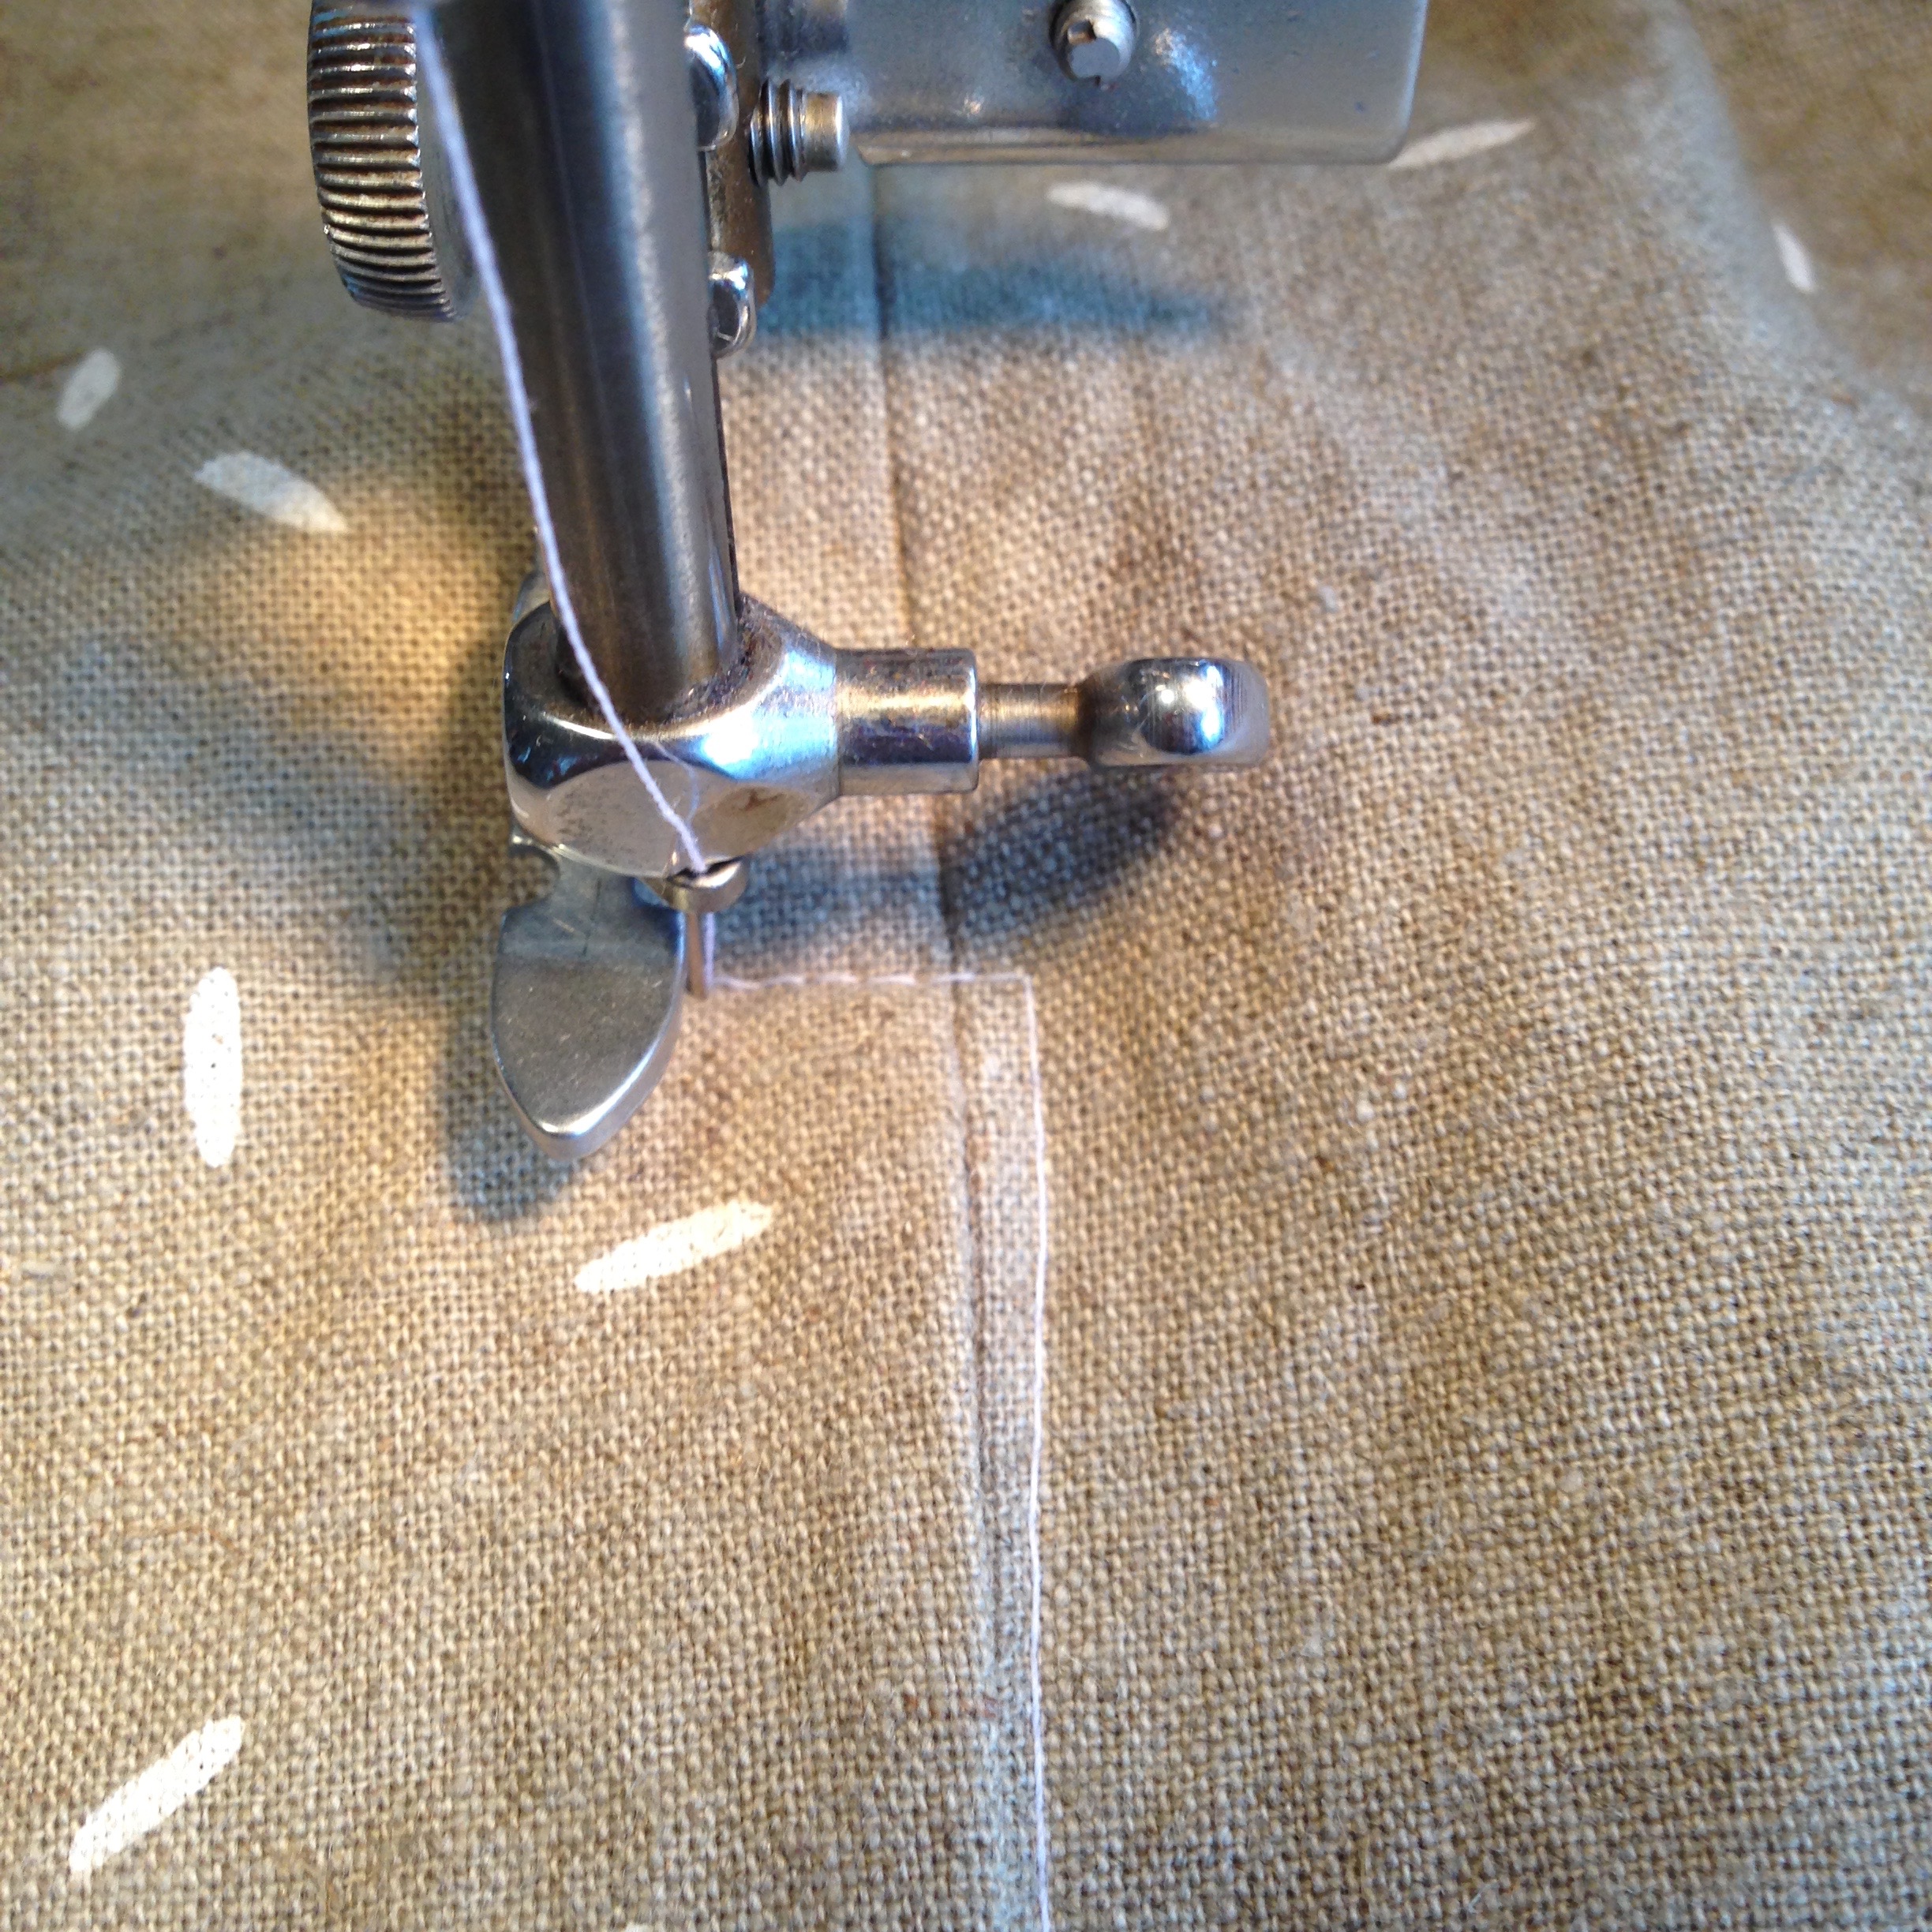
With the zipper partially unzipped, align the left side of your zipper teeth with the folded edge of the fabric. There should be a small gap between the zipper teeth and the fabric edge. This will help keep the zipper from getting caught on the fabric. Pin or baste the zipper to the fabric along this edge.
Ever wonder why your zip has extra, toothless tape at the top? This is to give you a bit of room for seam allowance, if your zippers end is being sewn into something else. That way, you don't have to sew over teeth. Align the edge of this tape with the edge of your fabric, or align it so that the zipper head is 1/2" or 5/8" (or whatever your seam allowance is) from the edge of the fabric.

The other side of the opening will become the 'lap'. It often helps to mark this stitching line with chalk. For most zippers, you'll want the stitching to be 3/8"-1/2" away from the opening. You want to be sure that wherever your stitching line is, it must catch both the seam allowance and the zipper tape. Since those two factors are variable, try pinning or basting along this guideline, then checking the back to be sure you've gone through all layers.
Basting is a fantastic technique to have in your arsenal. If you have the patience for it, baste your zipper onto the fabric by hand, instead of using pins. This will help keep things aligned and predictable during each step of the process.
Set up your zipper foot with the needle coming down on the right side of the foot. Starting at the top of your zipper, sew along the folded fabric edge. Try to keep your fabric aligned with the side of the foot, making sure your stitching catches this fold. It's better to be a little further from the fabric edge than miss it entirely while sewing (which results in a zipper that is not attached)

When you've sewn about halfway down your zipper, sink the needle into the fabric and lift the presser foot.
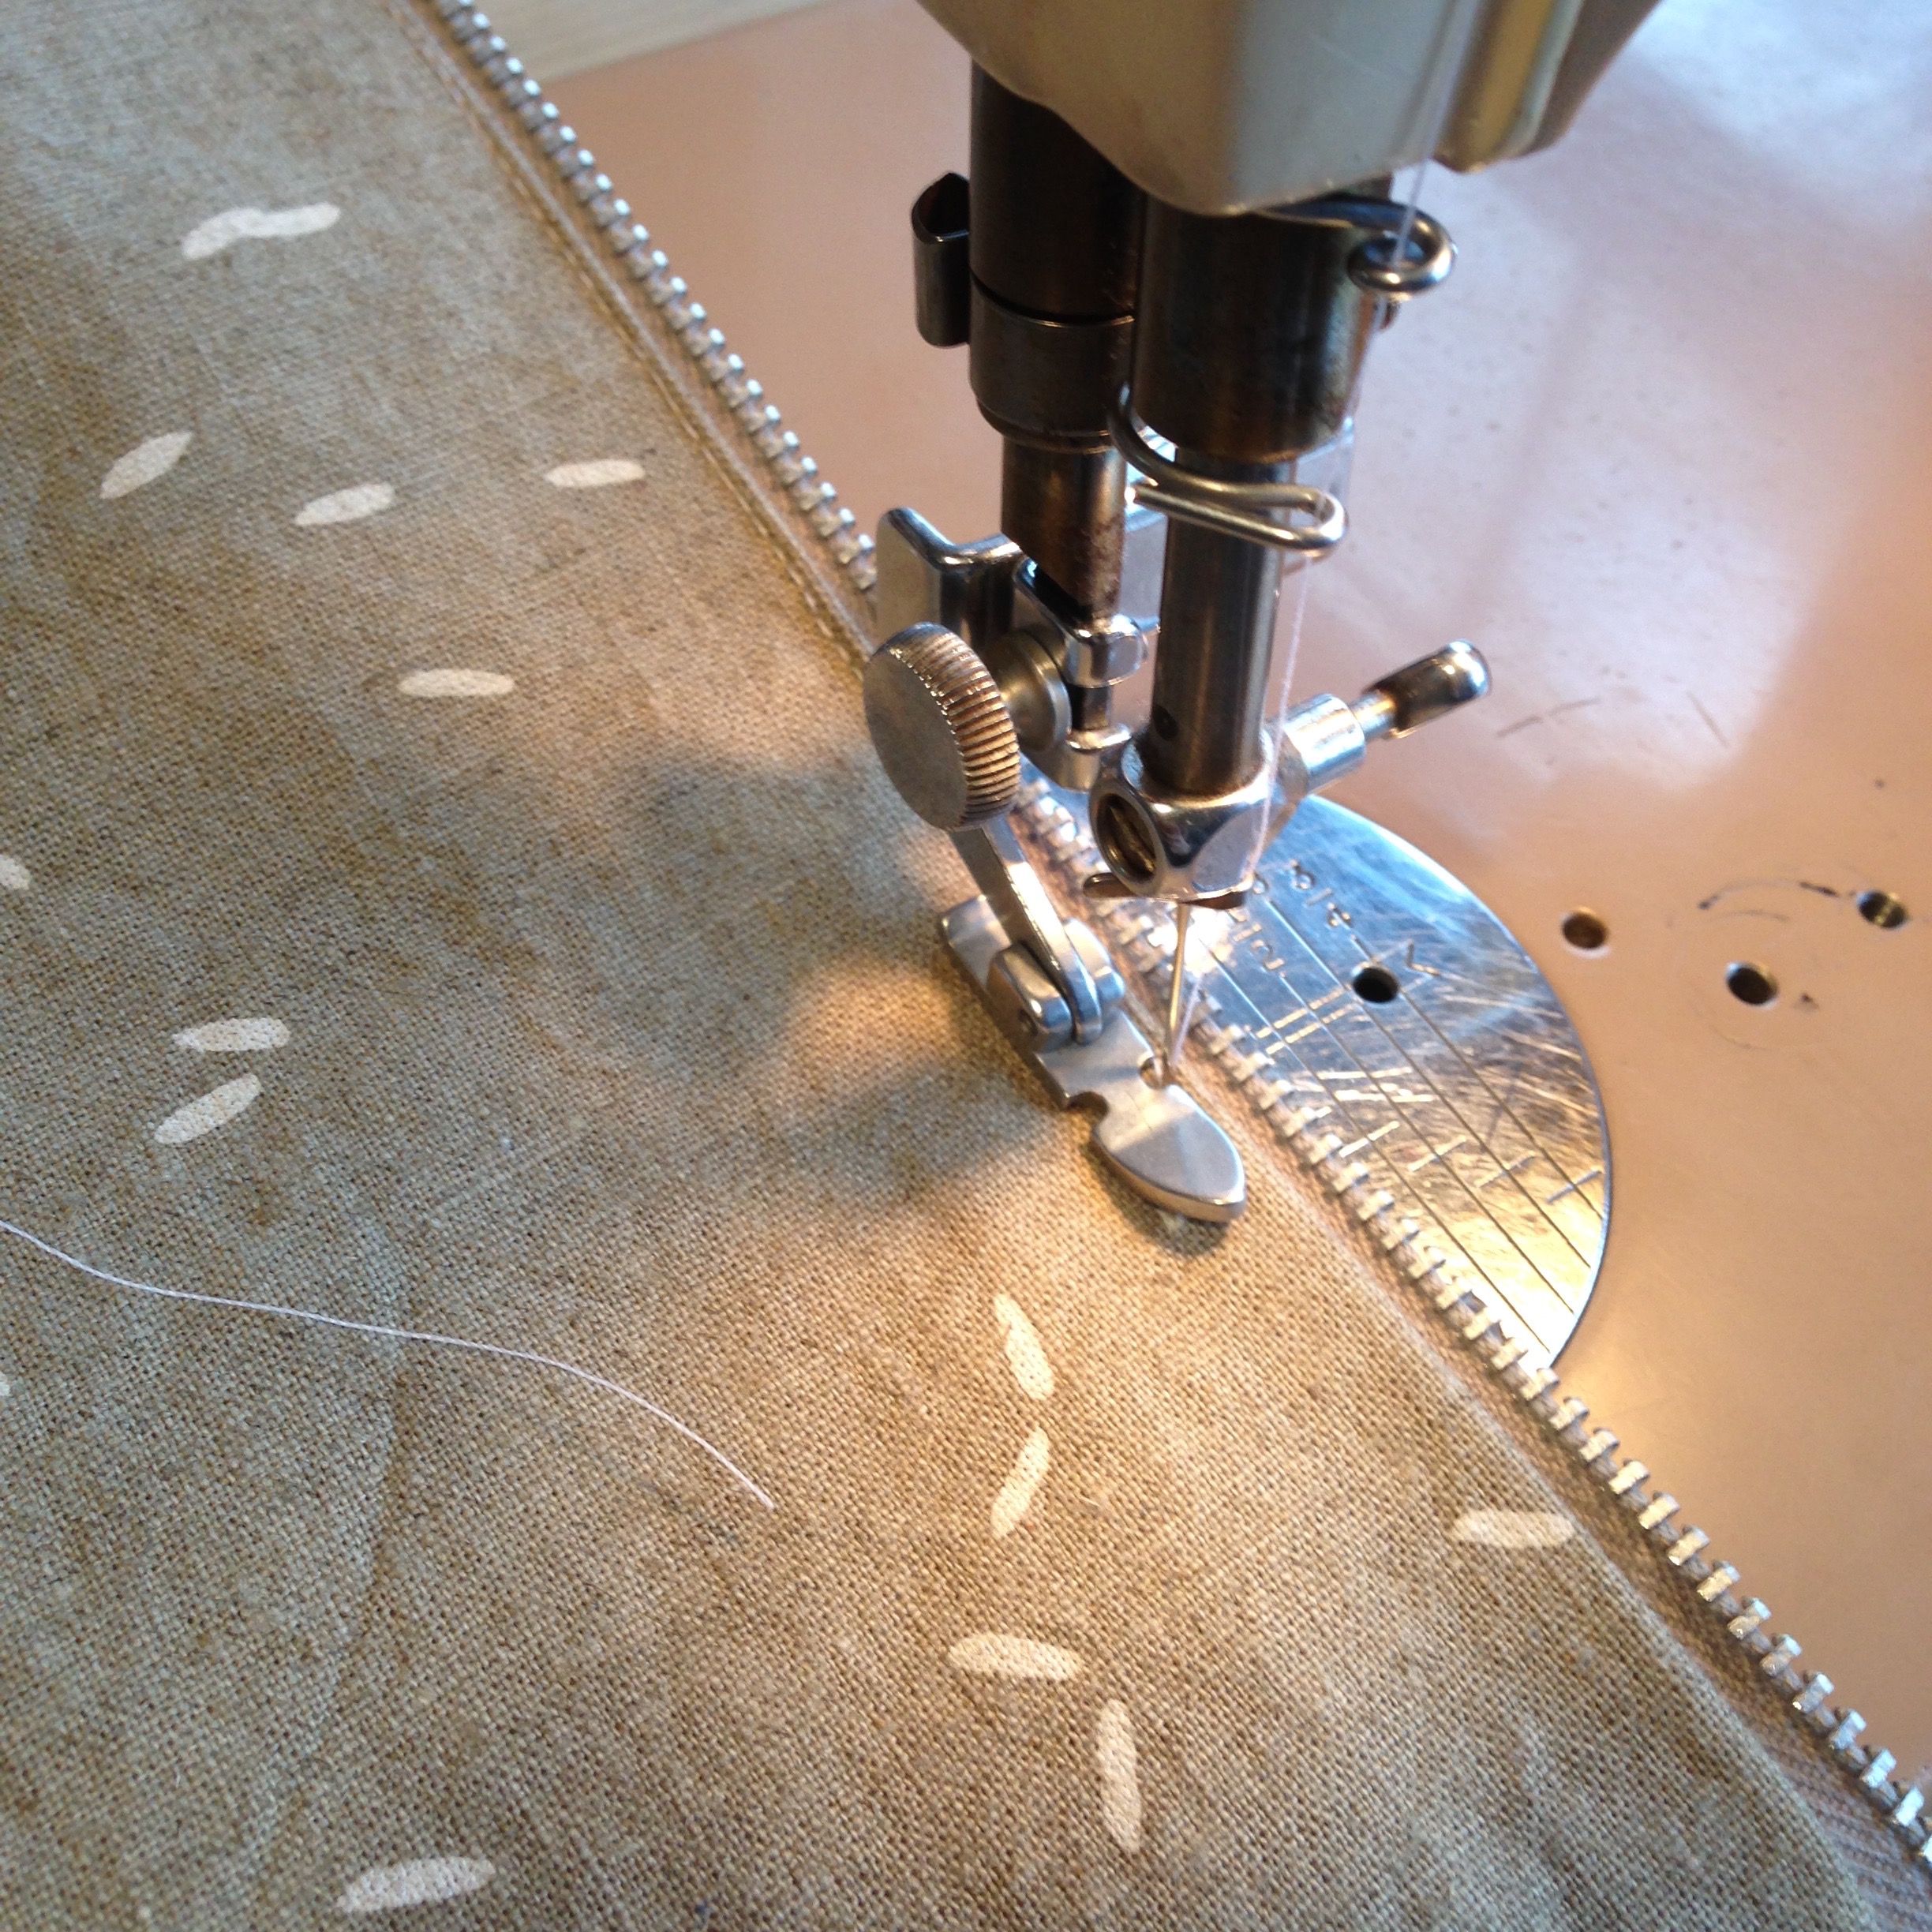
Zip your zipper back up to the top, past the presser foot. You'll almost always have to have the presser foot up in order to squeeze the zipper past it. Before you continue sewing, lower the presser foot.
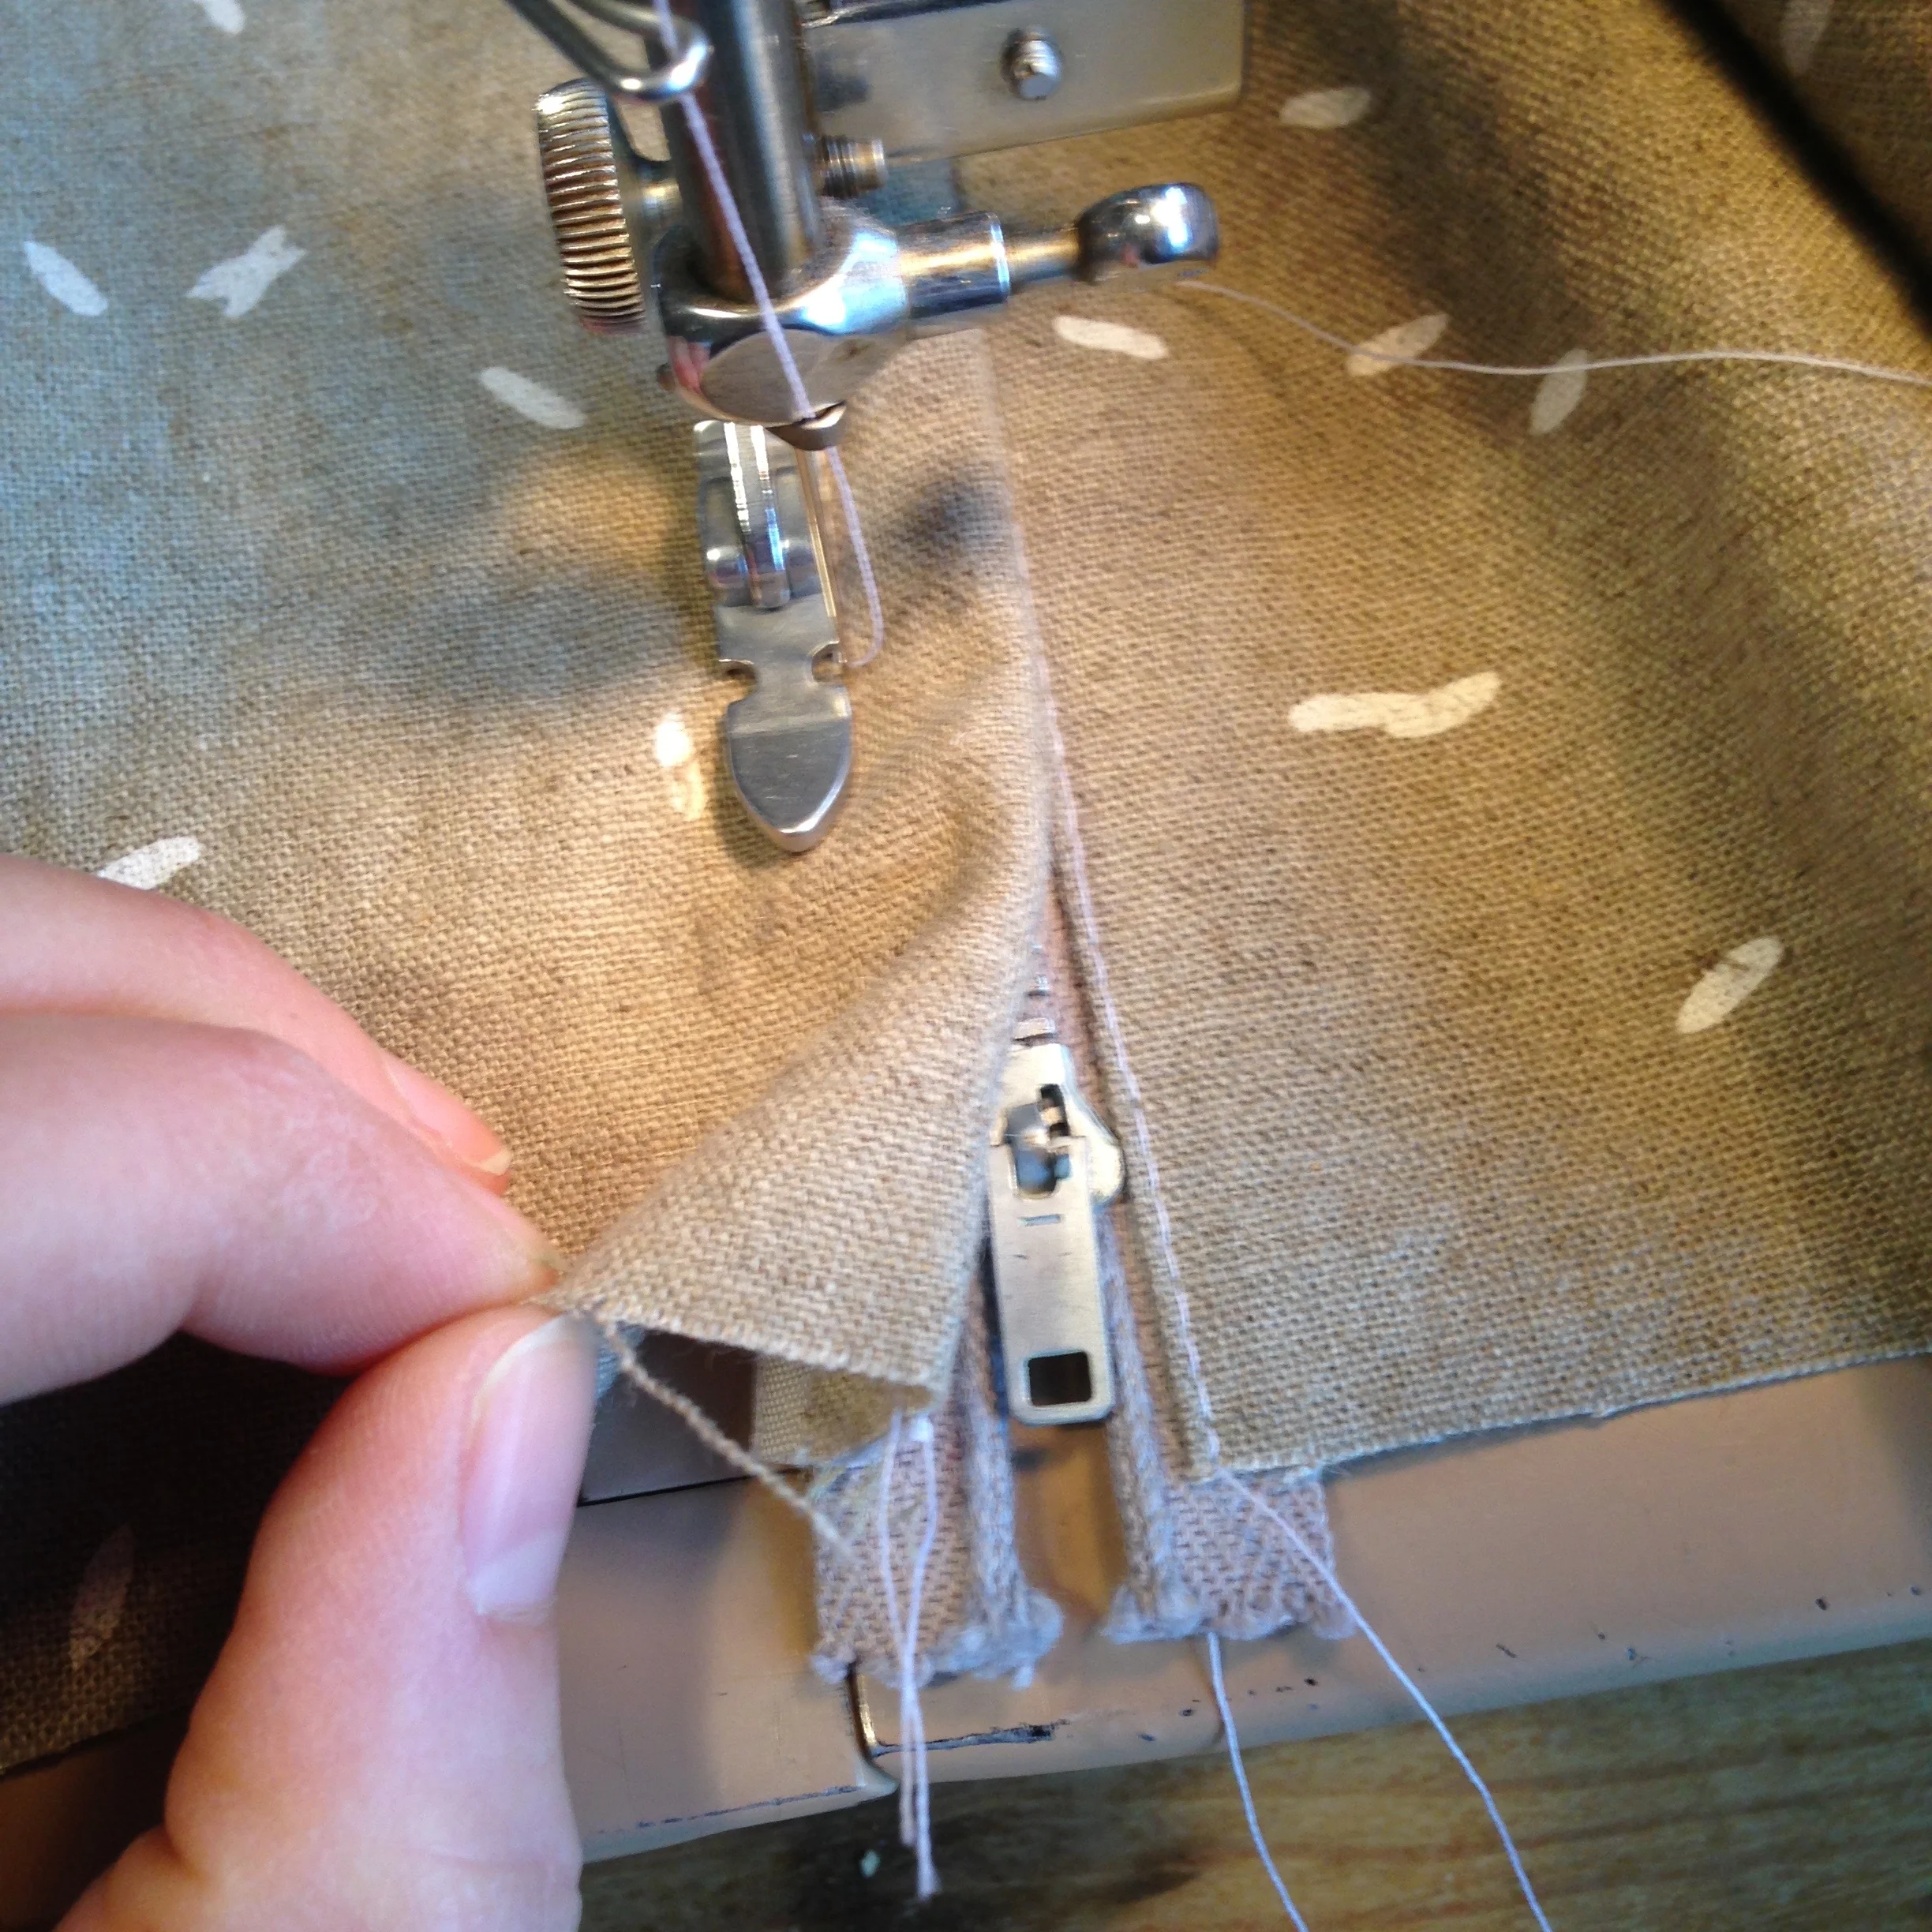
Continue sewing until you reach the end of the left side of the zipper opening. You'll want to stop sewing just at the end or a little bit past the end of the zipper opening (I'm stopped a bit short in the picture). If your zipper stopper- the metal bit at the end of the zipper - is in the way of where you're about to sew, you can sew a few stitches past it. Since we'll be sewing over the zipper next, you want to make sure the stopper is out of the way.
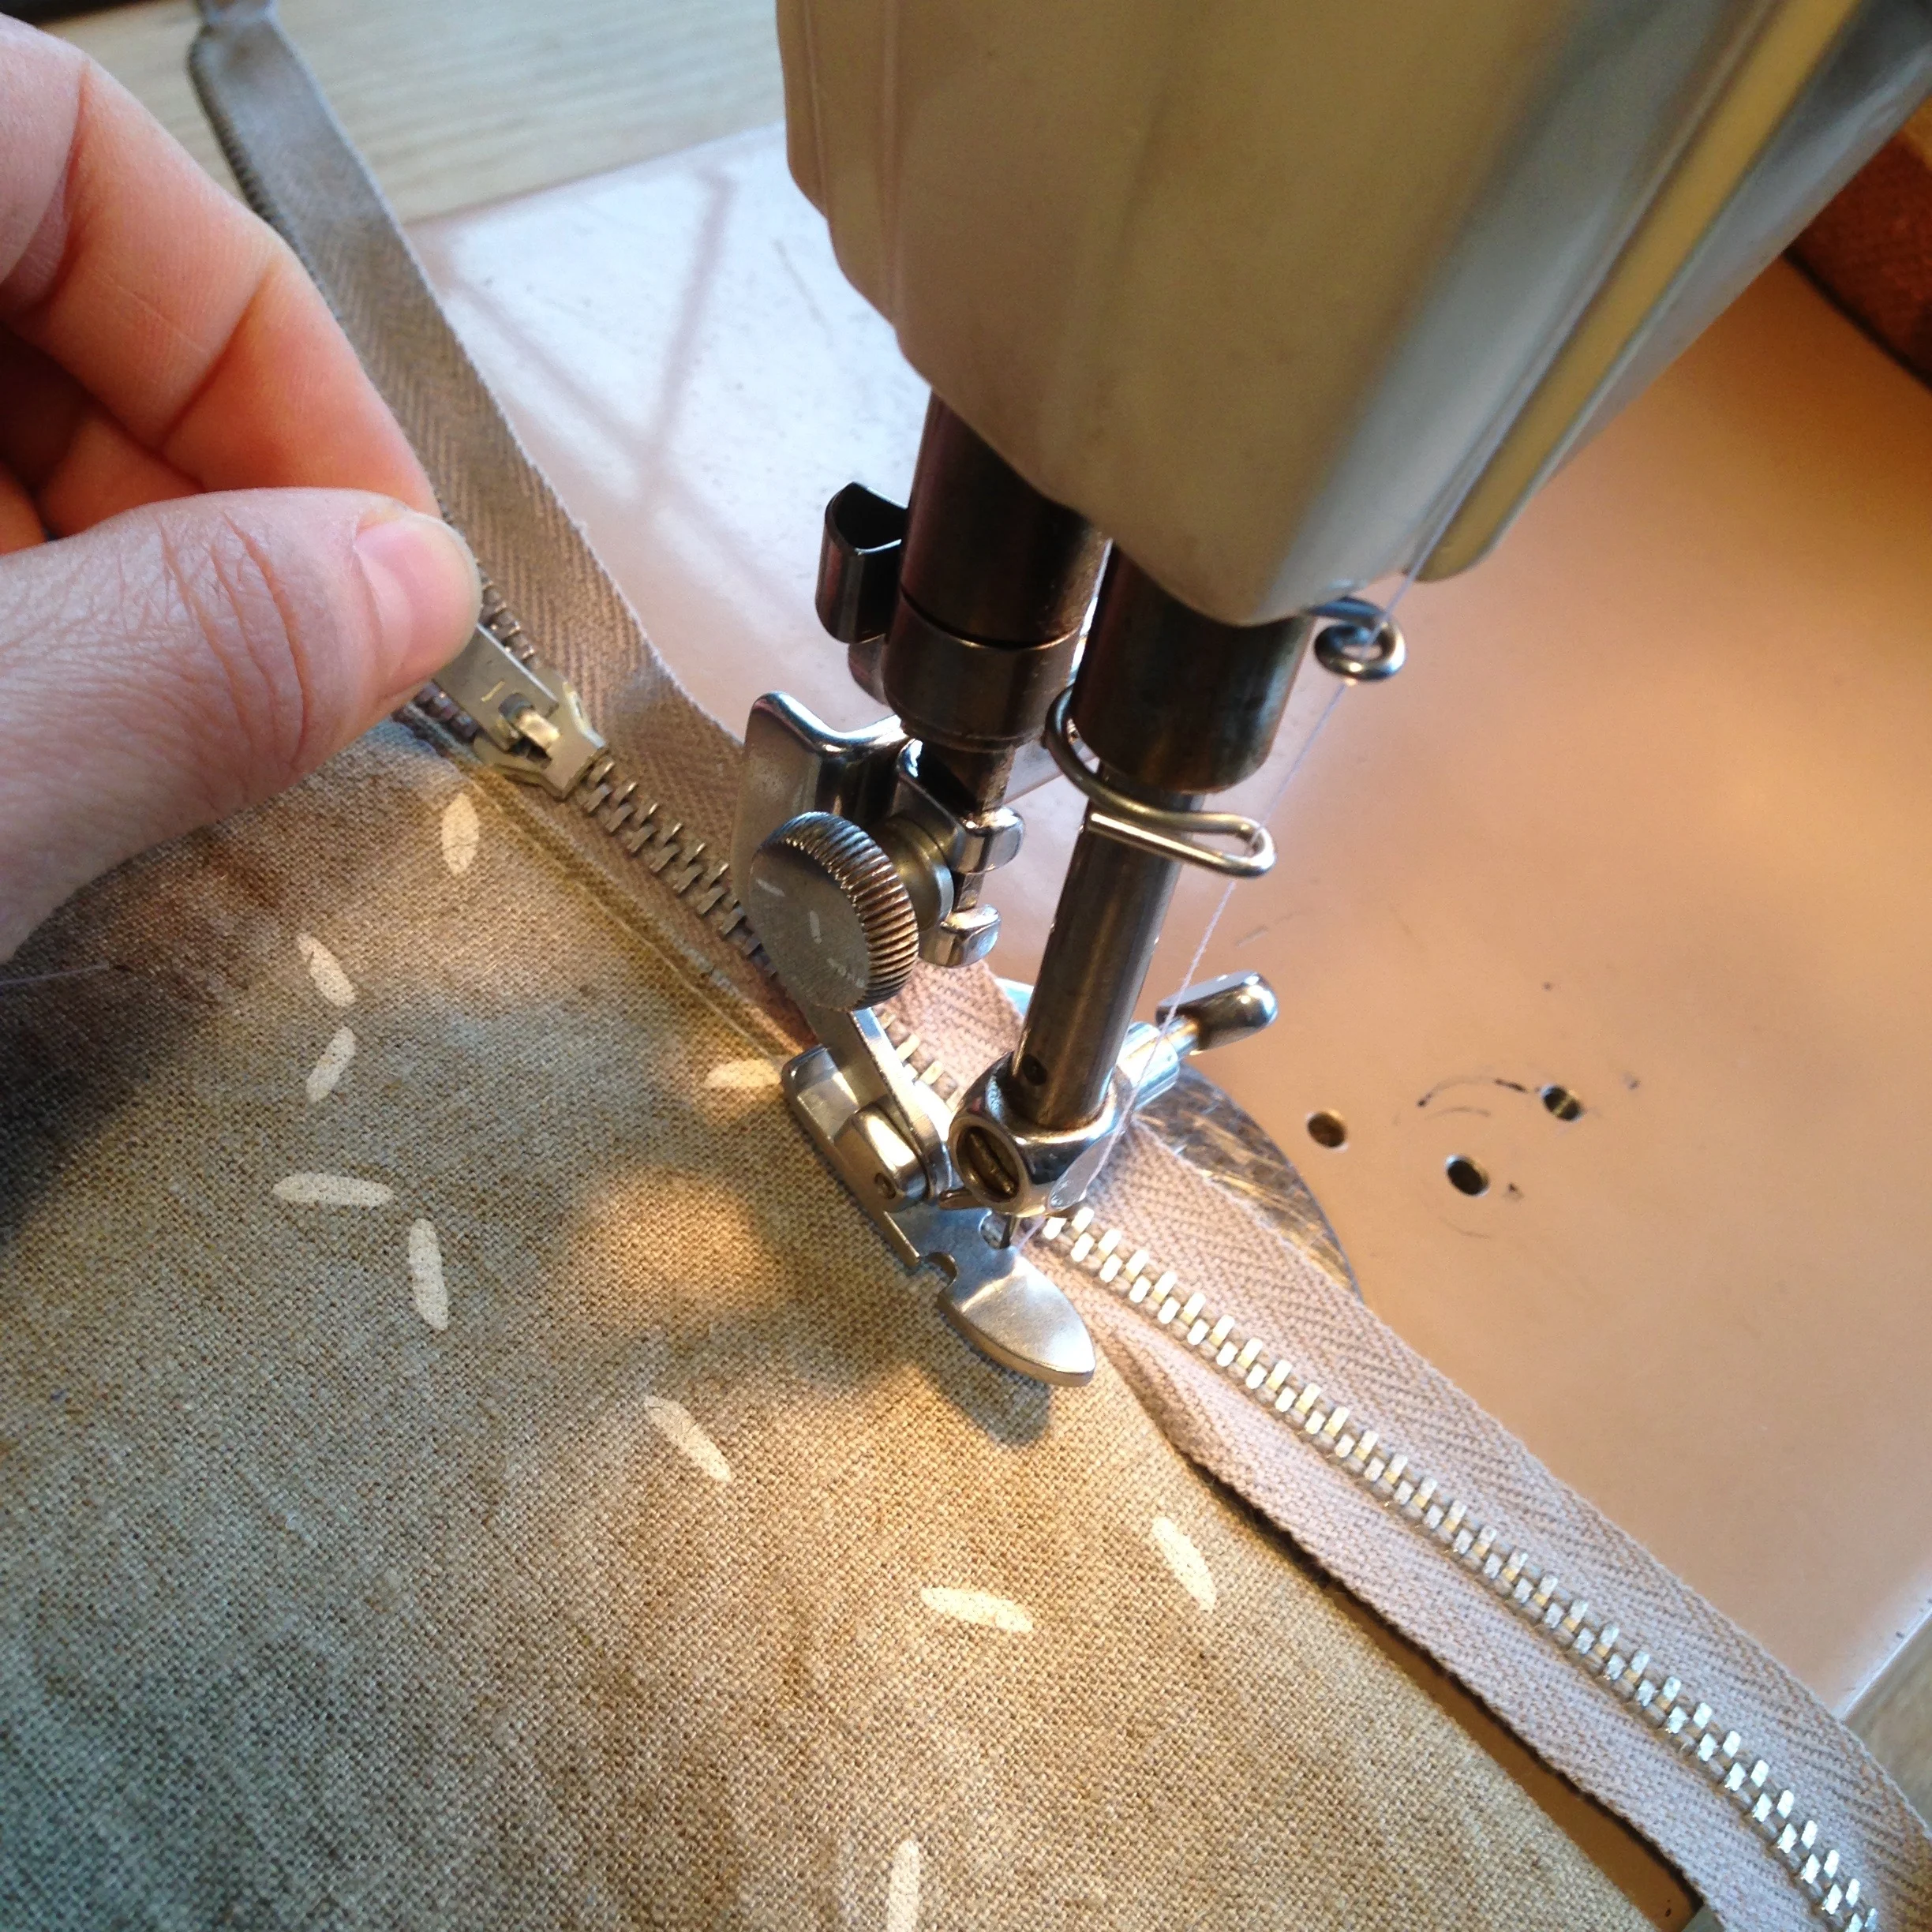
In this picture, I've attached a ribbon to my zipper seam allowance to give me both a clean finish inside and to add extra width to my seam allowance to be sure that I catch it while sewing the lapped part of the zipper. You can also cut your seam allowance at the zipper a bit wider, a technique included in the A-Frame pattern.
With the needle in the fabric, lift the presser foot, turn your fabric 90* clockwise, then lower the presser foot. We'll now be sewing across the bottom of your zipper. Most often, the best way to do this is by advancing the machine by hand. This way, you have more control.

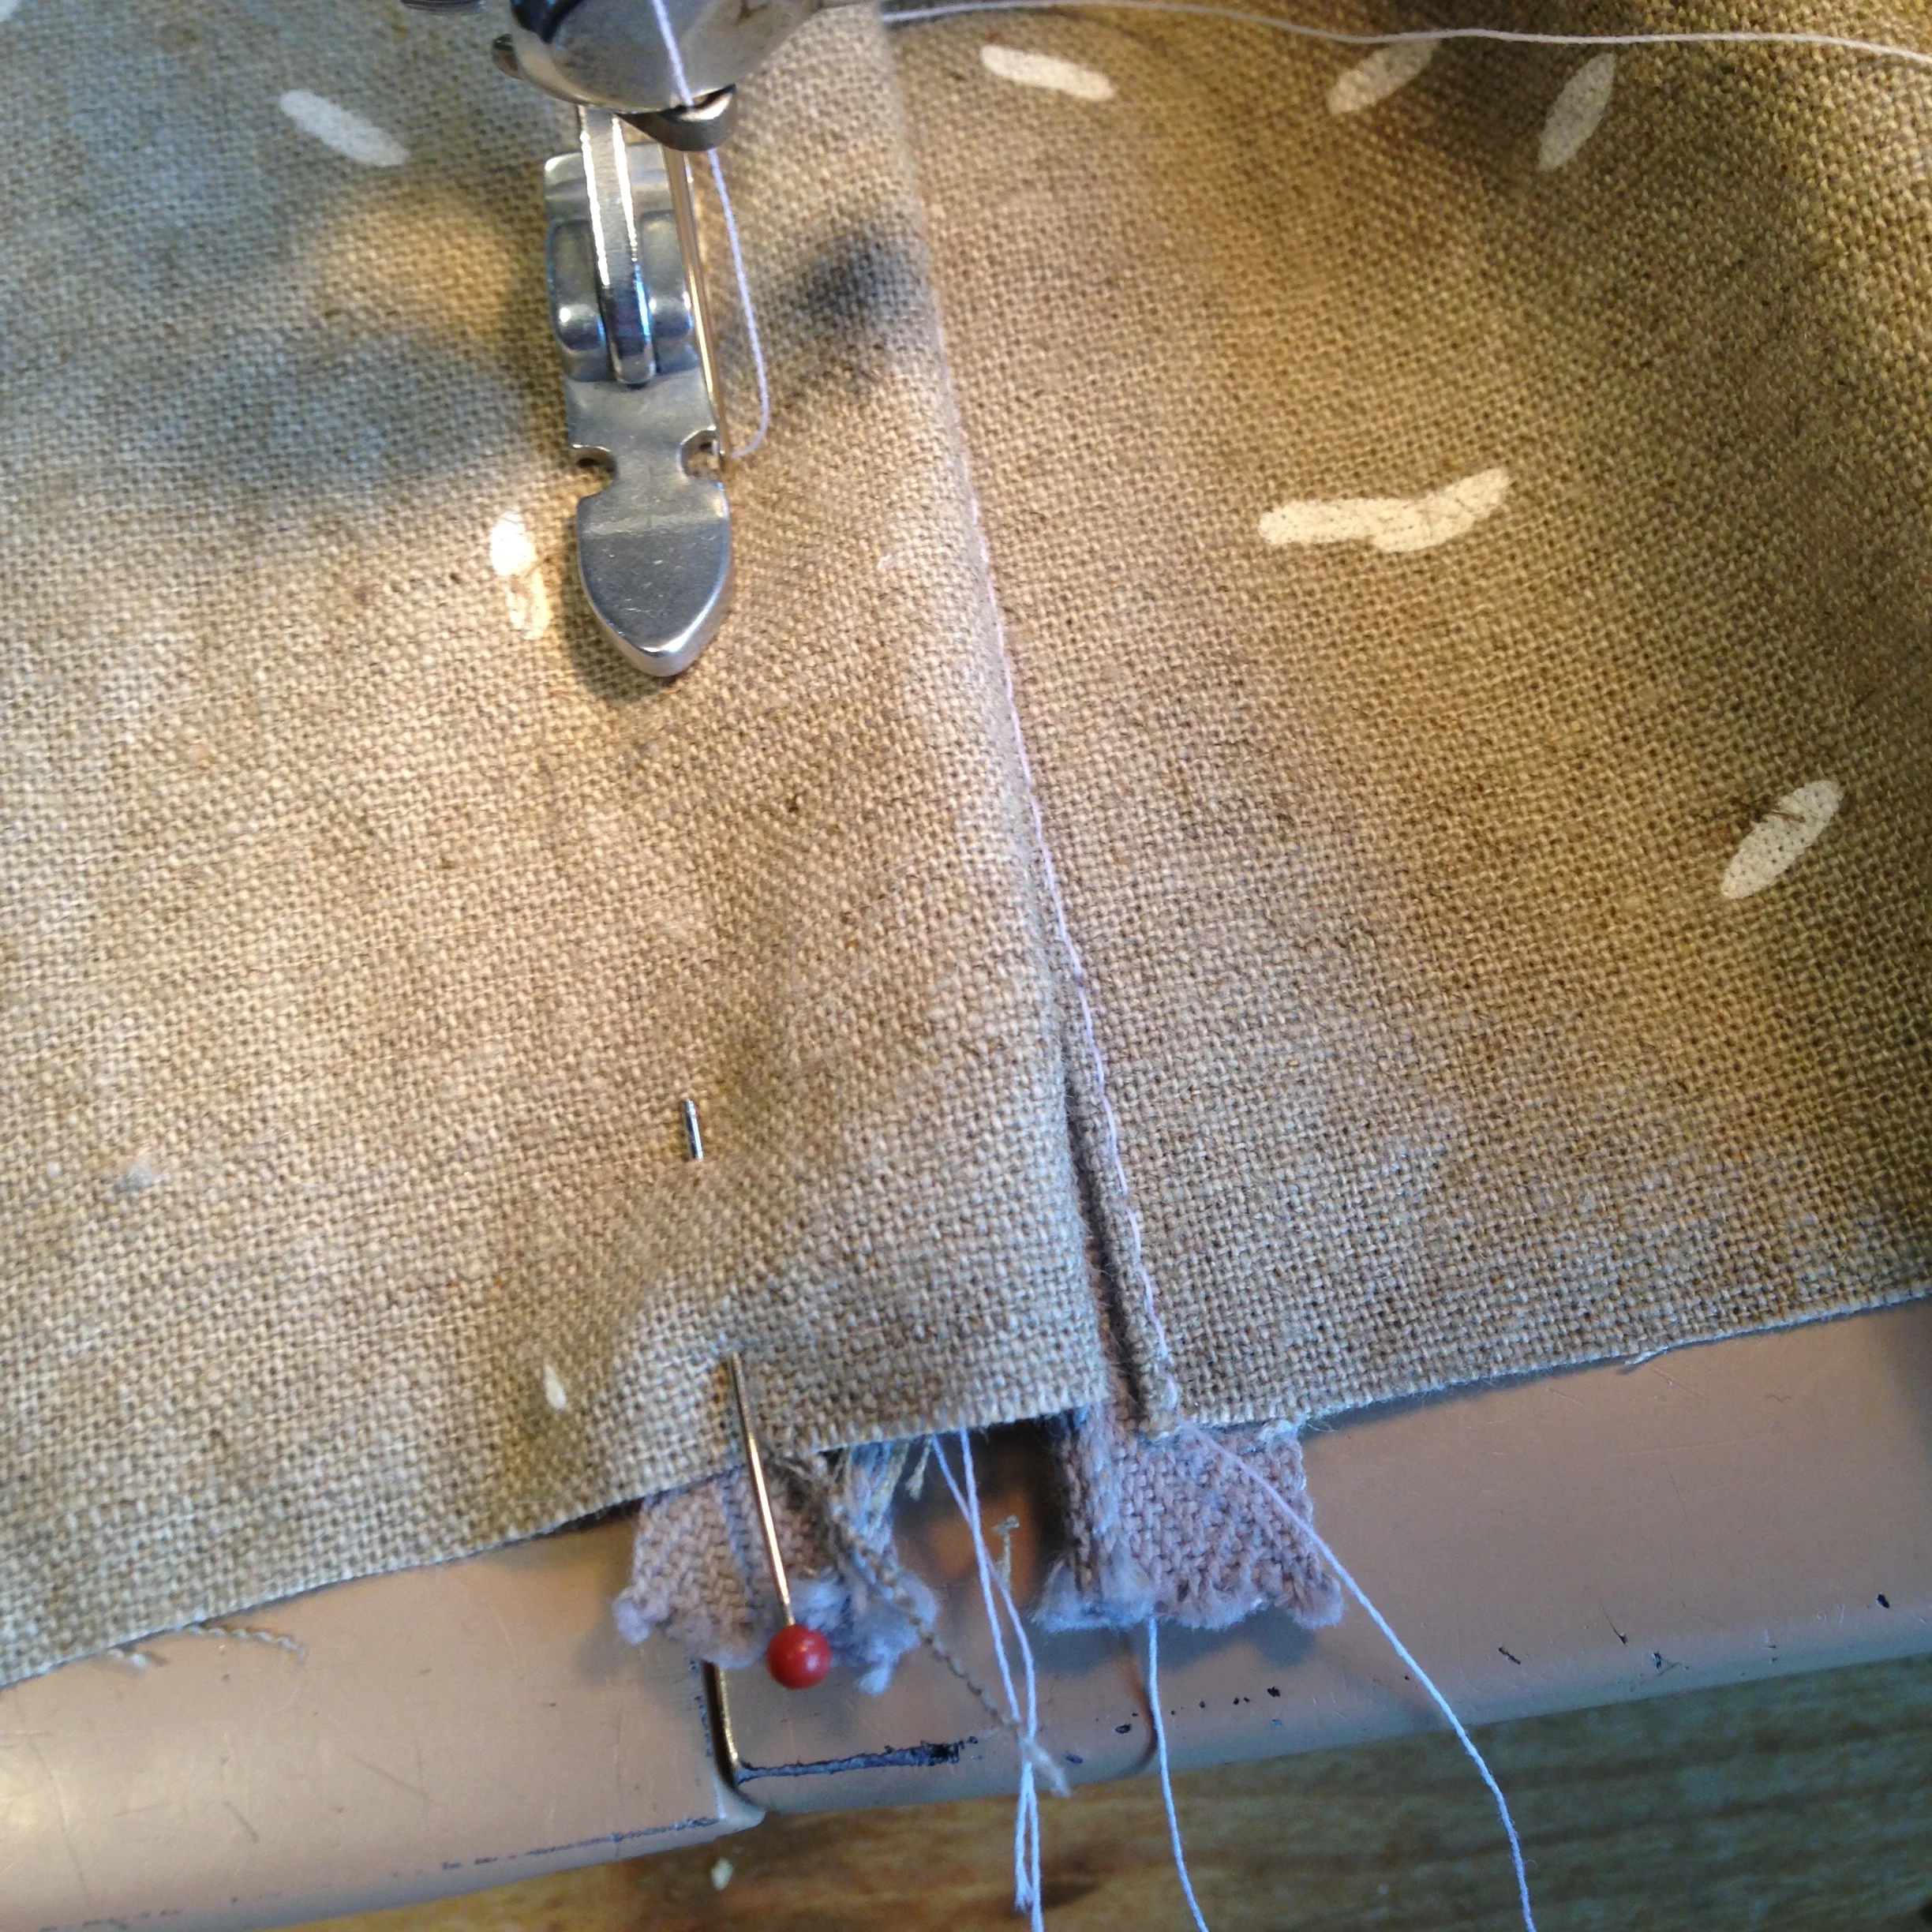
Once you've sewn across the zipper 3/8"-1/2" from the opening, with the needle in the fabric, lift your presser foot, turn the fabric 90* once more, and lower the presser foot.
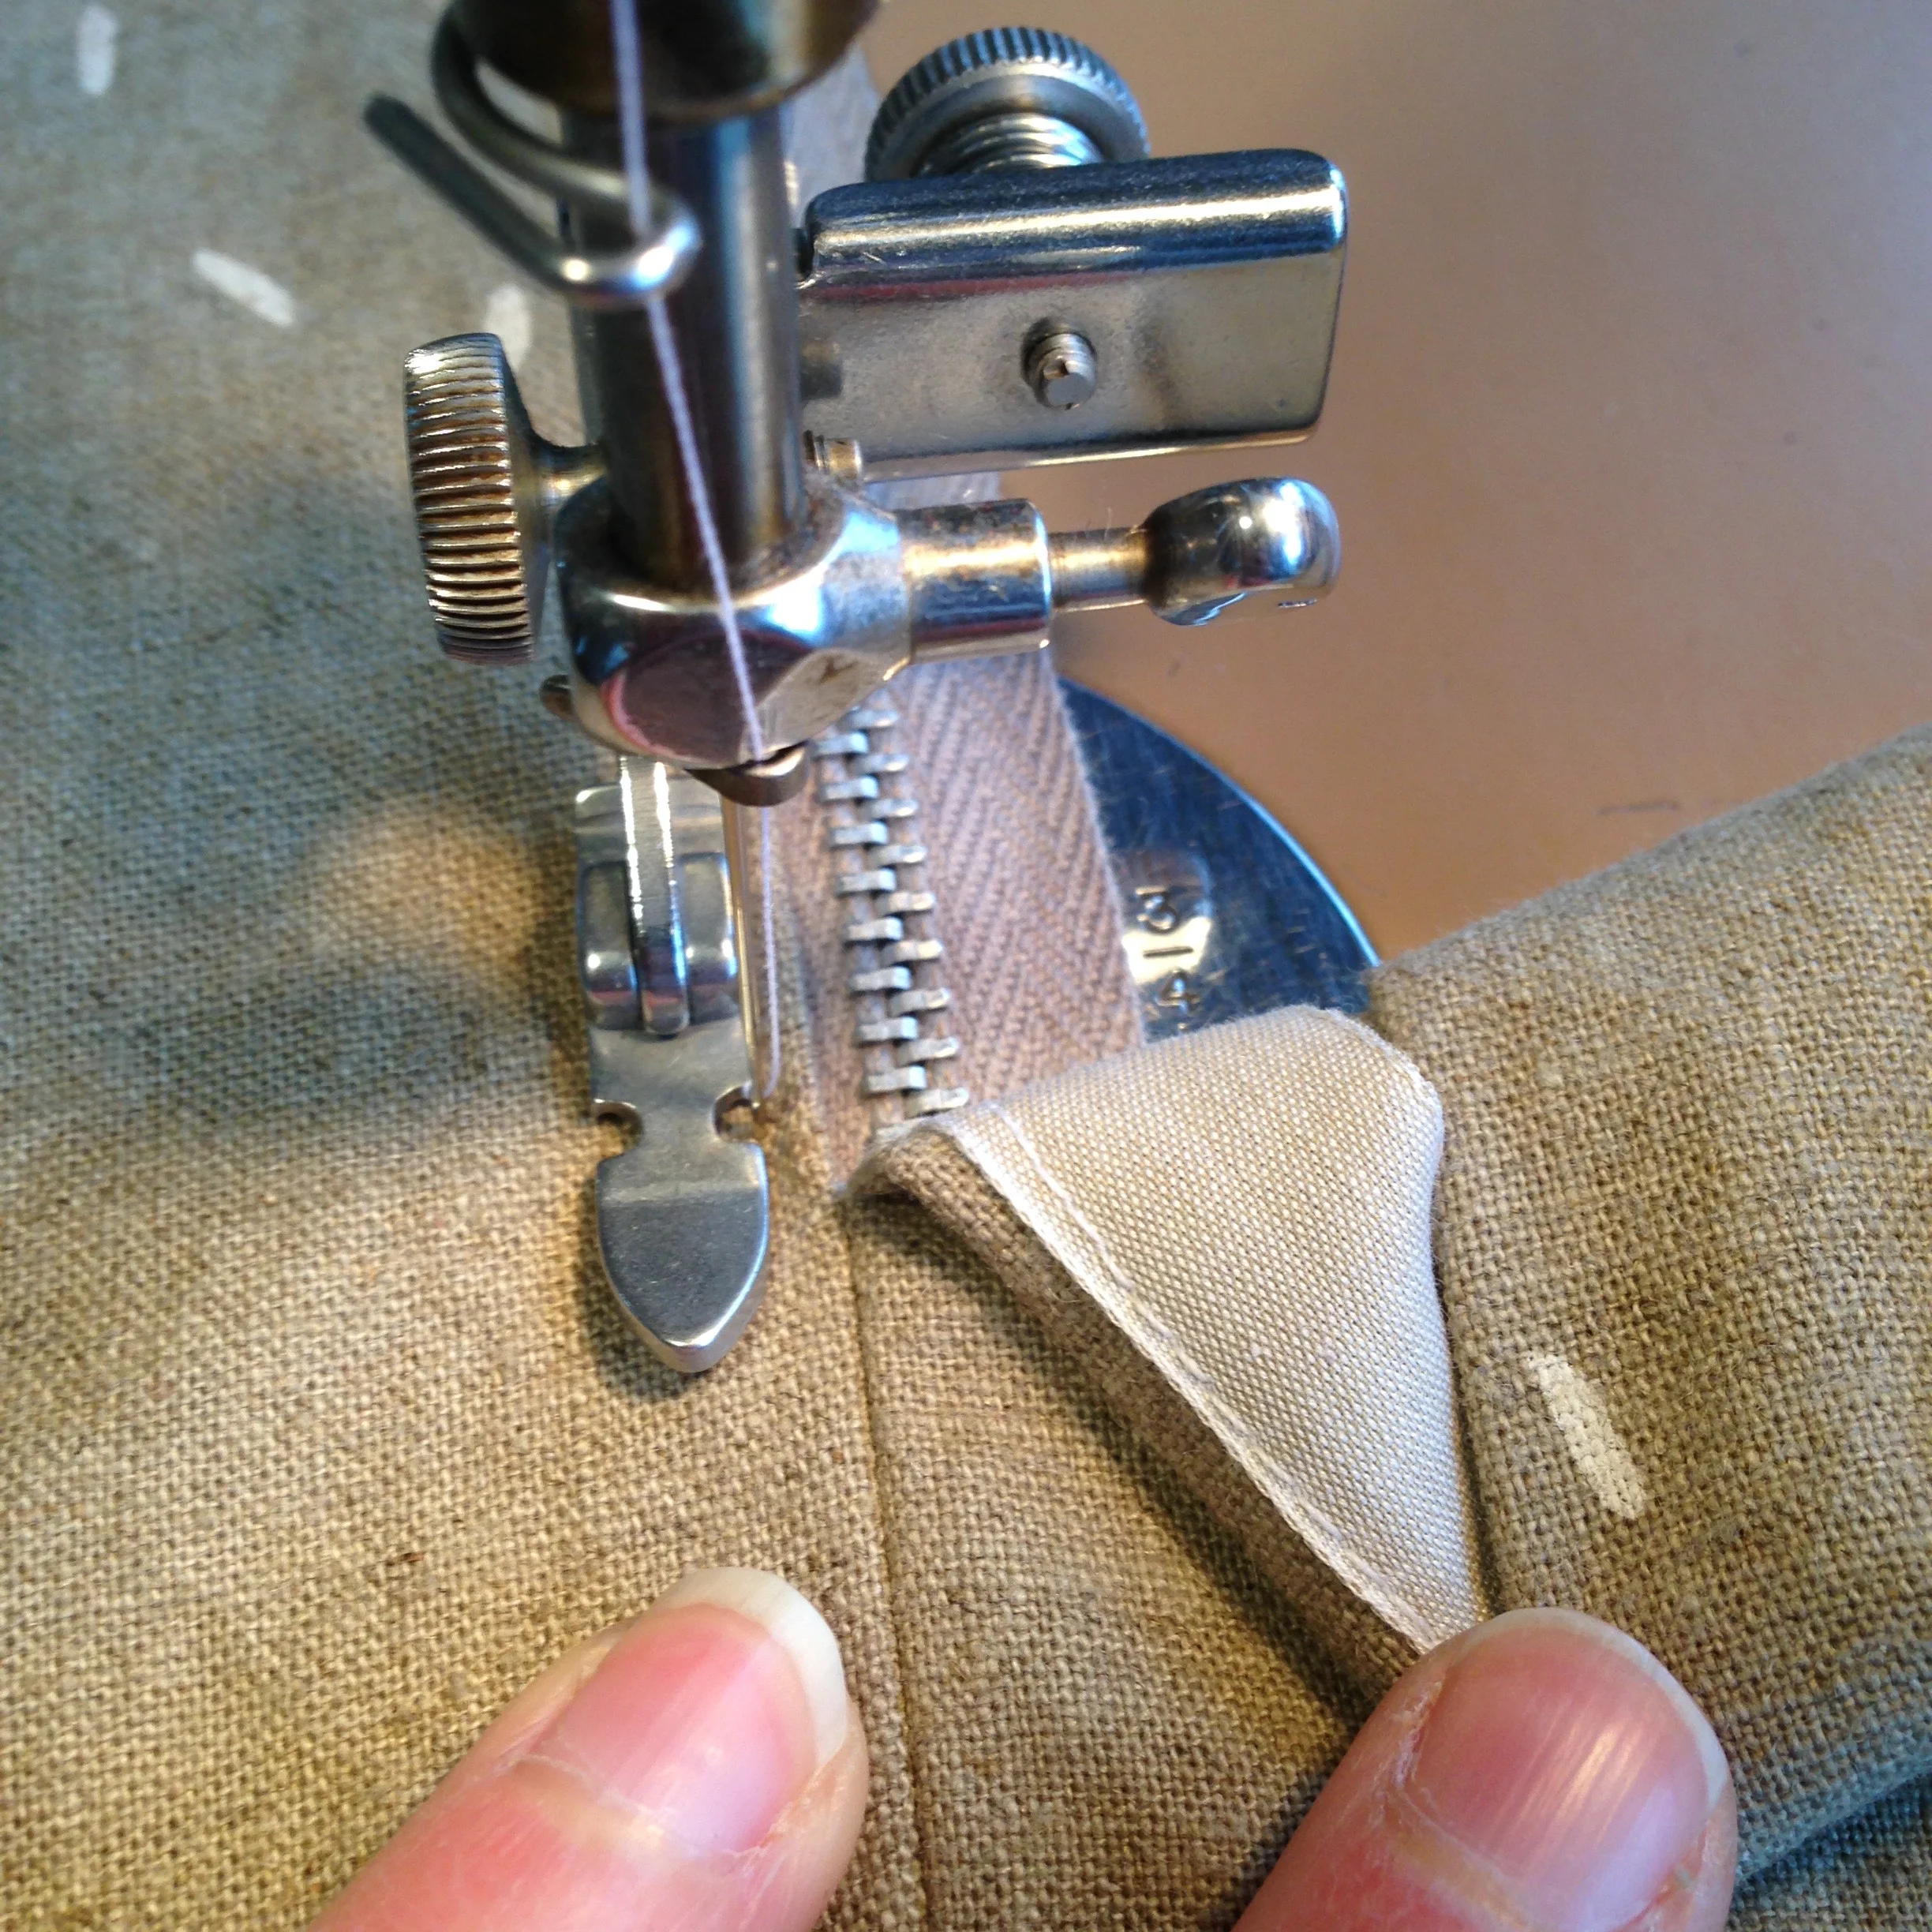
Now, without tugging on the fabric, align your 2nd fabric edge with the opening, covering the zipper teeth. If you like, you can even overlap your first line of stitching slightly. You can pin your fabric in place if you like.

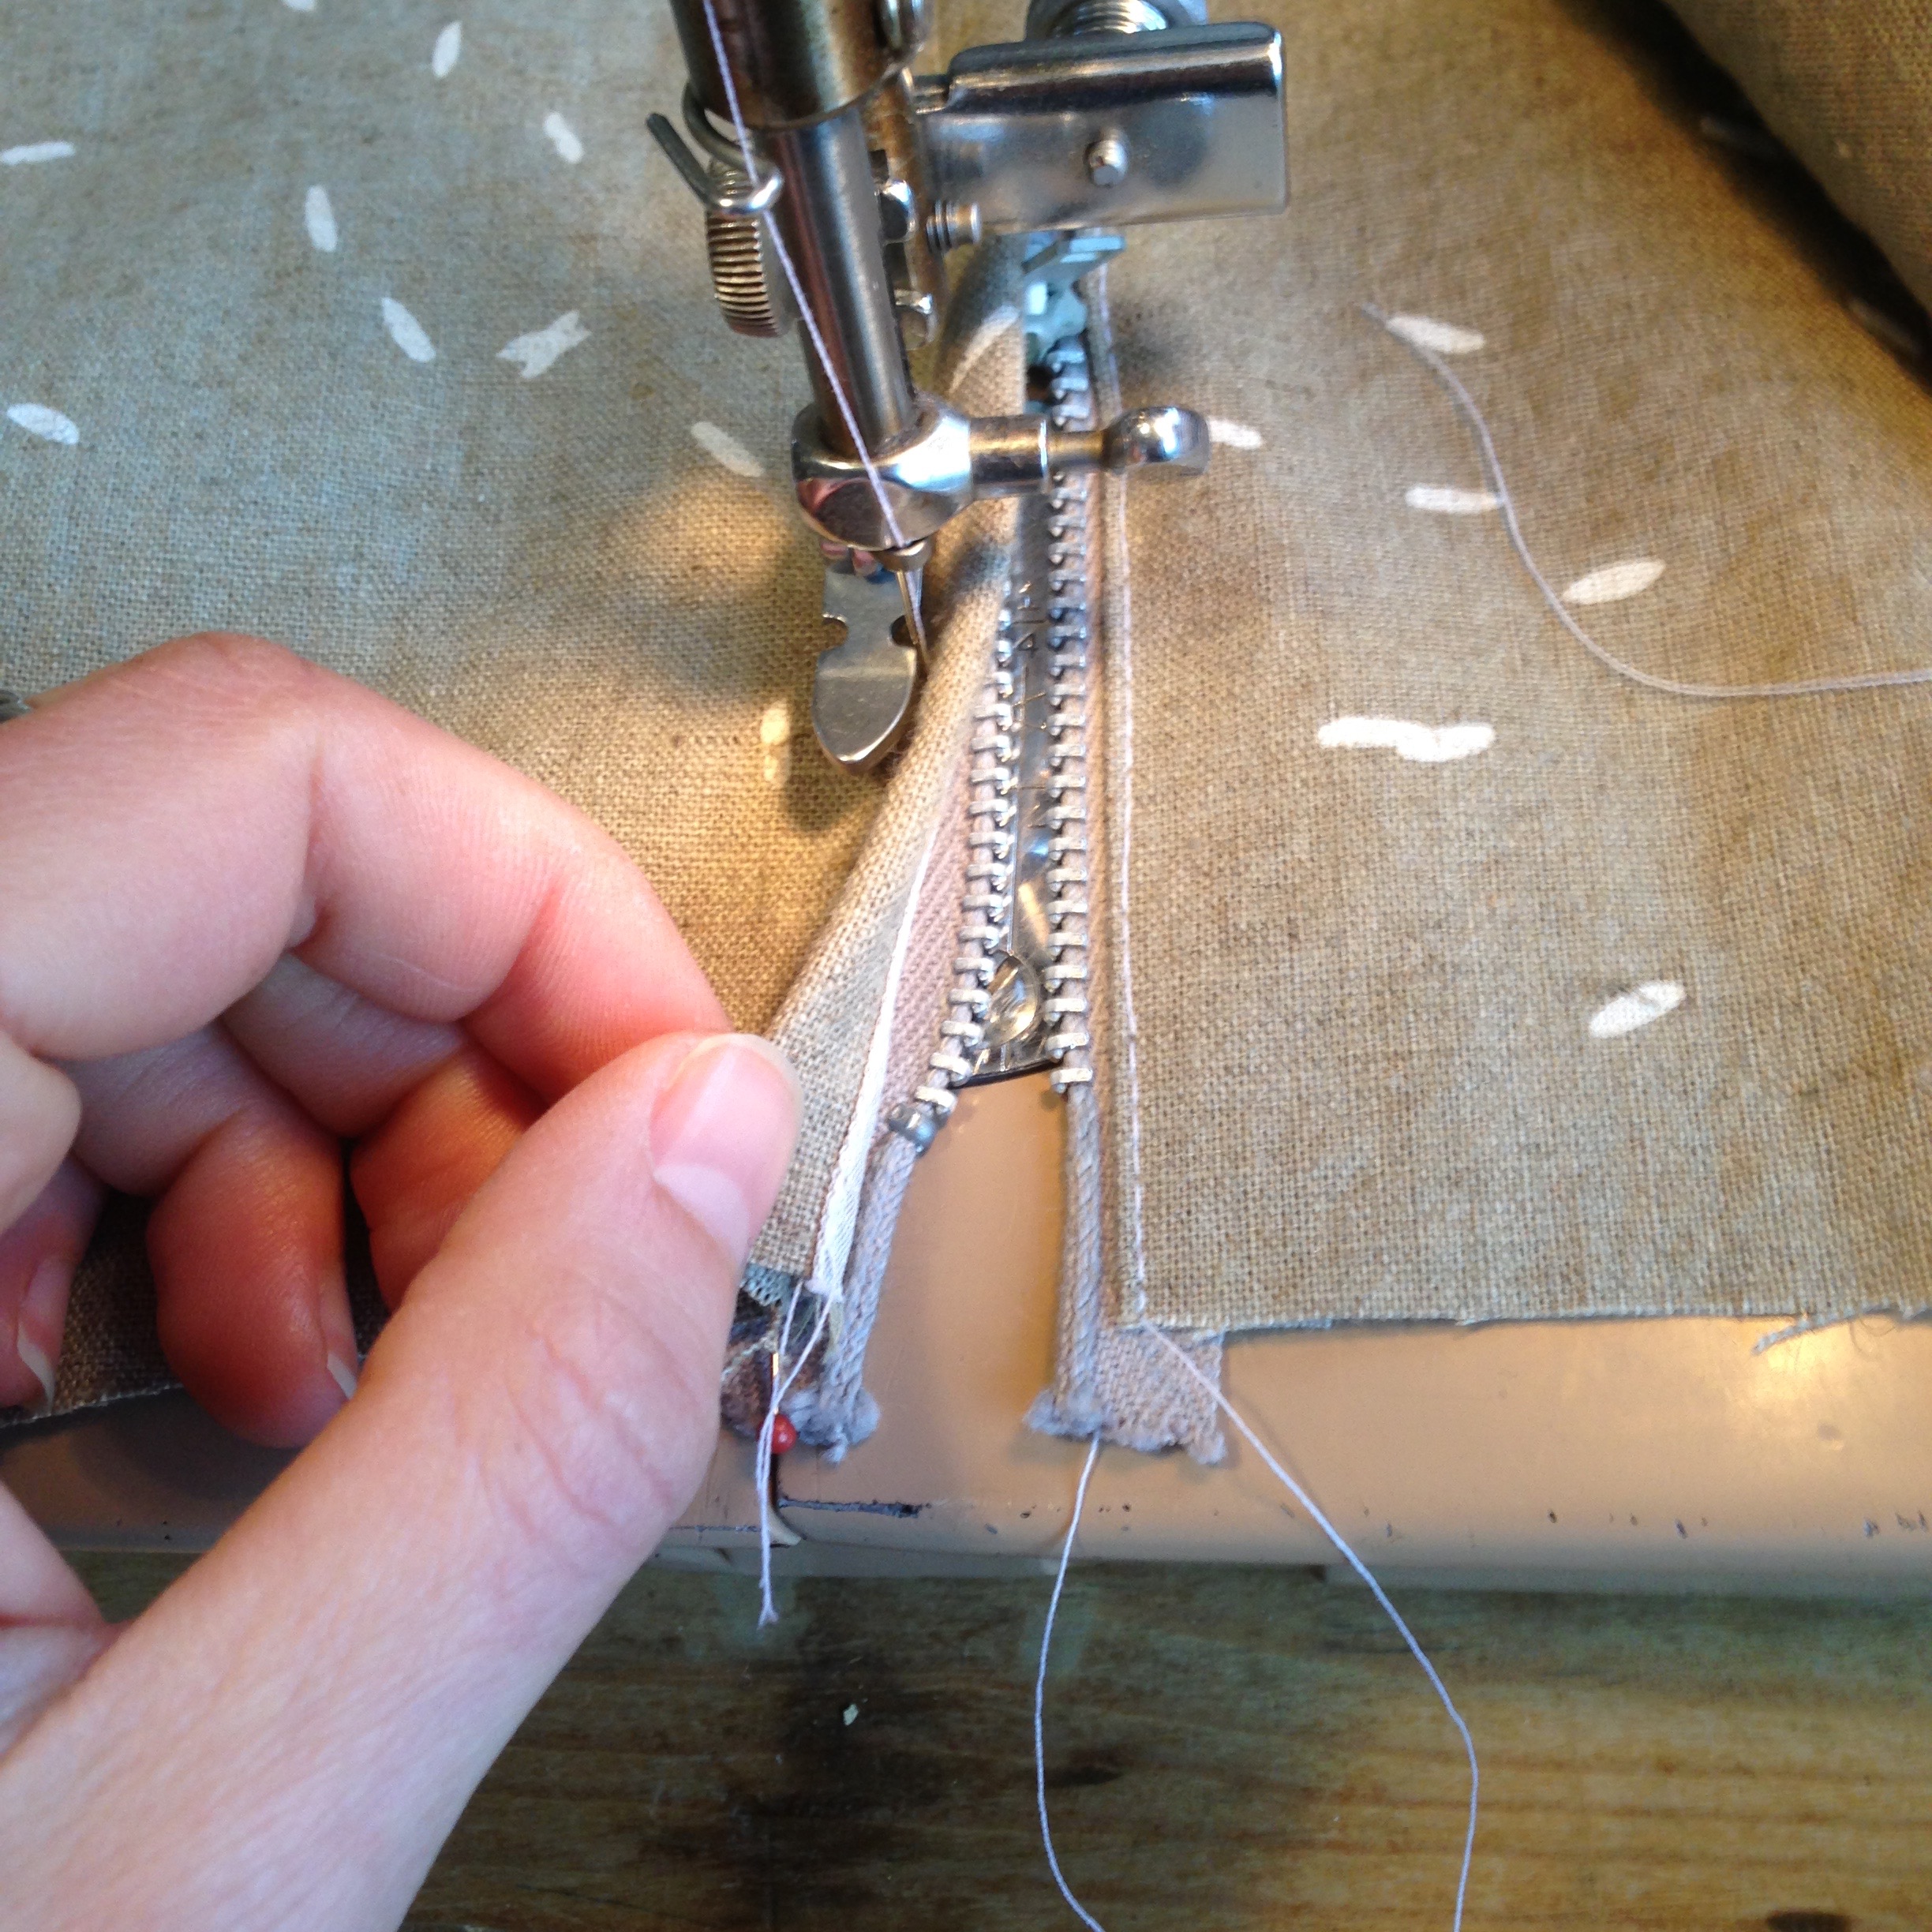
Sew along your guideline, until you are about an inch or two from the end of your zipper.

With the fabric overlapping the zipper head, pin the end of the zipper tape in place (if you've basted your zipper in, no need to pin). We'll want to zip the zipper head out of the way, like we did in the beginning. Make sure you lift the presser foot only with the needle in the fabric.
Finally, sew until you reach the end of your zipper opening.
When you're finished, give your zipper a light press (no hot iron on the teeth, they might melt!)
