
The little blouse that could.
One of the patterns available as part of the 1st Sewing Indie Month bundle is the Sutton Blouse by True Bias. I've seen this blouse around a lot on the 'gram as well as the web. At first I thought, "This is cute and my style! It's a bit like the Cabin top...I'll just make another Cabin."
But upon closer inspection it had some details that were quite different. These differences became even more pronounced as I began to sew. Perhaps Sutton is similar to Cabin in style, but the construction is very different and I like it. Opportunity for french seams? Awesome. Center front seam? Not usually my thing...but boy does it make for a lovely & easy neckline finish! I love a side vent and the extra deep hem helps the fluid fabric hang nicely.

This top almost didn't happen, as I'll explain below, but I'm so glad it did! I love both the muslin (wore it yesterday) and the altered version (wore it today). But getting to this point was quite the process!
Part I: Pattern printing problems
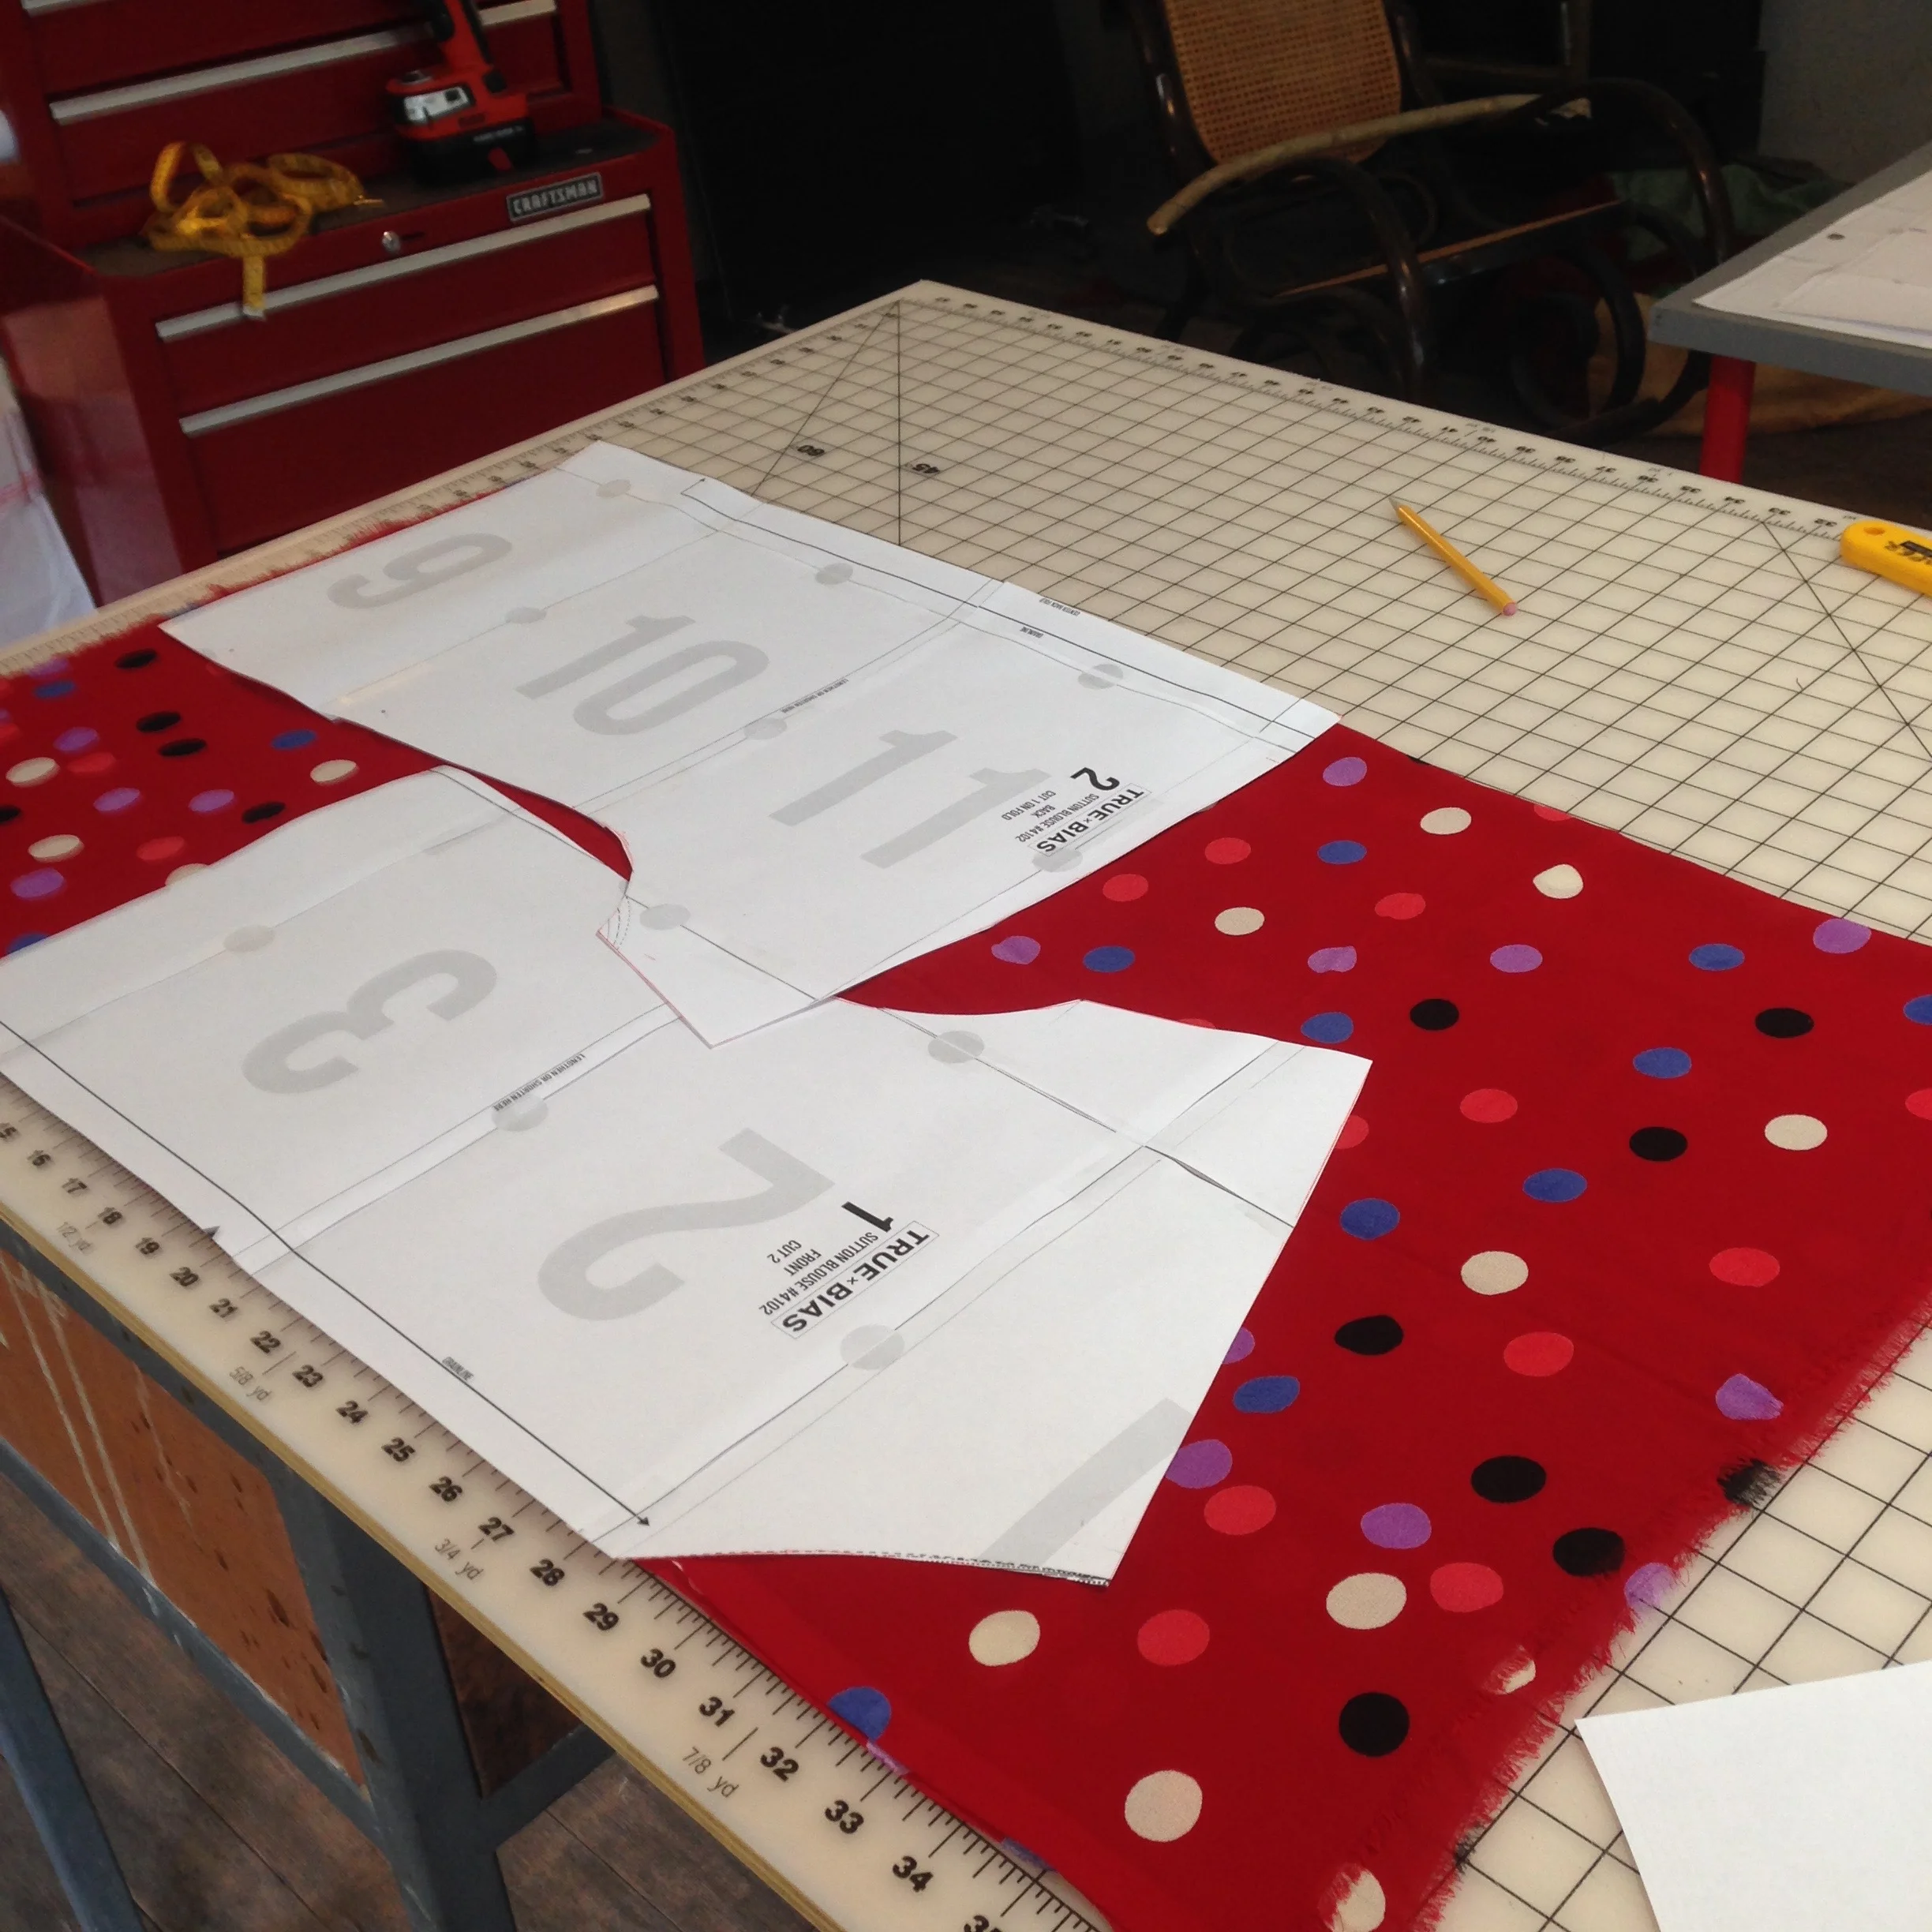
We've all done it. Without thinking, I printed the pattern 'sized to fit page' instead of at 100%. I had been printing non-pattern things earlier and had wanted something resized to fit the page. Then when I went to print the pattern, it was still on that setting. After printing, I noticed that the top seemed awfully big and I was right. When I went back to the computer to check, it appeared I had printed the pattern at 107%. This doesn't sound like much, but it made a big difference.

I managed to re-draw the pattern to scale by choosing a reference point and plotting new points after calculating where they would be at 100% scale. Sound confusing? It took me a while to figure it out, but I think I did it. I'm thinking about posting a tutorial for this in the future...though arguably it's easier to just re-print and assemble the pattern :)

Part II: Not enough fabric
I picked out a beautiful polka dot rayon crepe from my stash that I bought at Stounemountain & Daughter. But I ran into a problem: I only bought a yard of this fabric! And from a store in CA no less, so no opportunity to run over and pick up some extra. Why?
Now, I wouldn't call myself cheap per say, but when it comes to 'stashing' fabrics - aka fabrics that aren't purchased for a specific project - I tend to be pretty frugal. Super fancy fabrics I sometimes only buy 1/2 a yard! What could I make with that? Most fabrics I purchase a full yard, but still...there are seriously very few garments to be made with 1 yard of fabric. I may have to up my minimum to 1 1/2.
After wrestling with layout after layout, I decided it would help to squeeze a bit out of this top. From looking at the flat pattern, it appeared some length/width alterations might be necessary anyway. I really really really wanted to use this fabric. I had to make it work.
So I decided to make a wearable muslin. I used a mystery fabric from my stash that had languished unused and could either be awesome or hideous as a final garment. I had originally planned to give the fabric away, so I decided to give it a go. The fabric was very stiff...felt like it had starch in it. You'd think it would make for easy sewing but it was quite shifty! Think like a loosely woven cotton organza.

Here's me snuggling Pin outside in the grass in my muslin.
Anyway, the finished muslin turned out great, but it does give a bit of a 'wings' effect as the sleeves stick straight out rather than drape. Though with my body shape, this isn't necessarily a bad thing. (I've been working on a cool wardrobe planning project which I hope to share soon...very helpful for visualizing silhouettes on the body).
Ready for the serious version, I laid out the fabric in a single layer and wracked my brain for possibilities. I ended up just squeezing all the pieces in there by:
- Cutting the yoke as two pieces (adding a center seam)
- Cutting front & yoke on the lengthwise grain and the back on the cross grain
- Shortening the final pattern by 1" and taking 1" from the center front of both front pieces (basically, a poor man's SBA), redrawing the neckline.
- Shortening the yoke/sleeve by about 1/2"

And you know what? With all those changes, I think the fit is perfect! I'll be sure to carry those on to the next version. There will definitely be a next version!
This crepe is beautiful but shifty as all get out... did a lot of rotary cutting on this one! Sewing it was a lot of fun. I'm a big fan of french seams, both in how they're sewn and the way they look in a sheer fabric. I really took my time sewing due to the tricky fabric and am happy to report that I only made 1 really silly mistake: sewing the CF french seam backwards. Luckily this fabric was very easy to unpick. Shifty fabrics are usually also a pain to pick. Perhaps I picked just the right stitch length!
Fabric choice is key for this pattern. Though I like the way the stiff linen mystery floral version turned out, I definitely prefer the drape and flow of the rayon crepe for this pattern. I think it's just the right fabric for this pattern!

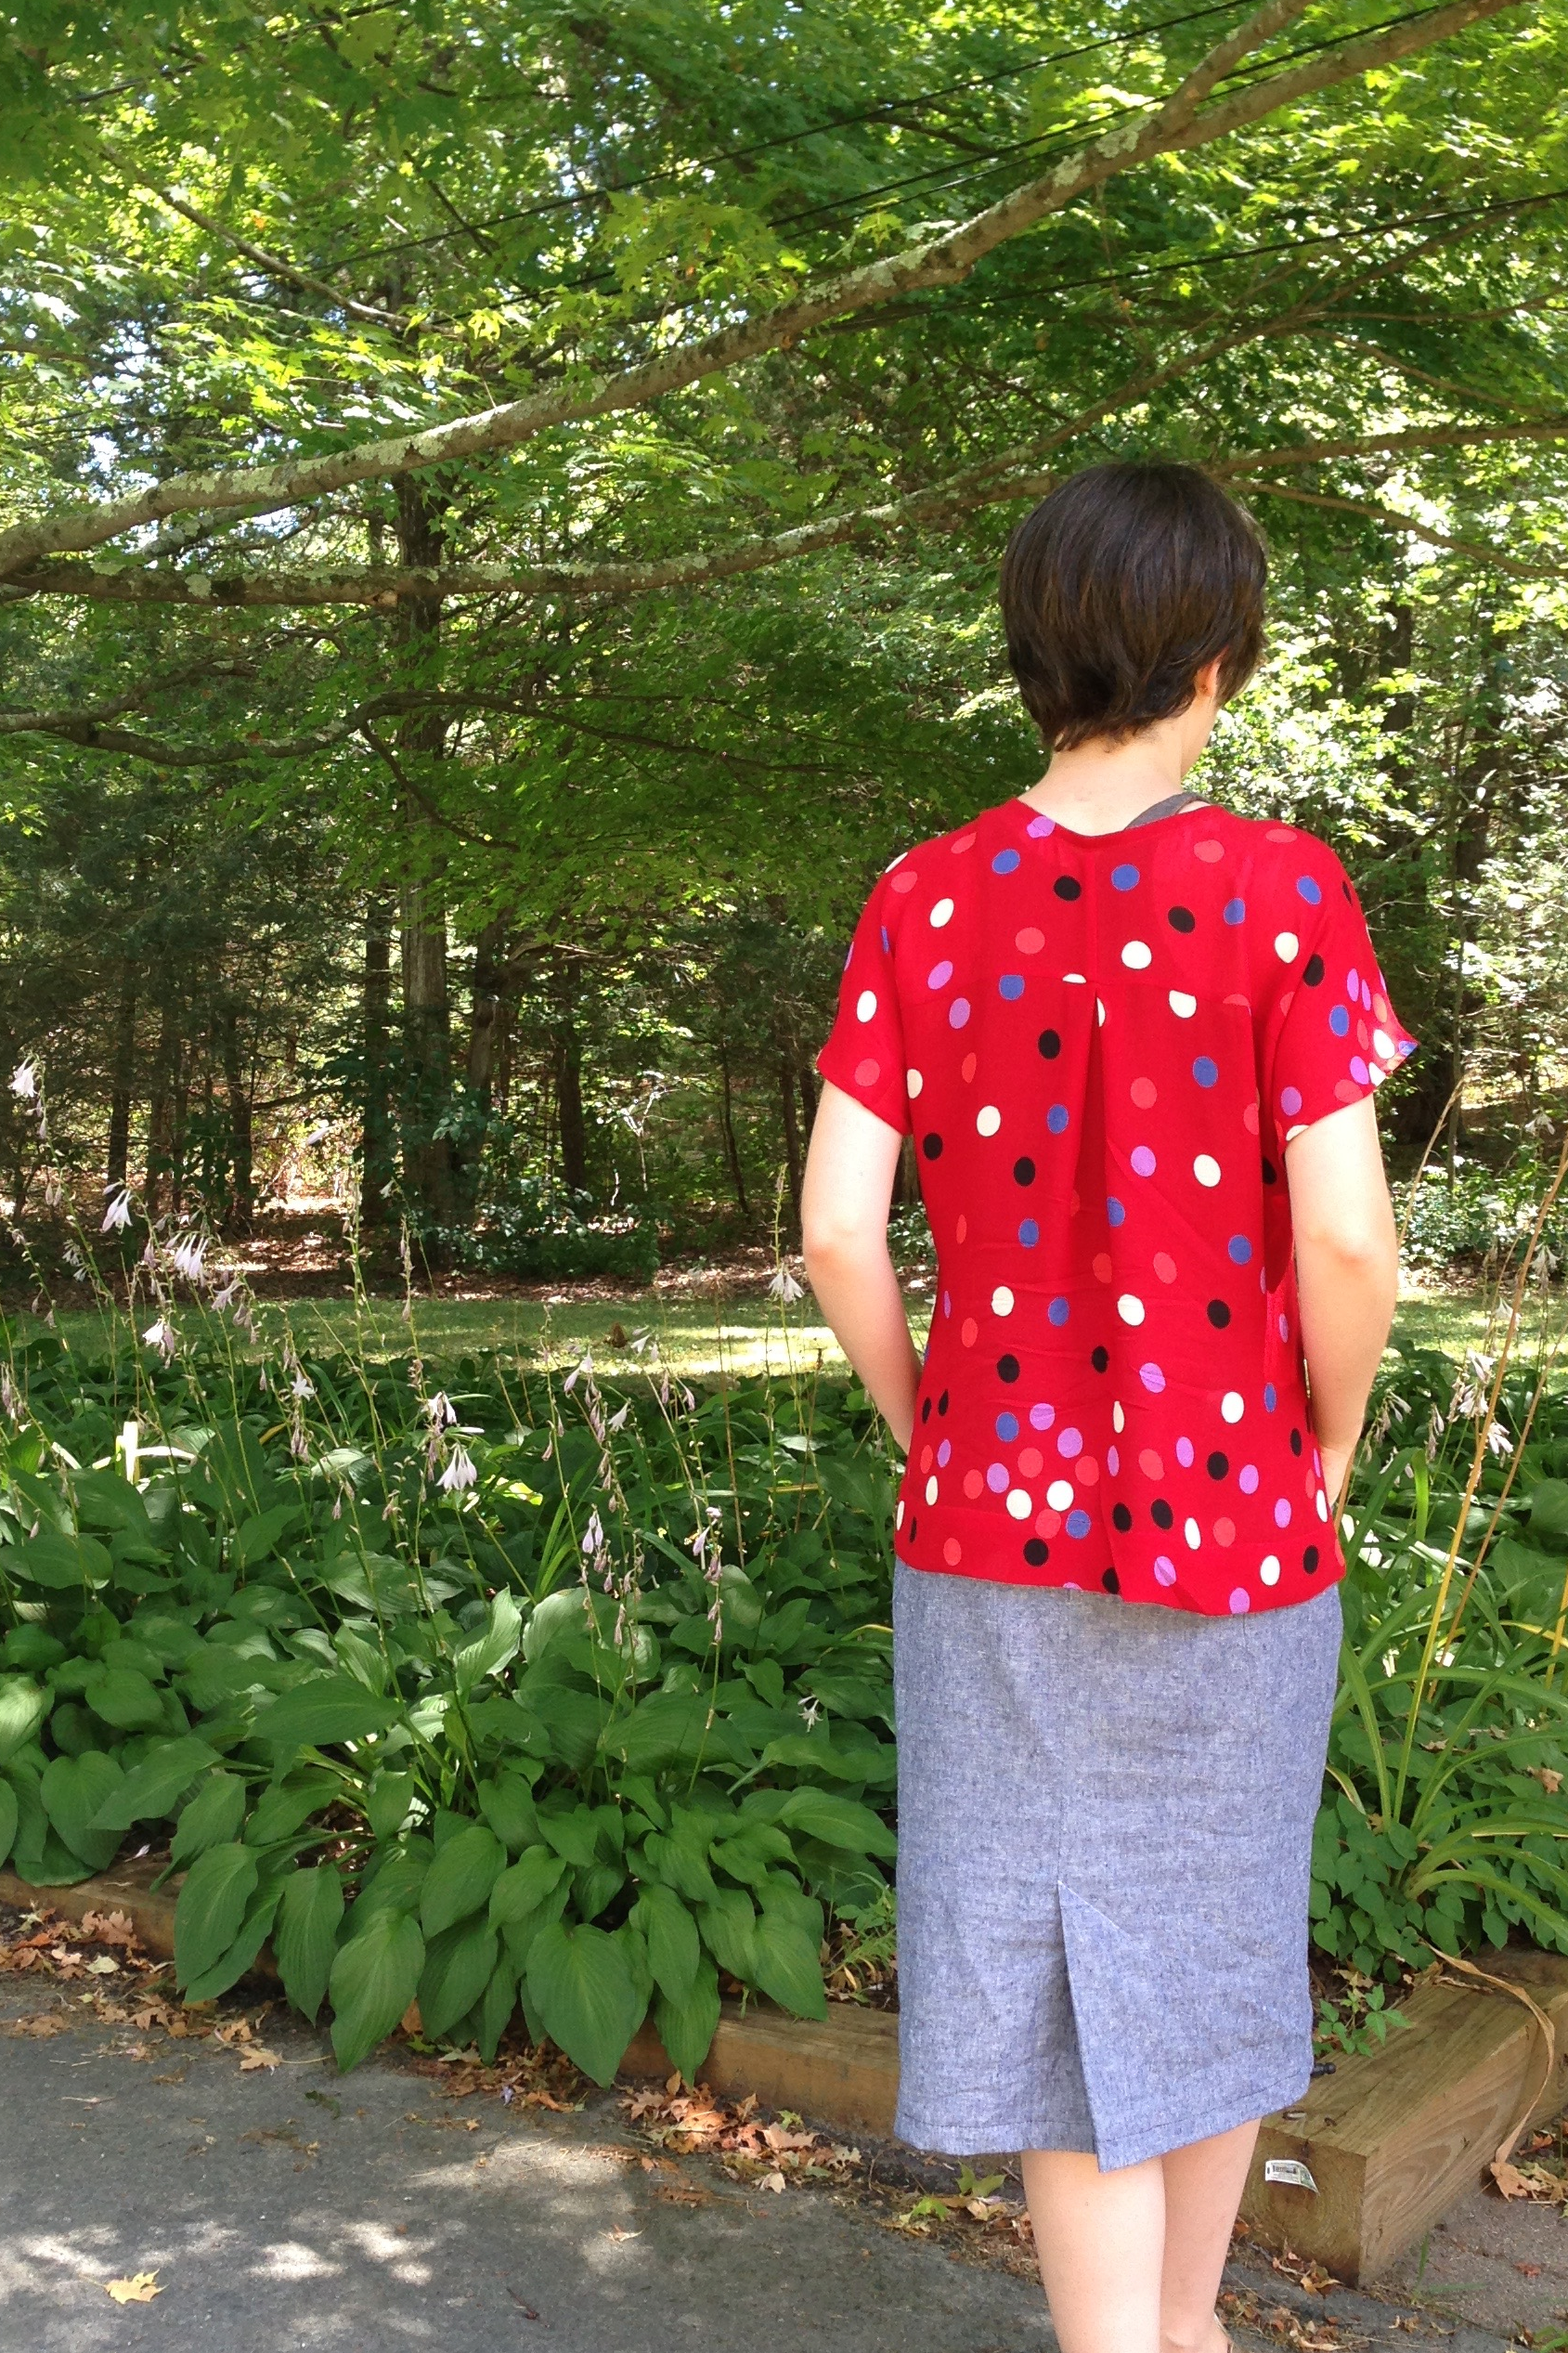
The skirt, by the way, is A-Frame! It's made up in some Robert Kaufman Essex Linen. I made a size bigger than usual for a more relaxed fit...nice for summer. More of a straight skirt than a pencil fit. After looking at the pictures, I think I might forgo the high-low hem on the next one. But there will definitely be a next one!
The Sutton Blouse, as well as my new pattern Saltbox, are available as part of the Sewing Indie Month August Bundle.
