
Make your own clothing labels using stamps
One of my favorite finishing touches to a handmade garment is a personalized tag. I've seen all kinds of beautiful DIY versions, like overstitched fabric scraps, screenprinted bits, and even just special ribbon loops. I've also recently come across lots of label producers who are offering small minimum orders for professional looking woven labels.
Since I love a good DIY fix (and find most woven labels very itchy) I thought I would share my favorite tag making method, using ribbon or fabric and stamps!
The process is very straightforward. Get stamps, stamp on ribbon or fabric. Set with iron and sew in!
Here's what you'll need:
Something to stamp on
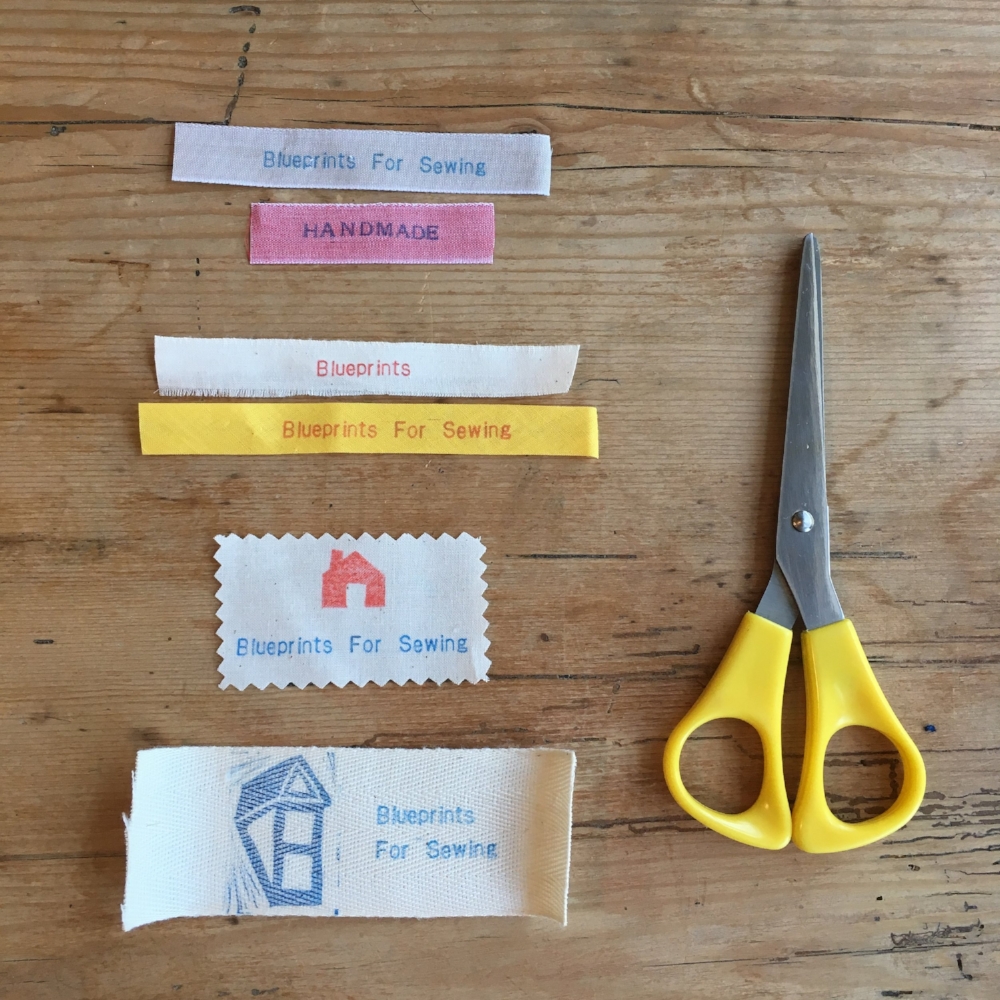
1. Use a flat, plain weave ribbon. The smoother, the better. This helps get a nice, clean stamp. Any ribbon that is tightly woven and made from natural fiber should work well.
My favorite ribbon for tags (pictured above) is a chambray ribbon made in France, which I buy locally. Your local fabric shop might carry something similar. I had a bit of a hard time tracking down an online source for it, but came across this Etsy seller that offers the same ribbon.
2. If you can't track down the right ribbon (or you just want to start your project right away) the selvedge from your favorite light hued fabric works well in a pinch! You can also use bias tape.
3. You can also use any plain woven fabric. Light colors and tight weaves (like poplin, voile, or shirting) work best. Trim the edges with pinking shears, cut on the grain and pull away some threads to create a fringe, or finish the edges with a serger. Press your fabric to get it nice and smooth before stamping.
2. Twill tape, which is a bit easier to find in shops, works okay but the texture prevents you from getting a really clean, clear line. Pressing it with a hot iron first will help smooth the texture a bit. This guy should be a last resort.

Stamps
Text
My favorite way to get clear, consistent text on tags is to use alphabet stamps or kits that include stamps and letters. Kits are great because they include multiples of each letter, upper and lower case, and symbols. You can arrange the type and stamp them over and over.

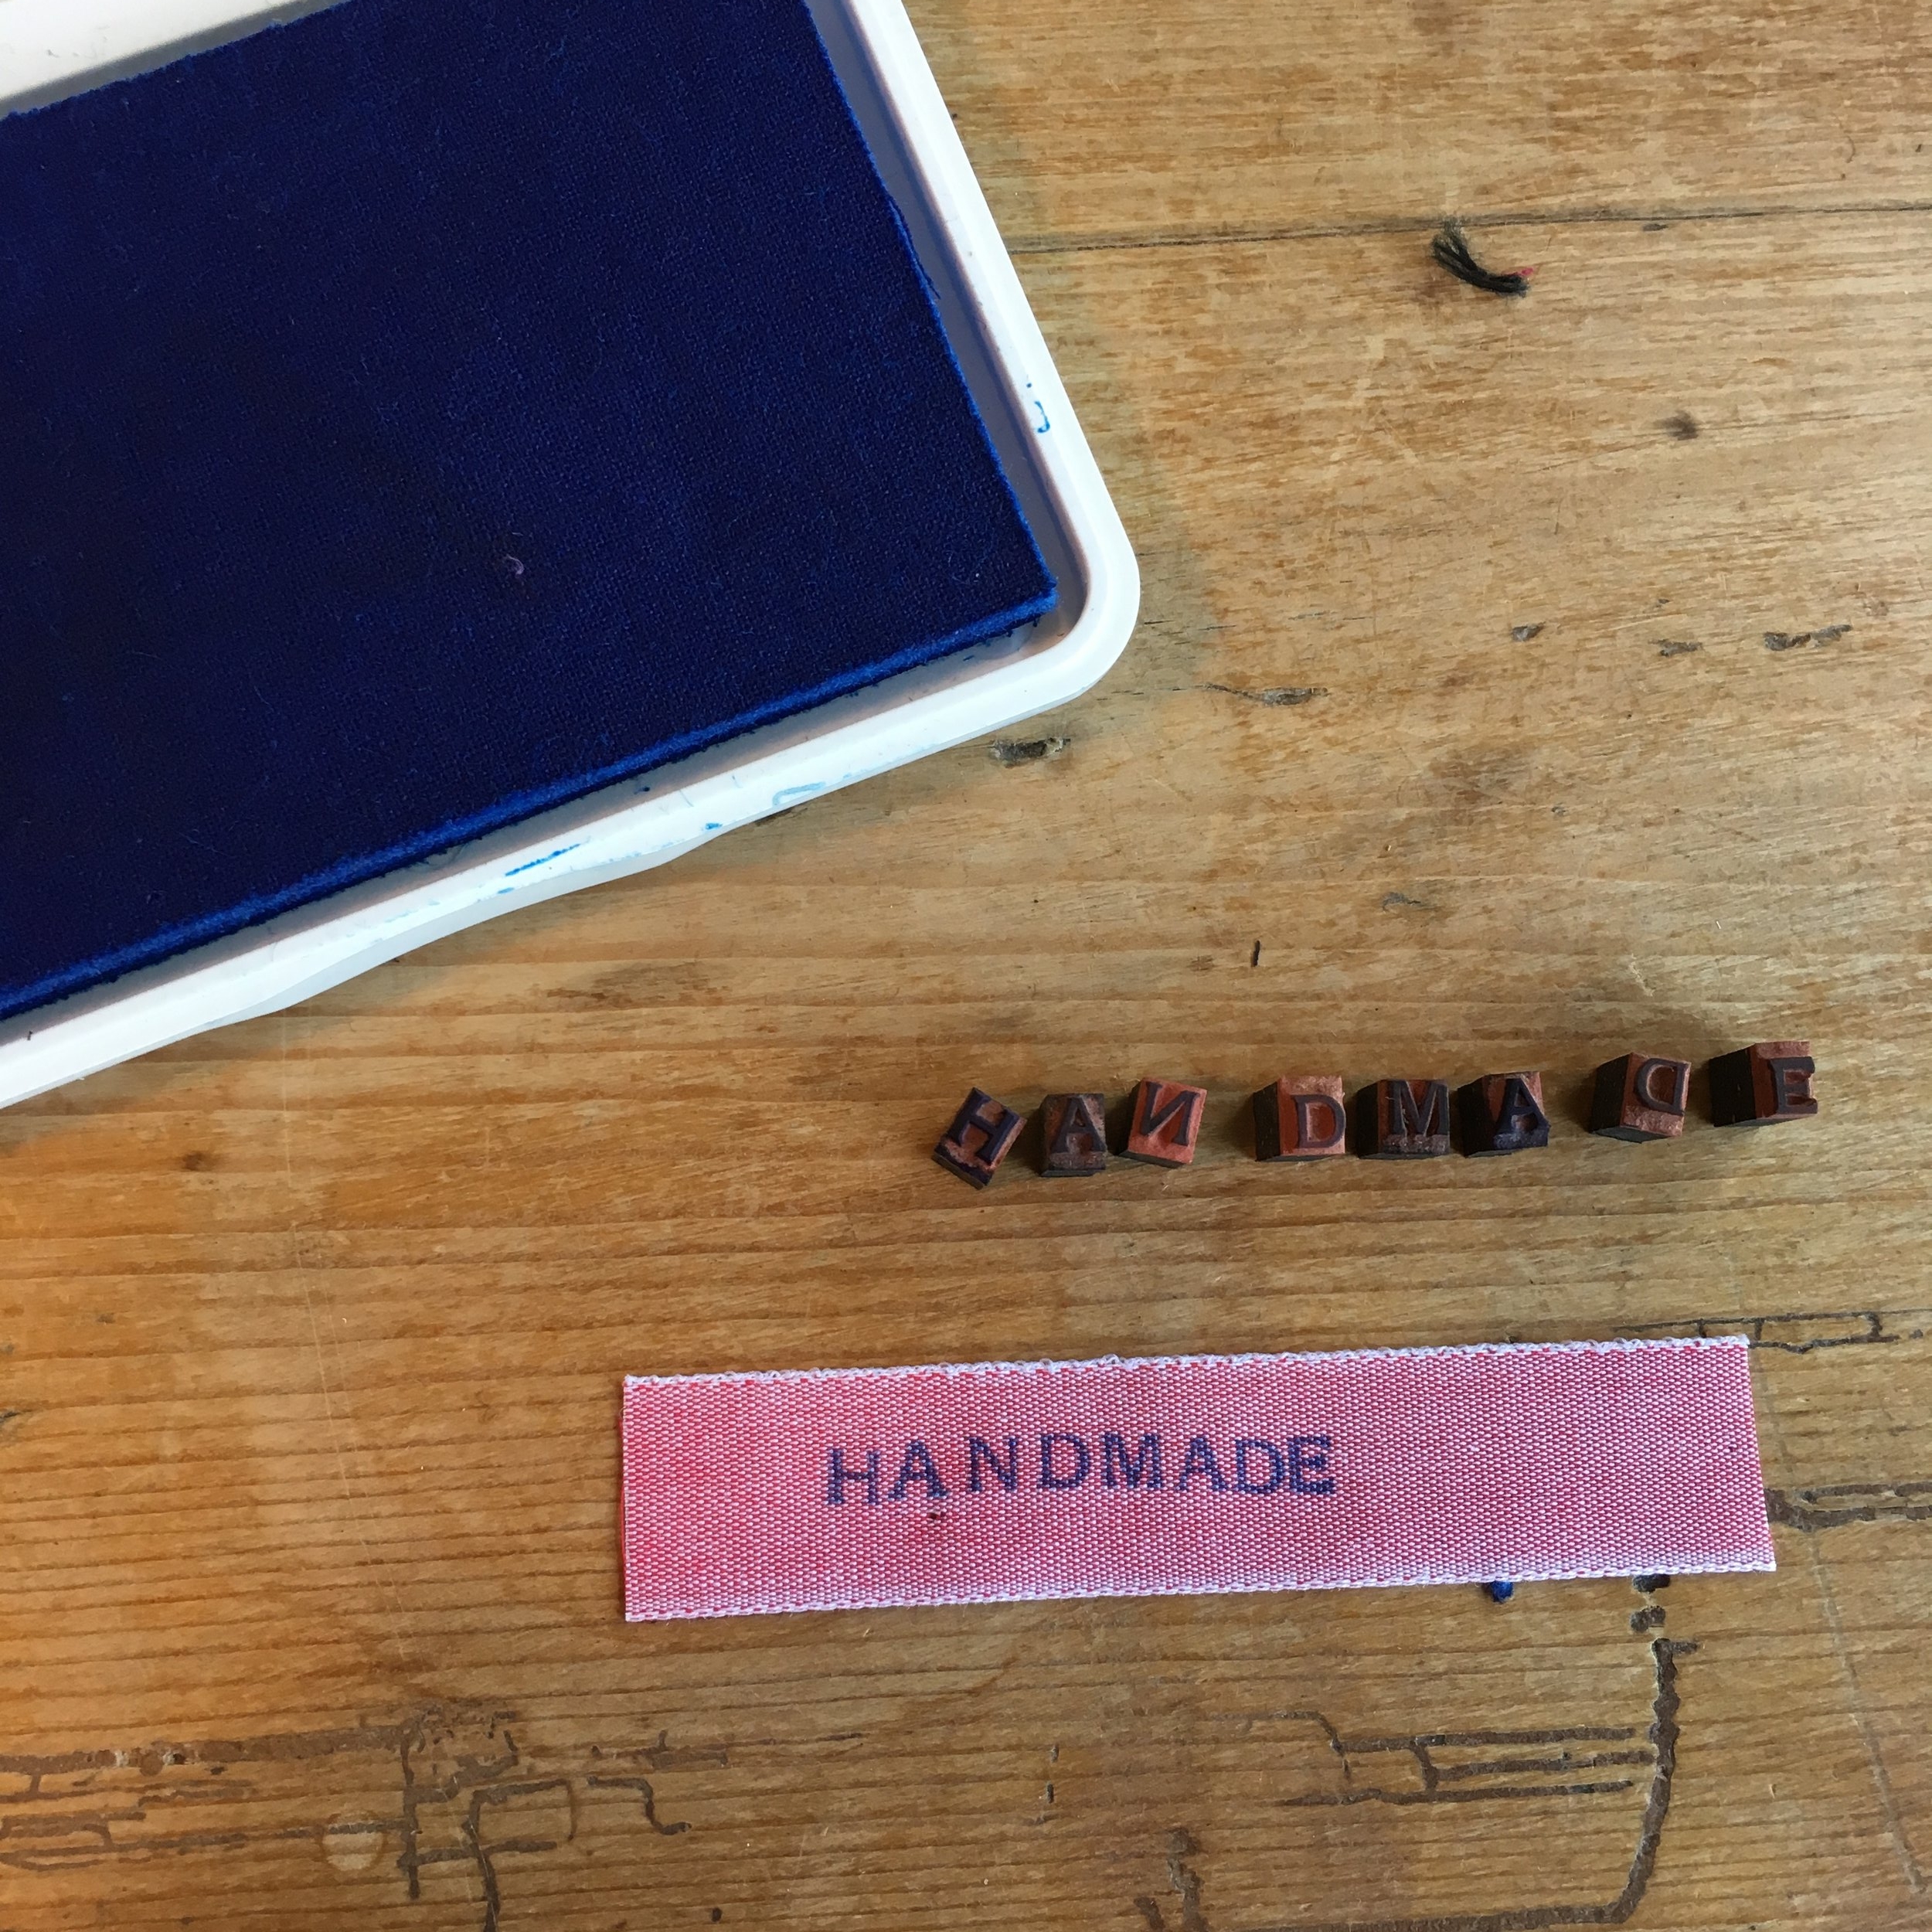
Each type has their pros and cons. I have a few vintage kits I've collected over the years and I love them. Kits make stamping easier, but leave you a bit limited in terms of font. Loose letter sets come in a wider variety of size and font, but you have to stamp each letter individually and line them up.

Your local craft store will have a variety of alphabet stamp sets and Etsy is a great place to track down old stamp kits. You can also find new stamp kits at office supply stores. Martha Stewart makes a kit that comes with round pieces to set letters in a circle. If you know of any other brands that make these stamp kits, please share!
Images & Decorative elements

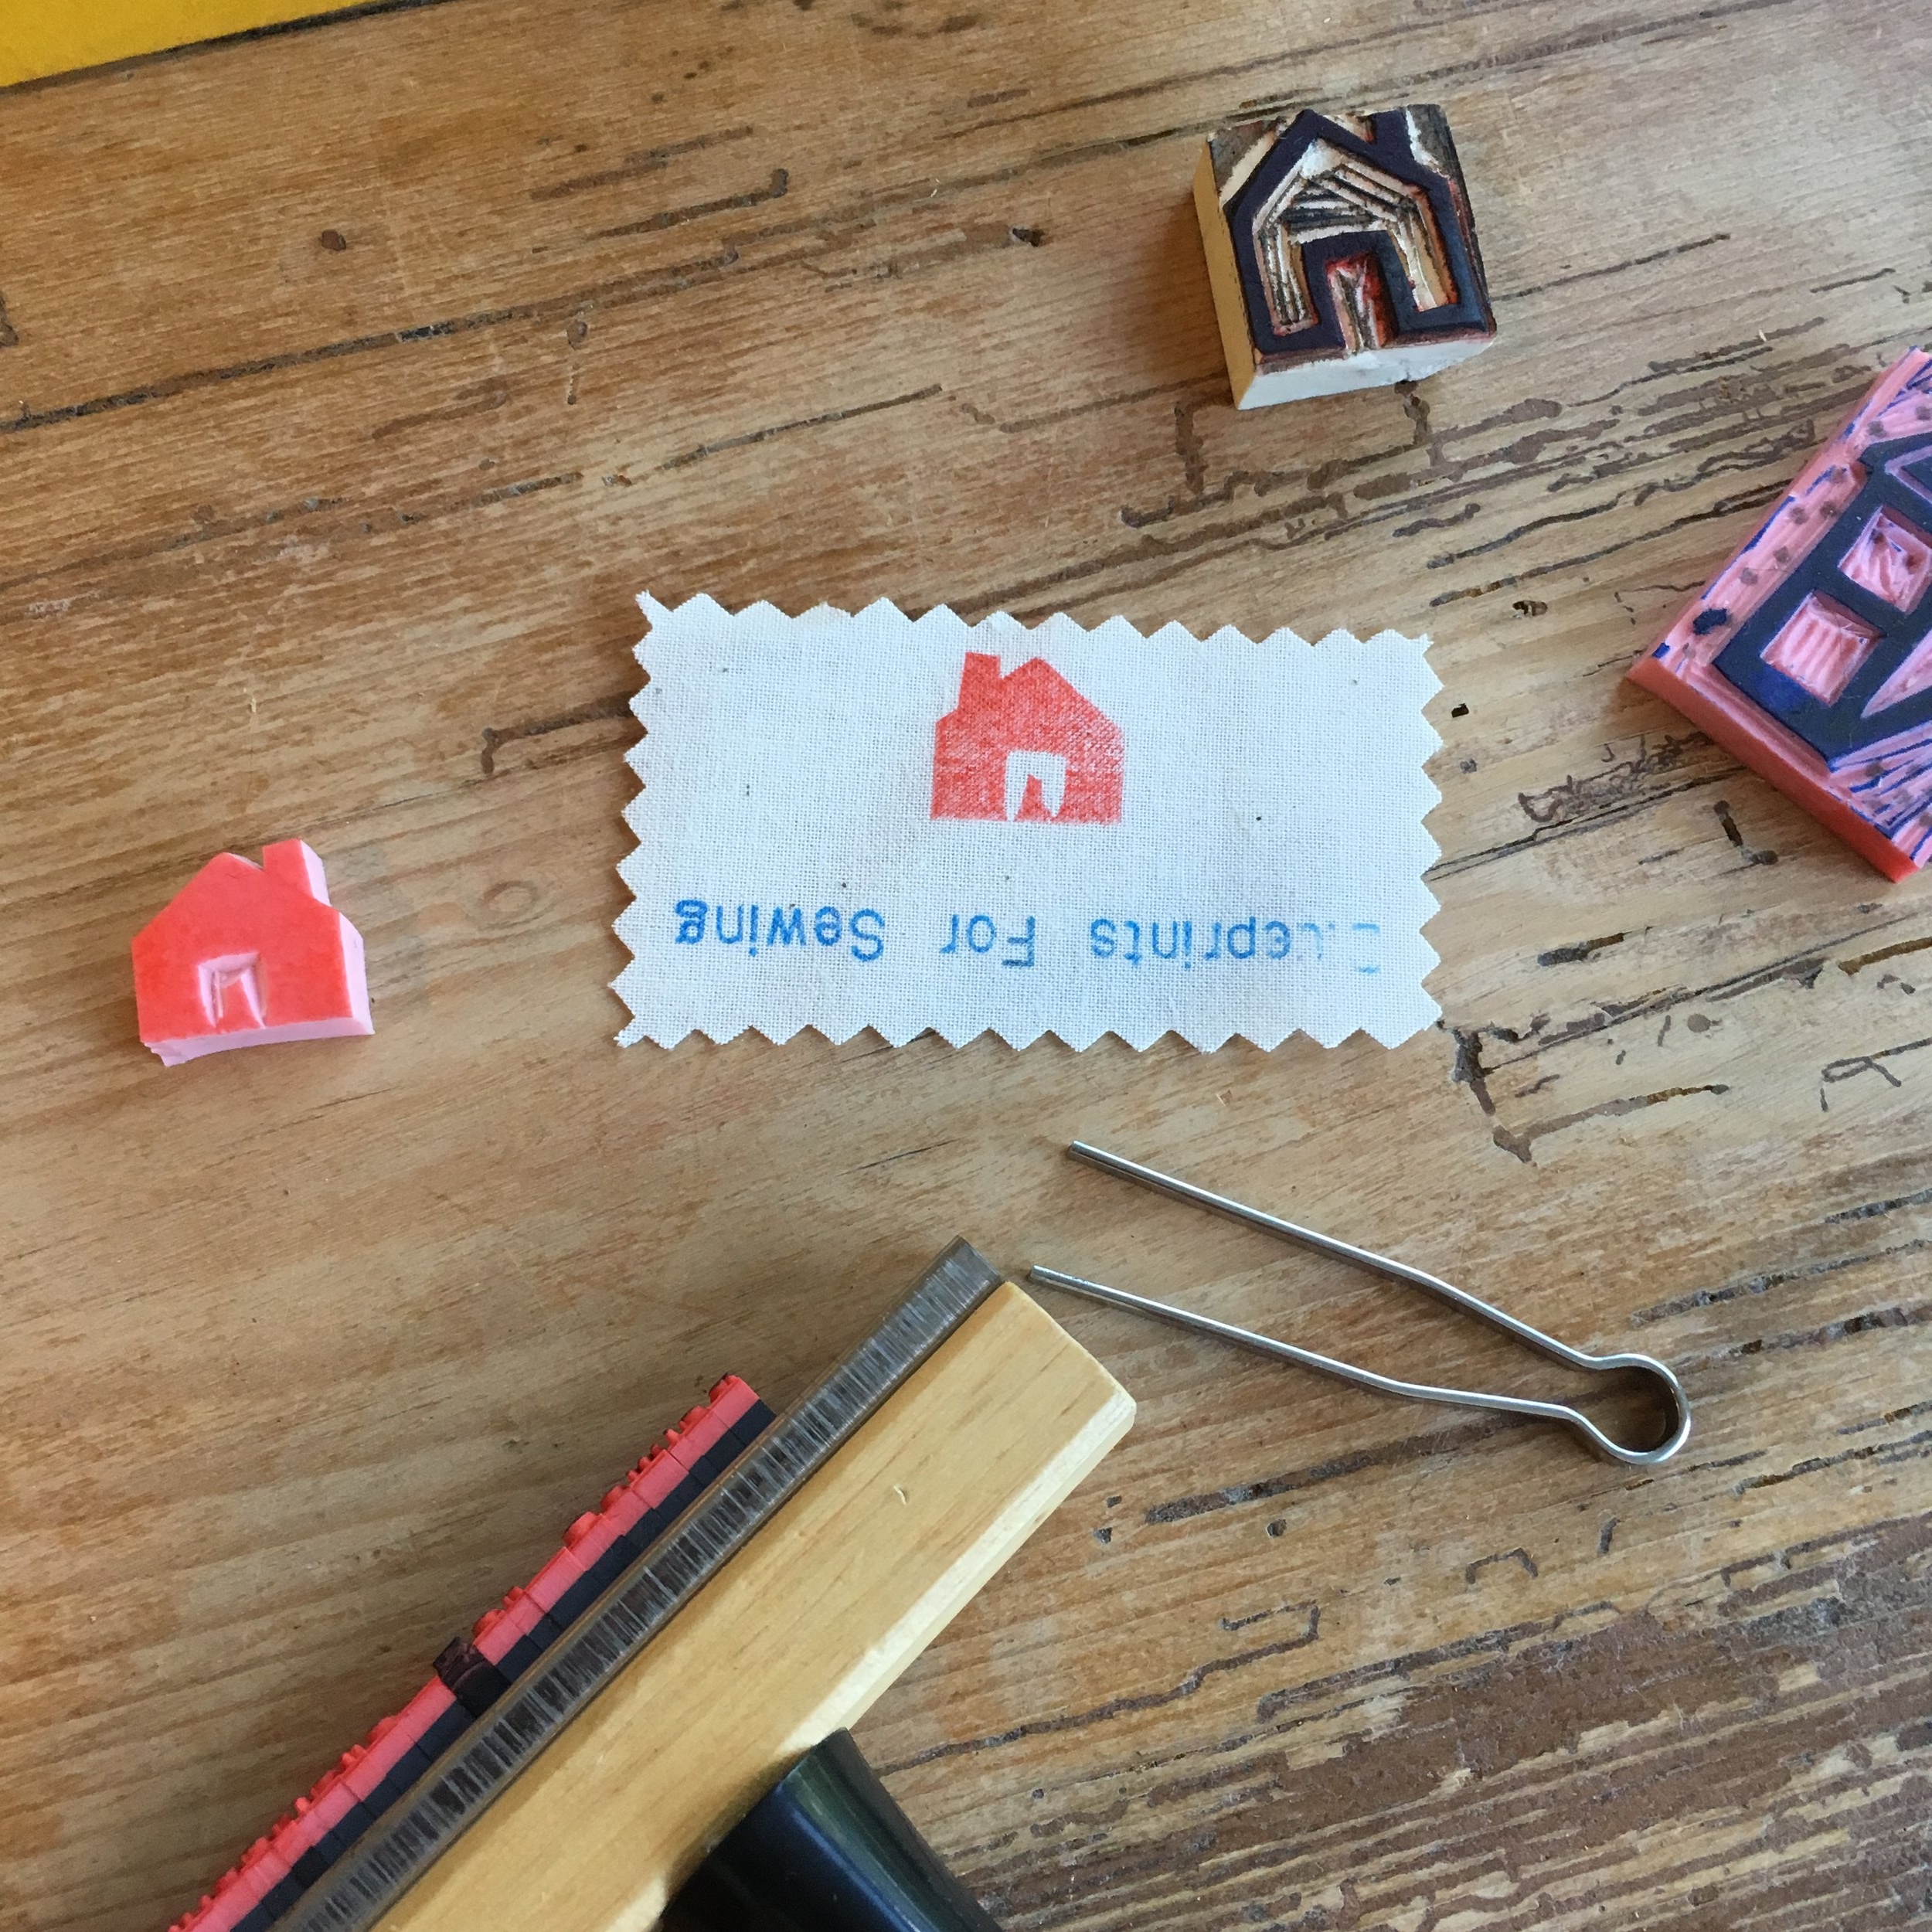
Your local craft or stationary store will likely have a nice variety of fun stamps. Keep in mind the size if you want it to fit on ribbon of a certain width. Sets of small stamps are a great way to add decorative elements to your text.
You can also create your own stamps! I wrote a holiday tutorial a few years back that covers the basics. Remember, your image will stamp in reverse, so be sure to draw it backwards.
Ink
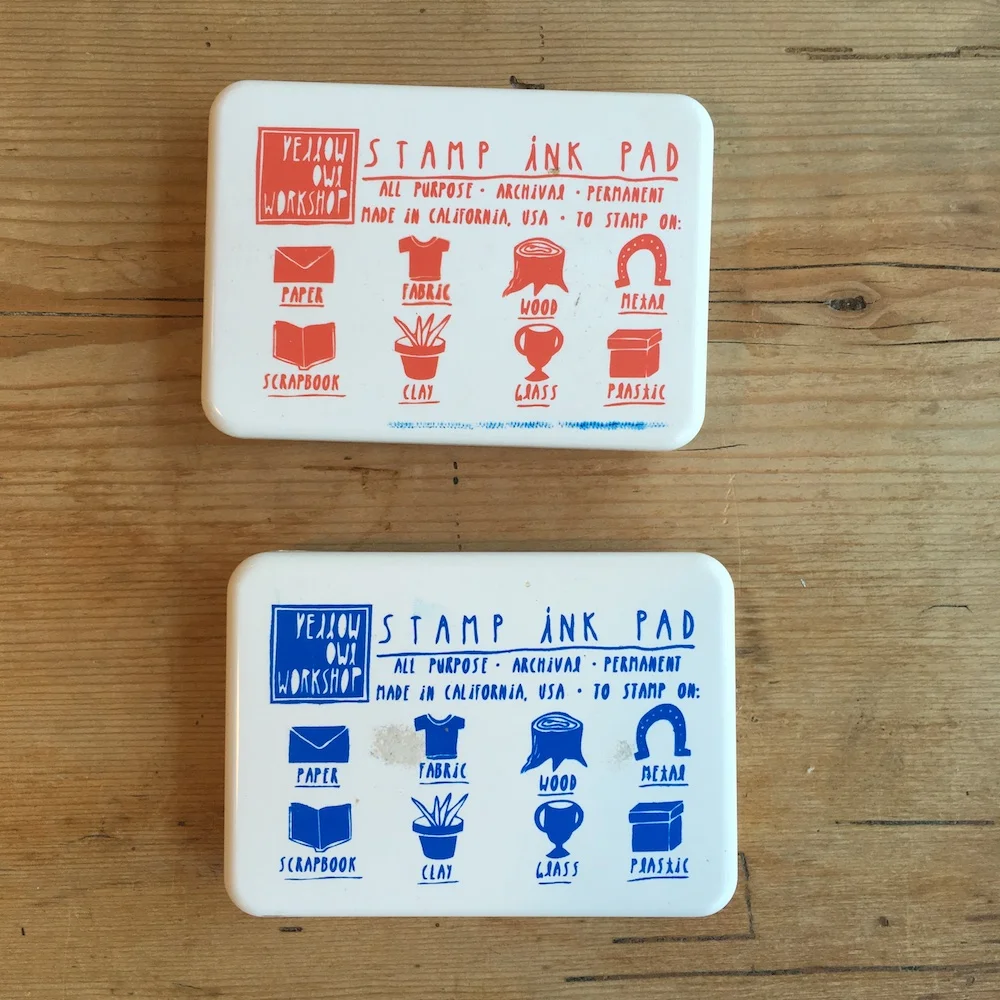
You can use any stamp pad that is formulated to work on fabric. Be sure to check, because many of them are not. My favorites are Yellow Owl Workshop's large stamp pads (note that their smaller ink pads are not formulated for fabric!). Tags I've made using this ink have withstood years of machine washing with little to no fading or bleeding. They'll also last at least a couple years without drying out (as long as you keep the lid shut). Mine are about 5 years old and still work brilliantly.
Remember, most fabric stamping inks must be heat set using your iron! Be sure to review the instructions for heat setting that come with your ink.
You may also want to run a stamped piece of fabric through the wash if testing out a new ink to make sure it doesn't run or fade.
Tips


+ Test your design on paper first! I can't tell you how many times I've flipped something upside down printed the wrong thing. Do a test first.
+ Plan your spacing. To keep stamps in an even line, use masking tape to create a guideline on your fabric or ribbon.
+ Ink evenly and press firmly on your stamp!
+ Mind your P's and Q's! Remember, certain letters look the same backwards and forwards. Always do a test print to make sure you've got the right letters.
+ Heat set your tags! Iron on the cotton setting for 5-10 seconds and let cool.
+ If you want to print only part of a stamp, or break up lines of text, use a piece of scrap paper to catch the ink and only stamp the part of the text or image you want on your fabric.