
Prairie Skirt Sew Along!

Have Company is hosting a sew along for the Prairie Skirt, the pattern zine I created while artist in residence. The sew along goes until June 15th and you can participate by using the hashtag #HCSKIRTALONG.
For this sew along, I decided to create another prairie skirt using Robert Kaufman Essex Linen as a base. I pulled a couple of my favorite scraps from the stash and went with the 'easy' pocket from the pattern, to keep things simple. But, in my typical fashion, I couldn't have it be too simple, so I added a bit of embroidery to the pocket to emphasize the piecing on the bottom.

If you want to add some embroidery to your pocket, here's a trick: use the opening in your turned pocket to hide the knots of your embroidery in between the pocket and lining. That way, you don't have any knots in your pocket.

I also find that a simple vent in the skirt can get strained or even rip when doing important things like riding bikes, climbing over fences, doing high kicks, etc. I took a cue from vintage suit pockets and reinforced the top of the vent with an embroidered arrowhead. Here's how to do one yourself if you so desire:

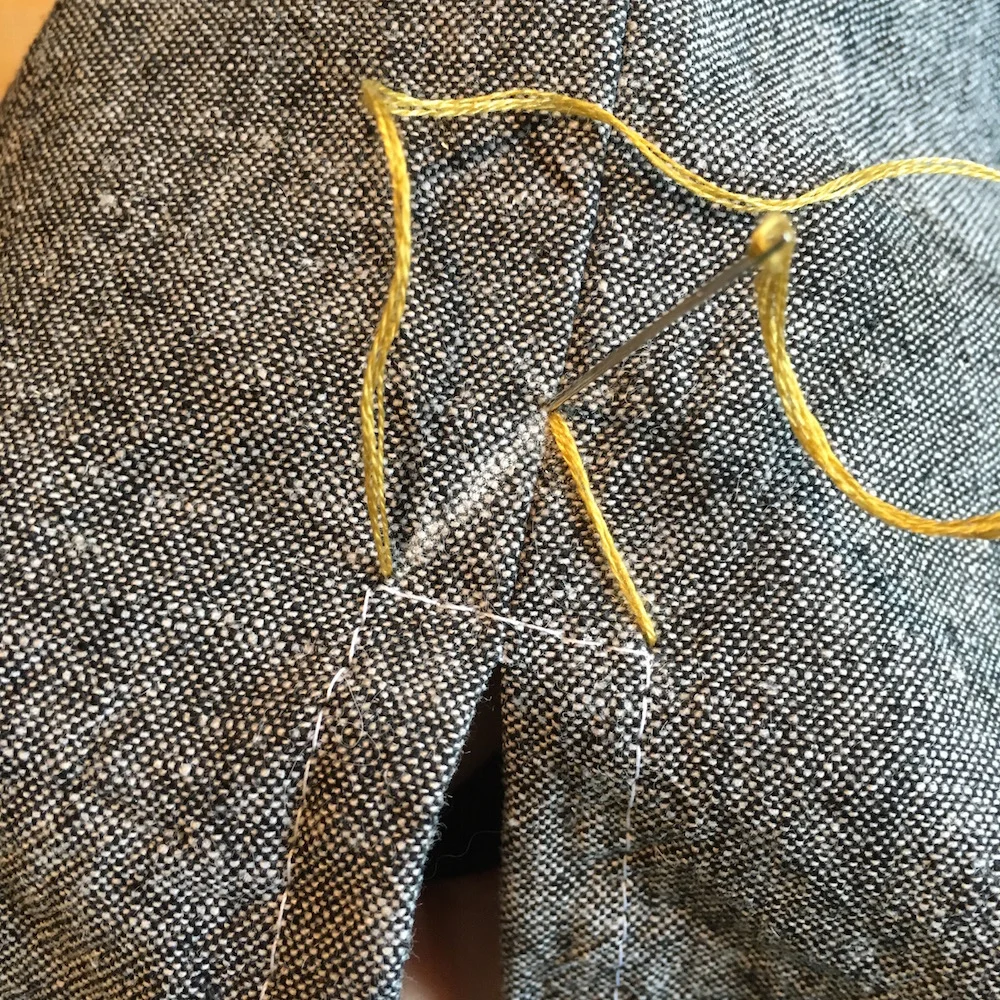
First, draw in your little triangle as a guideline. With a strand of embroidery floss, pearl cotton or buttonhole thread, come up through the top of the triangle, then down through one bottom corner.
Come up through the opposite bottom corner and back down through the top corner.

Next, come back up through the fabric just to the right and below the top point. Then, go back down next to the last stitch sewn on the left side, so that your two strands on the left are side by side.

Come back up next to the bottom of the stitch on the right side, then go down to the left and slightly below the top point.
Repeat this process until your threads stitches on each side of the triangle reach the center. You can choose to keep the triangle even, or create more of an arrowhead shape by drawing the threads in slightly each time you make a stitch. The stitches overlap each other as you alternate sizes.

This cute little arrowhead adds some reinforcement to the back skirt vent.
Here's my finished Prairie Skirt! Perfect for today with temps in the 80's! Hello summer!
