
Tutorial: Setting In Sleeves

Setting in sleeves can be a harrowing experience for many new and experienced sewists alike. Here's why:
Most set in sleeves include what is called sleeve cap ease. To put it simply, the measurement of the sleeve cap is slightly bigger than the armhole to which it will be sewn. The idea here is that the excess fabric can be 'eased' into the seam to create a small amount of fullness around the shoulder without the need for darts or gathers. At least, that's the intention.
Part of this has to do with the fact that, in general, women's fitted shirts have an armhole seam that sits further in from the shoulder than menswear. This isn't always the case, but generally you find this feature on a lot of shirts.

Typical women's sleeve
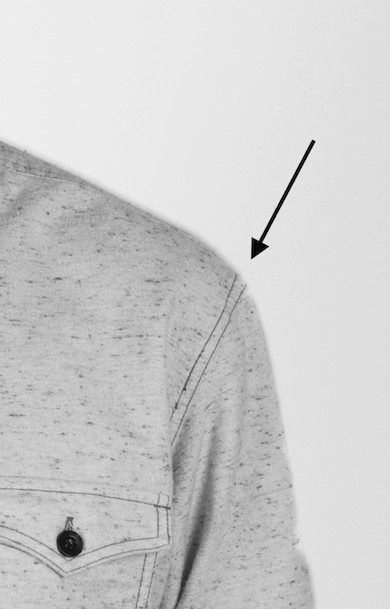
Typical men's sleeve
Because of this, the top of the sleeve needs to have a bit of volume to fit the shoulder comfortably and the simplest way to achieve this is by adding some sleeve cap ease. It can be tricky to sew in the sleeve, squeezing the extra fabric into the armhole without creating wrinkles, gathers, or unintended tucks.
You may be saying to yourself, how can my sleeve and armhole possibly match up smoothly if they are two different lengths. The answer to this is explained by looking at the sleeve cap's position on the grain of the fabric (for more about fabric grain, check out this tutorial).

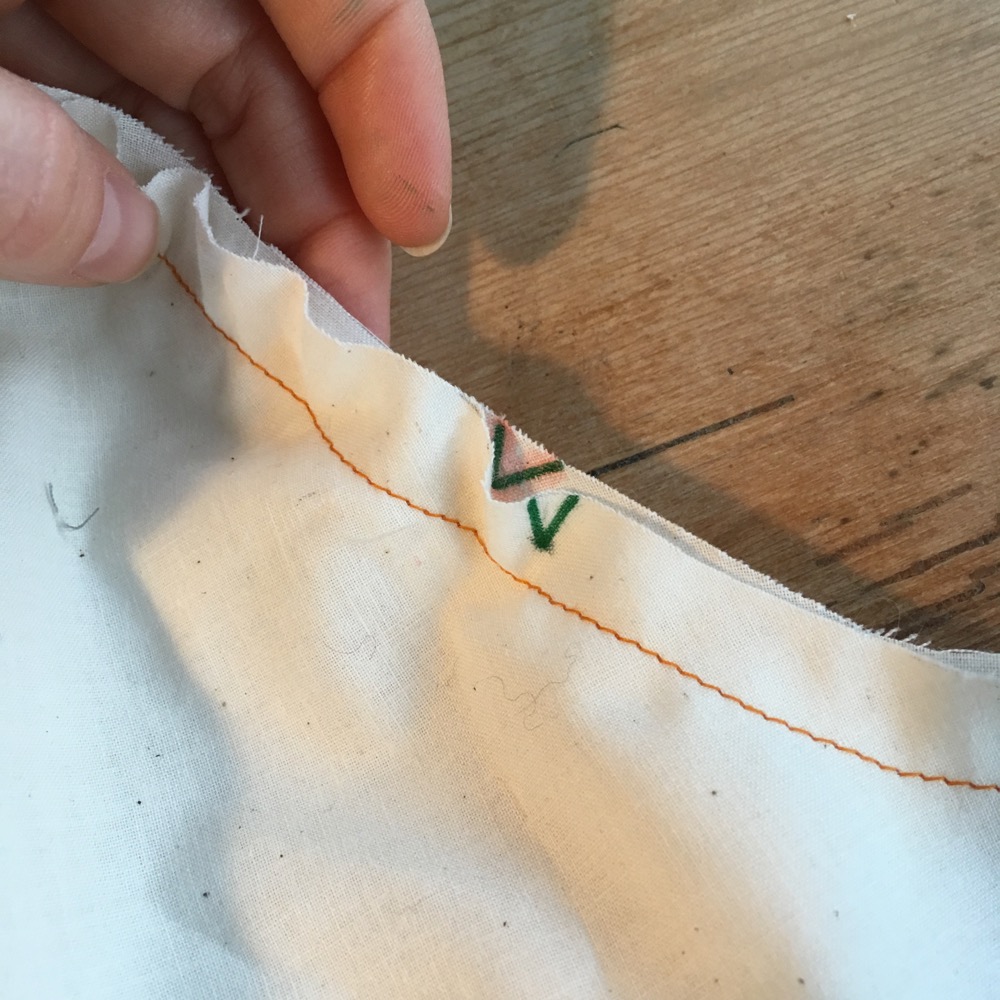
Sleeves are meant to be eased between your front and back armhole notches. This is because that part of the sleeve falls on the bias, or the diagonal grain. The bias of the fabric is naturally stretchy, which makes it great for things like bias tape. Not only can bias fabric stretch, it can also contract. This is how you can squeeze a larger sleeve into a smaller armhole, by relying on the bias grain's ability to contract.
The amount of sleeve cap ease varies depending on the pattern. Usually, tops with a shoulder seam that sits farther out will have less ease (Saltbox has a slightly dropped shoulder line, for example). You can figure out how much sleeve cap ease your pattern has by comparing the sleeve seam measurement to the armhole measurement. Remember to measure at the seam line for the most accurate measurement.

Most sleeves will have between 1/2" and 1 1/2" of sleeve cap ease. If your sleeve ease is minor (1/2" or so), you can often get away with easing the sleeve to fit by hand. If you have more ease, you will want to use some stitching to help shrink up the excess fabric before sewing.
Setting in your sleeve
Sleeves can either be set in 'in-the-round' or 'flat'. When sewn in the round, all seams are sewn before the armhole seam. When sewn flat, only shoulder seams are sewn and the sleeve is attached flat. Afterwards, the sleeve and side seam are sewn up.
Saltbox gives instructions for setting in the sleeve flat, which is often an easier way to manage sleeve cap ease. (NOTE: The flat method can sometimes result in a bit of uncomfortable bulk at the underarm. Later in this post, I include instructions for what I call the 'combination method' which gives you the best elements of both flat and in-the-round methods: easy sleeve easing and a smooth underarm seam.)
Even though the sleeve in this tutorial is set in flat, the techniques shown can also be used for sleeves sewn in-the-round.
Method 1: Easing by Hand (small amount of ease)
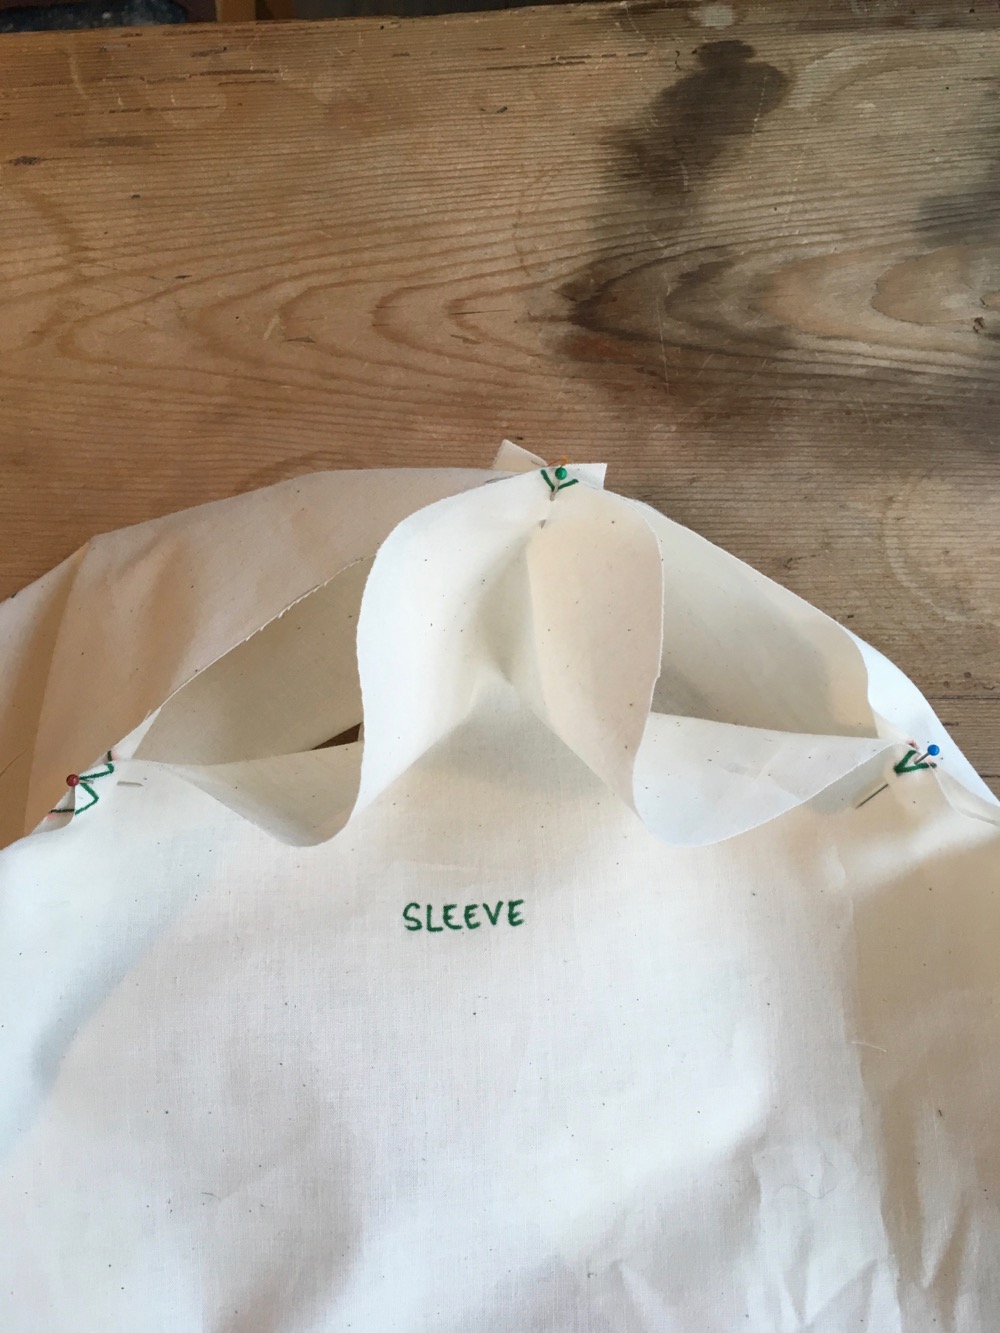
To start, pin your sleeve to your armhole, right sides together as pictured, with the sleeve curve positioned opposite the armhole curve. Make sure your sleeve notches match on both sides (tip: two notches will always indicate the back sleeve/armhole).

Then, continue by pining the sleeve at both notches and the beginning and end of the armhole.


Your sleeve should match perfectly between the end of the armhole and the notch. No easing necessary here. If your seam is off, it may be a cutting error. In this case, rely on your notches and leave any over/underlap to trim later later.
What you should have left is two big pockets of sleeve fabric between the top three pins. This is your sleeve cap ease!
If your sleeve doesn't have much ease (1/2" or so), use pins to divide up the ease, keeping even amounts of ease between pins.

When you're ready to sew in your sleeve, cup the fabric so that the sleeve shape is retained while sewing. This helps to ease in the cap.
This is where you'll use the stretchy/contracty properties of the bias to ease in the sleeve cap. If you've read the bias binding tutorial, the concept is very similar: Use your fingers to pull on opposite sides of the seam, contracting the fabric. It should now lay fairly smooth.


Continue easing the fabric this way between pins until your sleeve is set in.
If you are unable to easily contract the fabric to fit, it's time to call in the help of some easing stitches!
Method 2: Using Ease Stitches
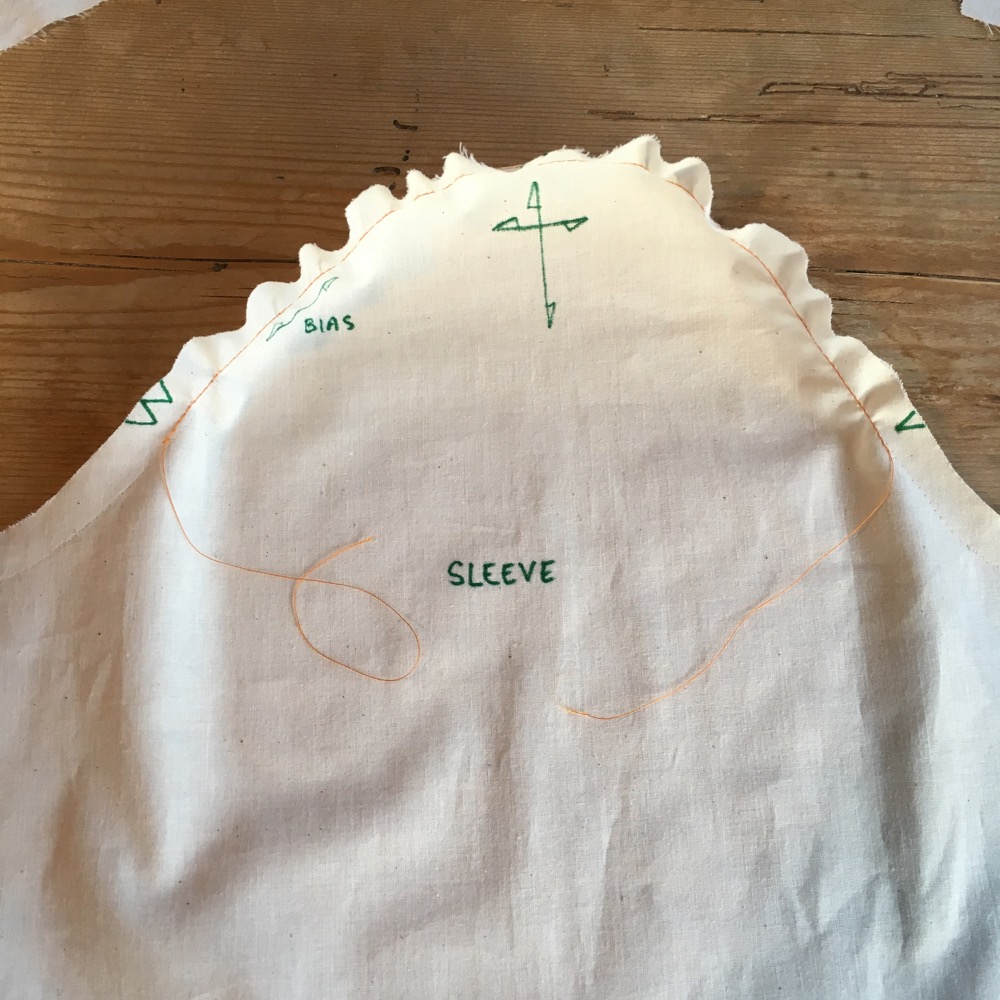
Start by sewing a line of stitching along the sleeve cap that is slightly smaller than your seam allowance, between both notches. Leave long thread tails.

This line of stitching will help you shrink your sleeve cap. As you pull the thread, you'll notice that the sleeve cap starts to curve inward. The goal here is to pull the threads enough to curve the cap, but not so much that it creates gathers.
Now, pin your sleeve in the same way as for the first method, pinning at the shoulder seam, notches, and seam ends. Use the thread to adjust the easing so that the sleeve head fits comfortably into the armhole. It helps to cup the sleeve here so that the eased portion behaves nicely. Once you've gotten the sleeve to match the armhole, knot each end of your easing thread and place an extra pin in the center each cap section.

Sew in your sleeve with the sleeve cap facing you, so that you can be sure to avoid accidentally sewing gathers into your cap. You'll be sewing just inside the line of ease stitches. If you run into a spot where the fabric bubbles up, take a pin and pull on the ease stitches to shrink up the fabric. As you see here, little ruffles in the seam allowance are just fine: this is the sleeve cap ease being displaced from the seam line. As long as your stitching line is free from gathers, you'll have a nice, smooth sleeve cap.

After sewing, your sleeve should create a nice smooth 'roll' to accommodate the shoulder.

Too much ease?
Easing in a sleeve is tricky to begin with, but in some cases, sleeves simply have too much sleeve cap ease to fit comfortably into the armhole, no matter how many techniques you try. In this case, you have two options.
1: Trim away a tiny portion of the sleeve cap from notch to notch, blending into the original curve. This will reduce some of the length of the sleeve cap and make easing easier. If you notice that your eased in sleeve has a pronounced puff at the shoulder, this is a good fix.

2: If the amount of ease seems ok (as in, the sleeve fits your shoulder, but is impossible to ease in without a few puckers here or there) you can move the sleeve notches down slightly, shifting some of the ease further towards the underarm seam.
Closing up the underarm seam: The 'Combination' Method
Last but not least, you'll need to close up your side seam and sleeve seam. When the sleeve is set in flat, this is done in one continuous seam from sleeve hem to waist/hemline. However, this sometimes creates uncomfortable bulk at the underarm. This method includes additional steps but is a fantastic combo of easy to do and nicely fitting.
To follow this method, leave the first and last 2" of your armhole sleeve unsewn. (If you've already attached your sleeve, start by unpicking about 2" of your sleeve seam on both sides).

Such a moody shot...the sun was beginning to set in my studio!
Sew your sleeve underarm seam and body side seam separately. Press both seam allowances open and finish the edges in whatever way you like.

Next, tuck the sleeve into the armhole. Align the underarm seam and pin in place. They should match up perfectly (if not, check your seam allowances on both seams).

Sew this section of your armhole seam, being sure to back stitch over the ends of your existing armhole seam (especially if you unpicked your stitches here).

Press, clip/trim and finish your armhole seam however you like. Once turned to the outside, you should have a nice smooth underarm finish.