
Adding a zipper front to Moderne
Now that spring is on the horizon I've been thinking about transitional wardrobe pieces. The Moderne Coat is a fantastic light coat and a perfect piece to add to your spring wardrobe. I've decided to share a blog series this month I'm calling Moderne March (clever, right?) that will include suggestions and tips for sewing the Moderne coat as well as some great pattern hacks! I'll be sharing these all month long, so stay tuned!
A Zipper Placket for Moderne
Don’t get me wrong, I love buttons as much as the next gal. In New England, however, there’s at least a few months out of the year where cold wind sneaks right into your coat between the buttons and a zipper is absolutely necessary.
I went back and forth about including a zipper placket option in the pattern but decided ultimately to include it as an extra. There’s only so many pattern pieces and so many instructions before a pattern gets too crazy. This seemed like an easy addition (plus, there’s just something nice about a free pattern bonus, isn’t there?)
This zipper is actually sewn into the placket for a nice clean finish. It also leaves space if you want to add additional snaps to the placket, like you see on your favorite RTW jackets.
To start, print off the Zipper Placket Addition PDF (download it here!)* Be sure 'scaling' is turned off or set to 100%. Print page one and measure the rectangle to ensure it has printed at the correct size.
*If you downloaded the zipper placket addition before 3/10/18 please note that there was a small error in the seam allowance which has now been fixed. For more info and how to fix this if you've already cut your fabric, visit our errata page.
You'll need a 22-24" zipper. If you're the kind of person who likes having a bit of room to kick at the front of their coat, I'd got for the 22".
Cutting & Marking
The new placket is made up of two pieces and they should fit in the same amount of space on your cutting layout. However, instead of cutting on the fold, each piece must be cut (especially if you’re making V2) from the right side of the fabric with the pattern piece facing up.
You should end up with two of the exact same pieces, rather than mirrored pieces as in the original pattern. If using fusible interfacing, be sure to cut in the same fashion, with the glue side (bumpy side) up. This doesn't matter so much for version 1, as the pieces are rectangular, but is crucial for V2. The pieces below are cut for V1, but the dashed line represents what it would look like for v2.
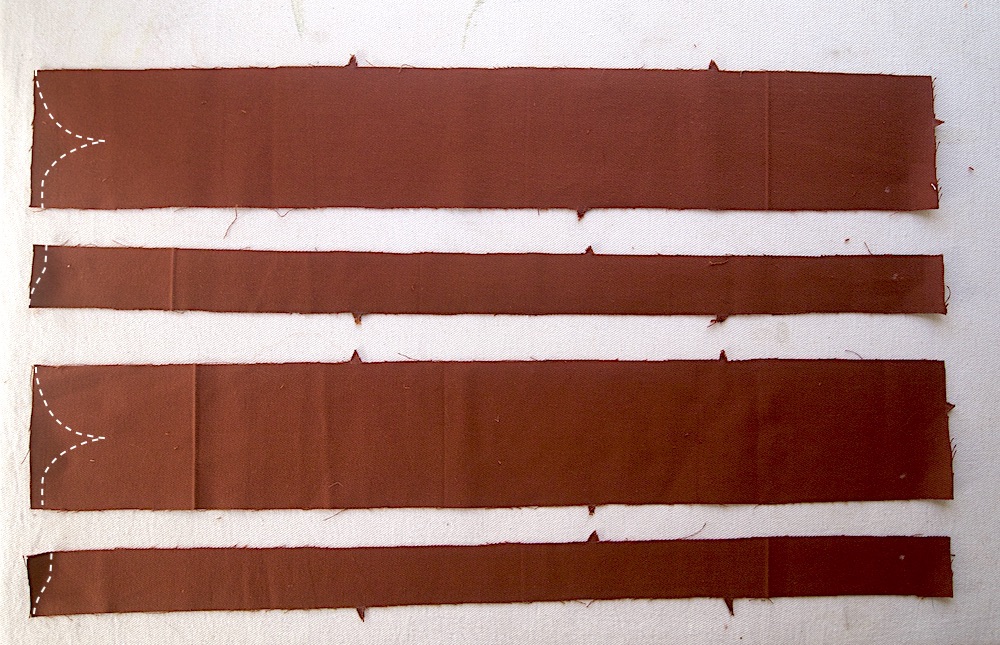
Be sure to mark your notches and the small circle markings (choose the correct circle based on version and bust size).
Instructions for attaching the zipper
Interface your placket pieces as usual. If using a stiff fabric or sew in interfacing, you may want to trim down the interfacing seam allowances to 1/8" to reduce bulk.
With your zipper facing up, mark the left and right side at the top of the tape (with chalk or removable pen). This will also indicate the right side of the zipper.
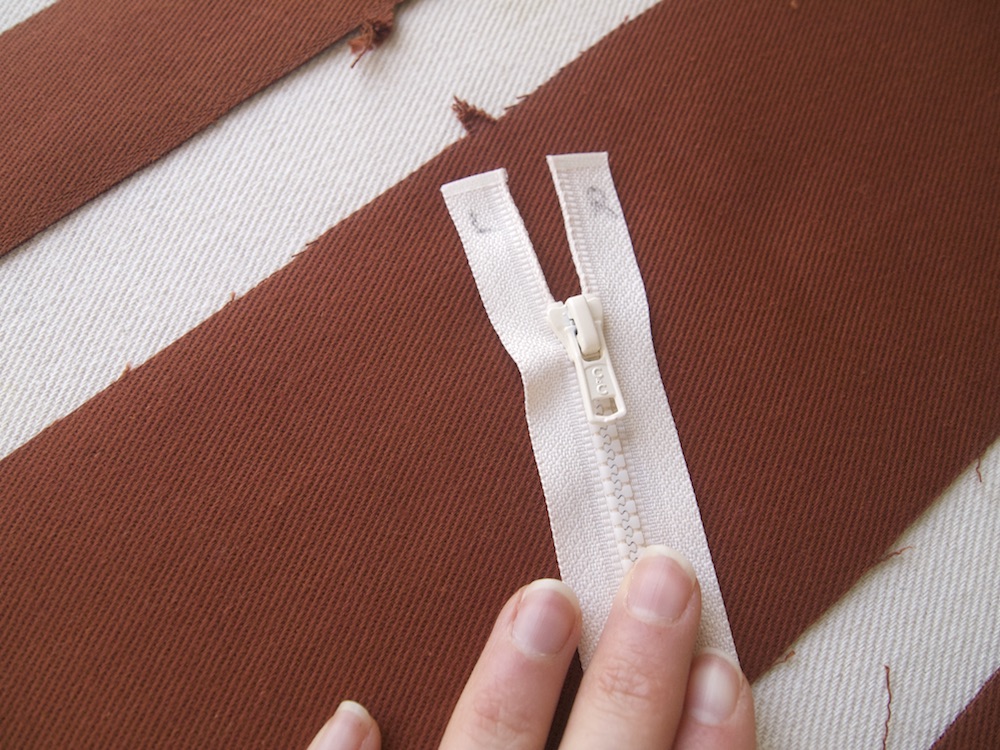
Lay out your wider placket pieces side by side. Separate the zipper and turn the left zipper piece over so the wrong side is facing up and the teeth are on the left. The right side of the zipper with remain with the right side facing up, teeth also on the left.
Pin each zipper to the right side of the wider placket piece, positioning the top of the zipper teeth with the circle marking.

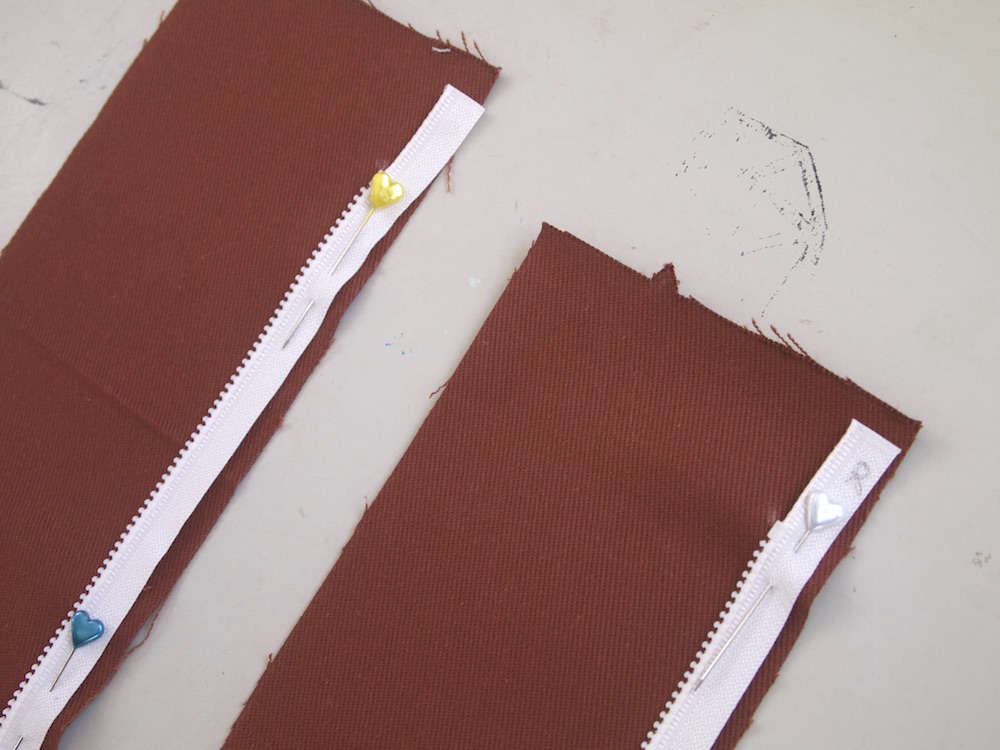
The teeth of the zipper should be 5/8” from the edge of the placket pieces. Fold the extra zipper tape towards the fabric edge at a 45 degree angle.
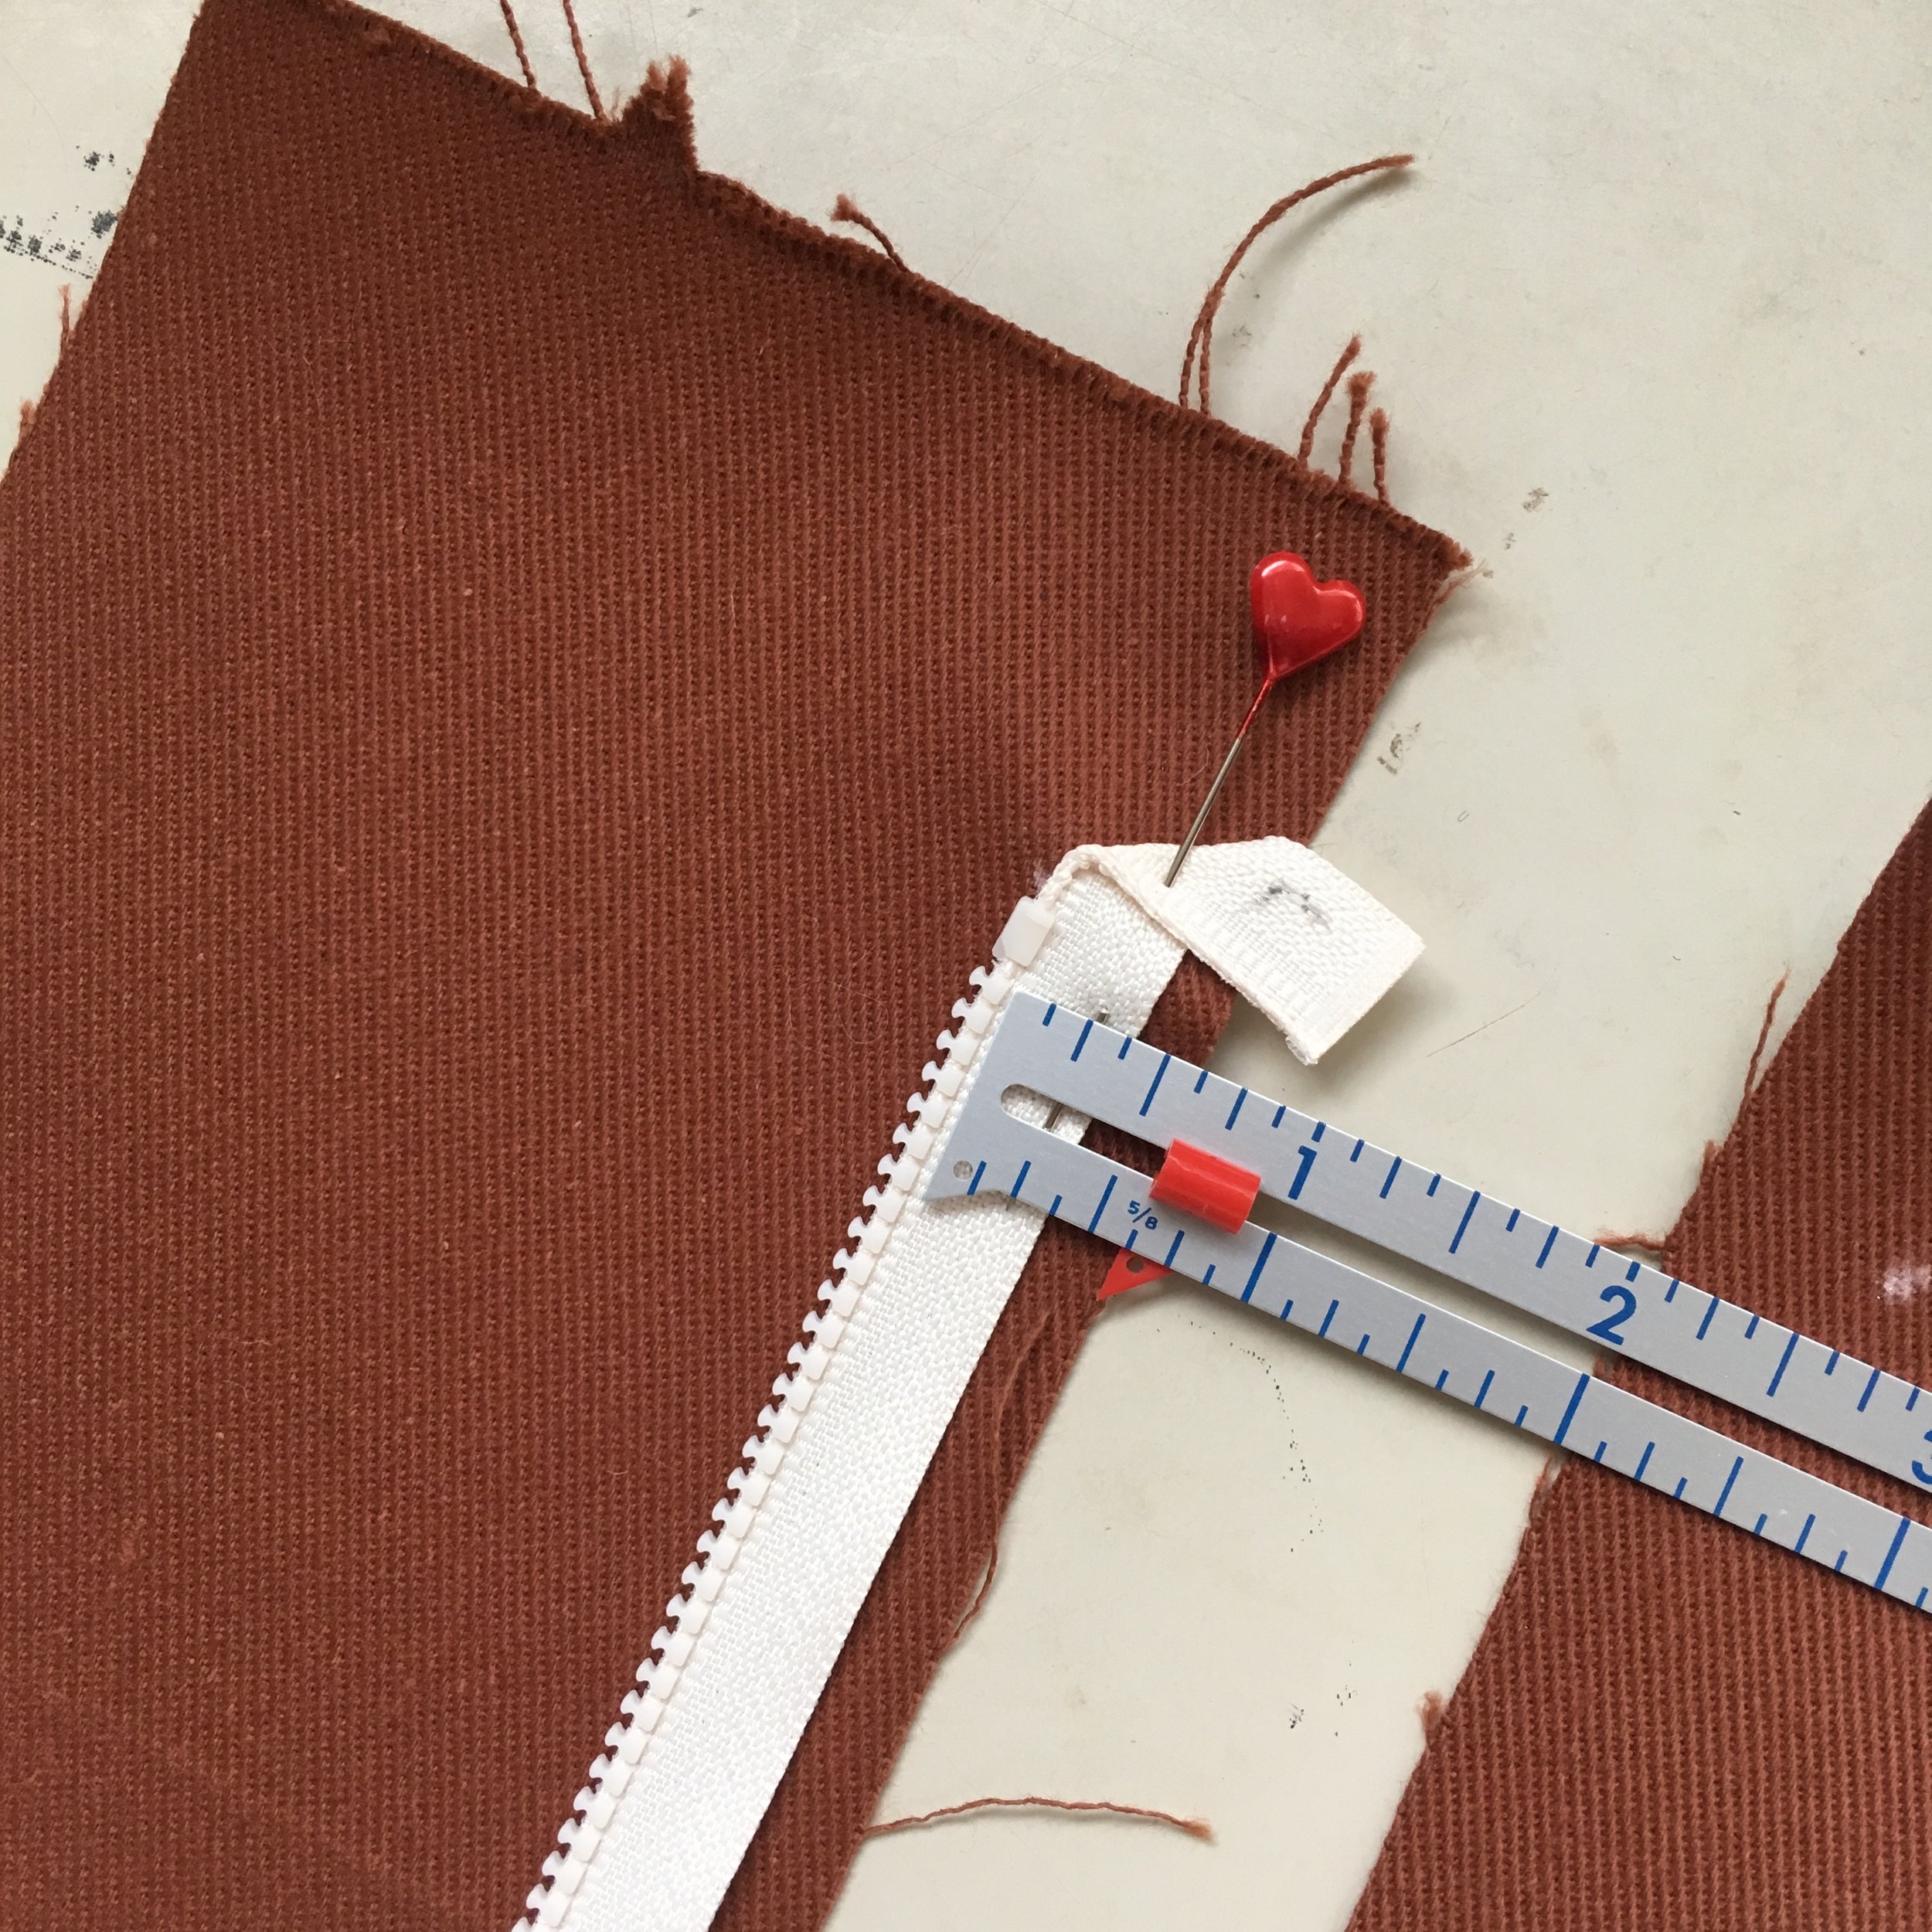
Baste each zipper in place by hand or machine at 3/8" seam allowance. At this point, zip your zipper together to check the that two placket pieces align correctly at the top and bottom.

Place each narrow placket piece on top of the wide placket piece with right sides together and with the zipper sandwiched between, matching the notch.

Using a zipper foot, sew together at a 1/2” seam allowance. Repeat for the 2nd placket.
Press the seam allowance on both plackets towards the narrower piece. If using a plastic zipper, avoid ironing over the zipper teeth, they can melt!

Edge stitch along the right side of the each zipper, catching the seam allowance underneath. Be sure to pull the fabric away from the zipper as you sew. It's easy for this seam to want to fold back closer to the zipper, especially if the fabric is thick. You want at least 1/8" space between the zipper teeth and fabric to allow the zipper to open and close without getting caught.
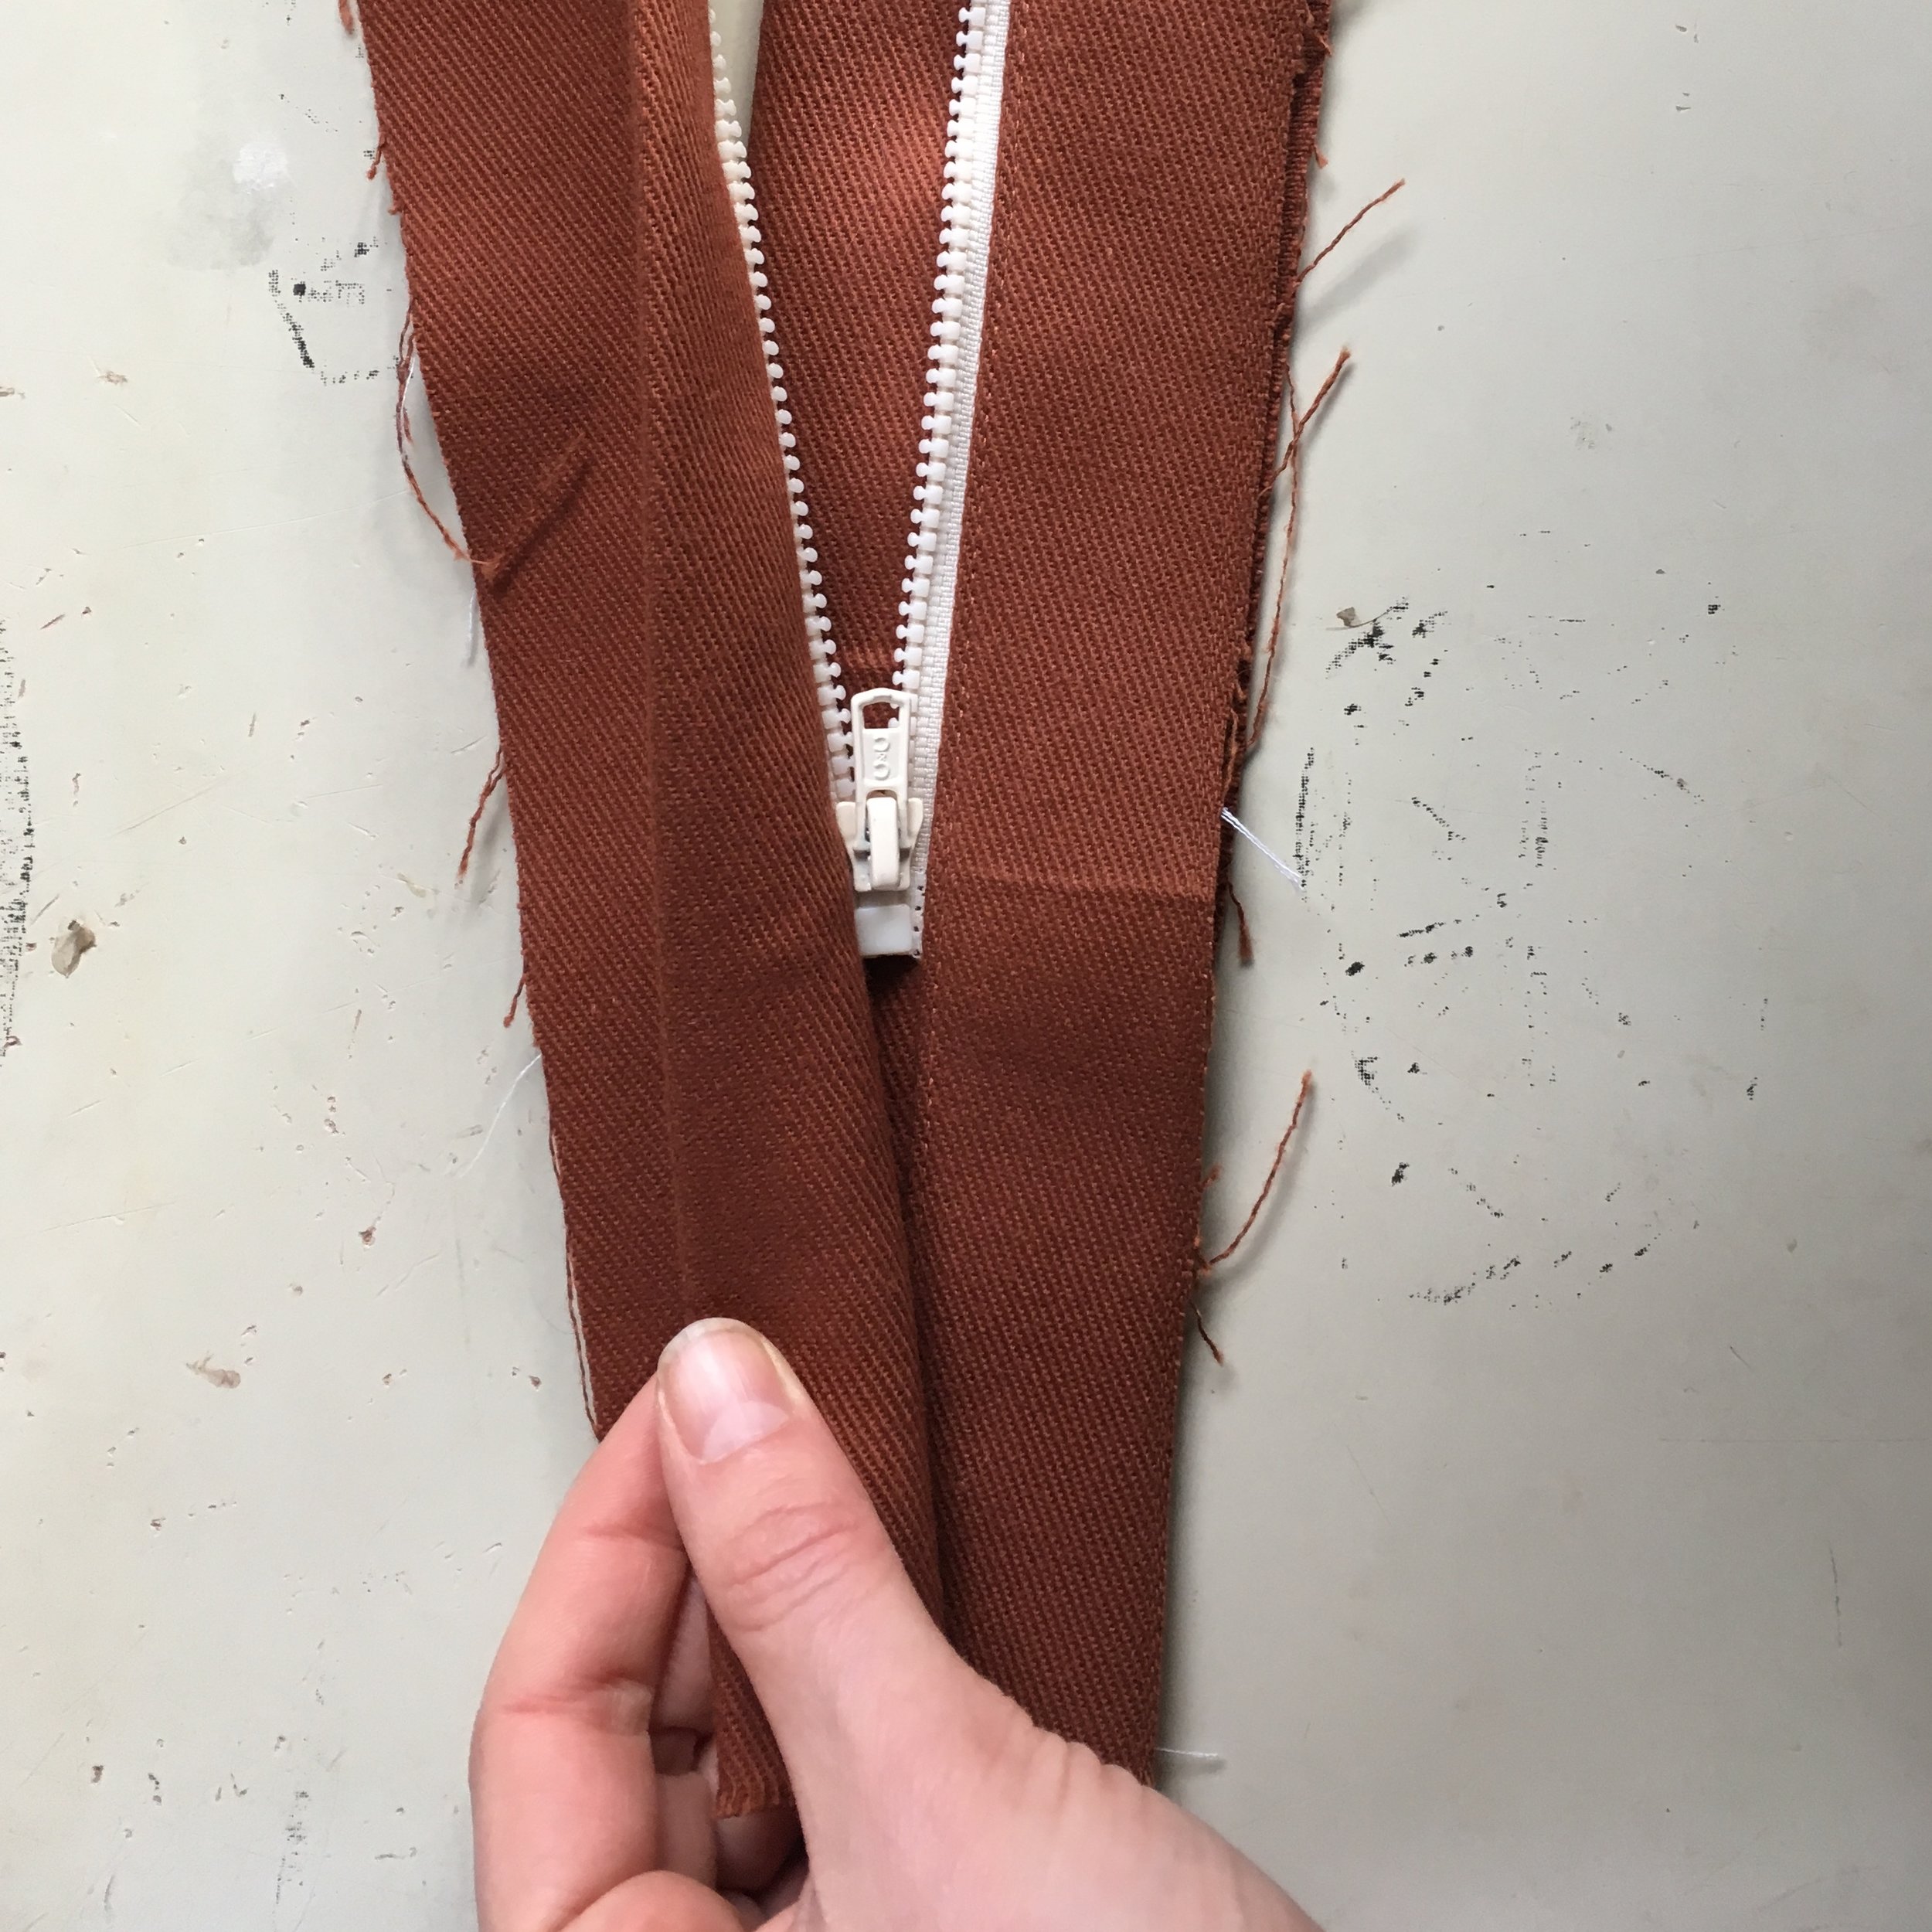
If you like, you can fold over the placket, matching the notches on each side and press. Your finished placket pieces should look like this:
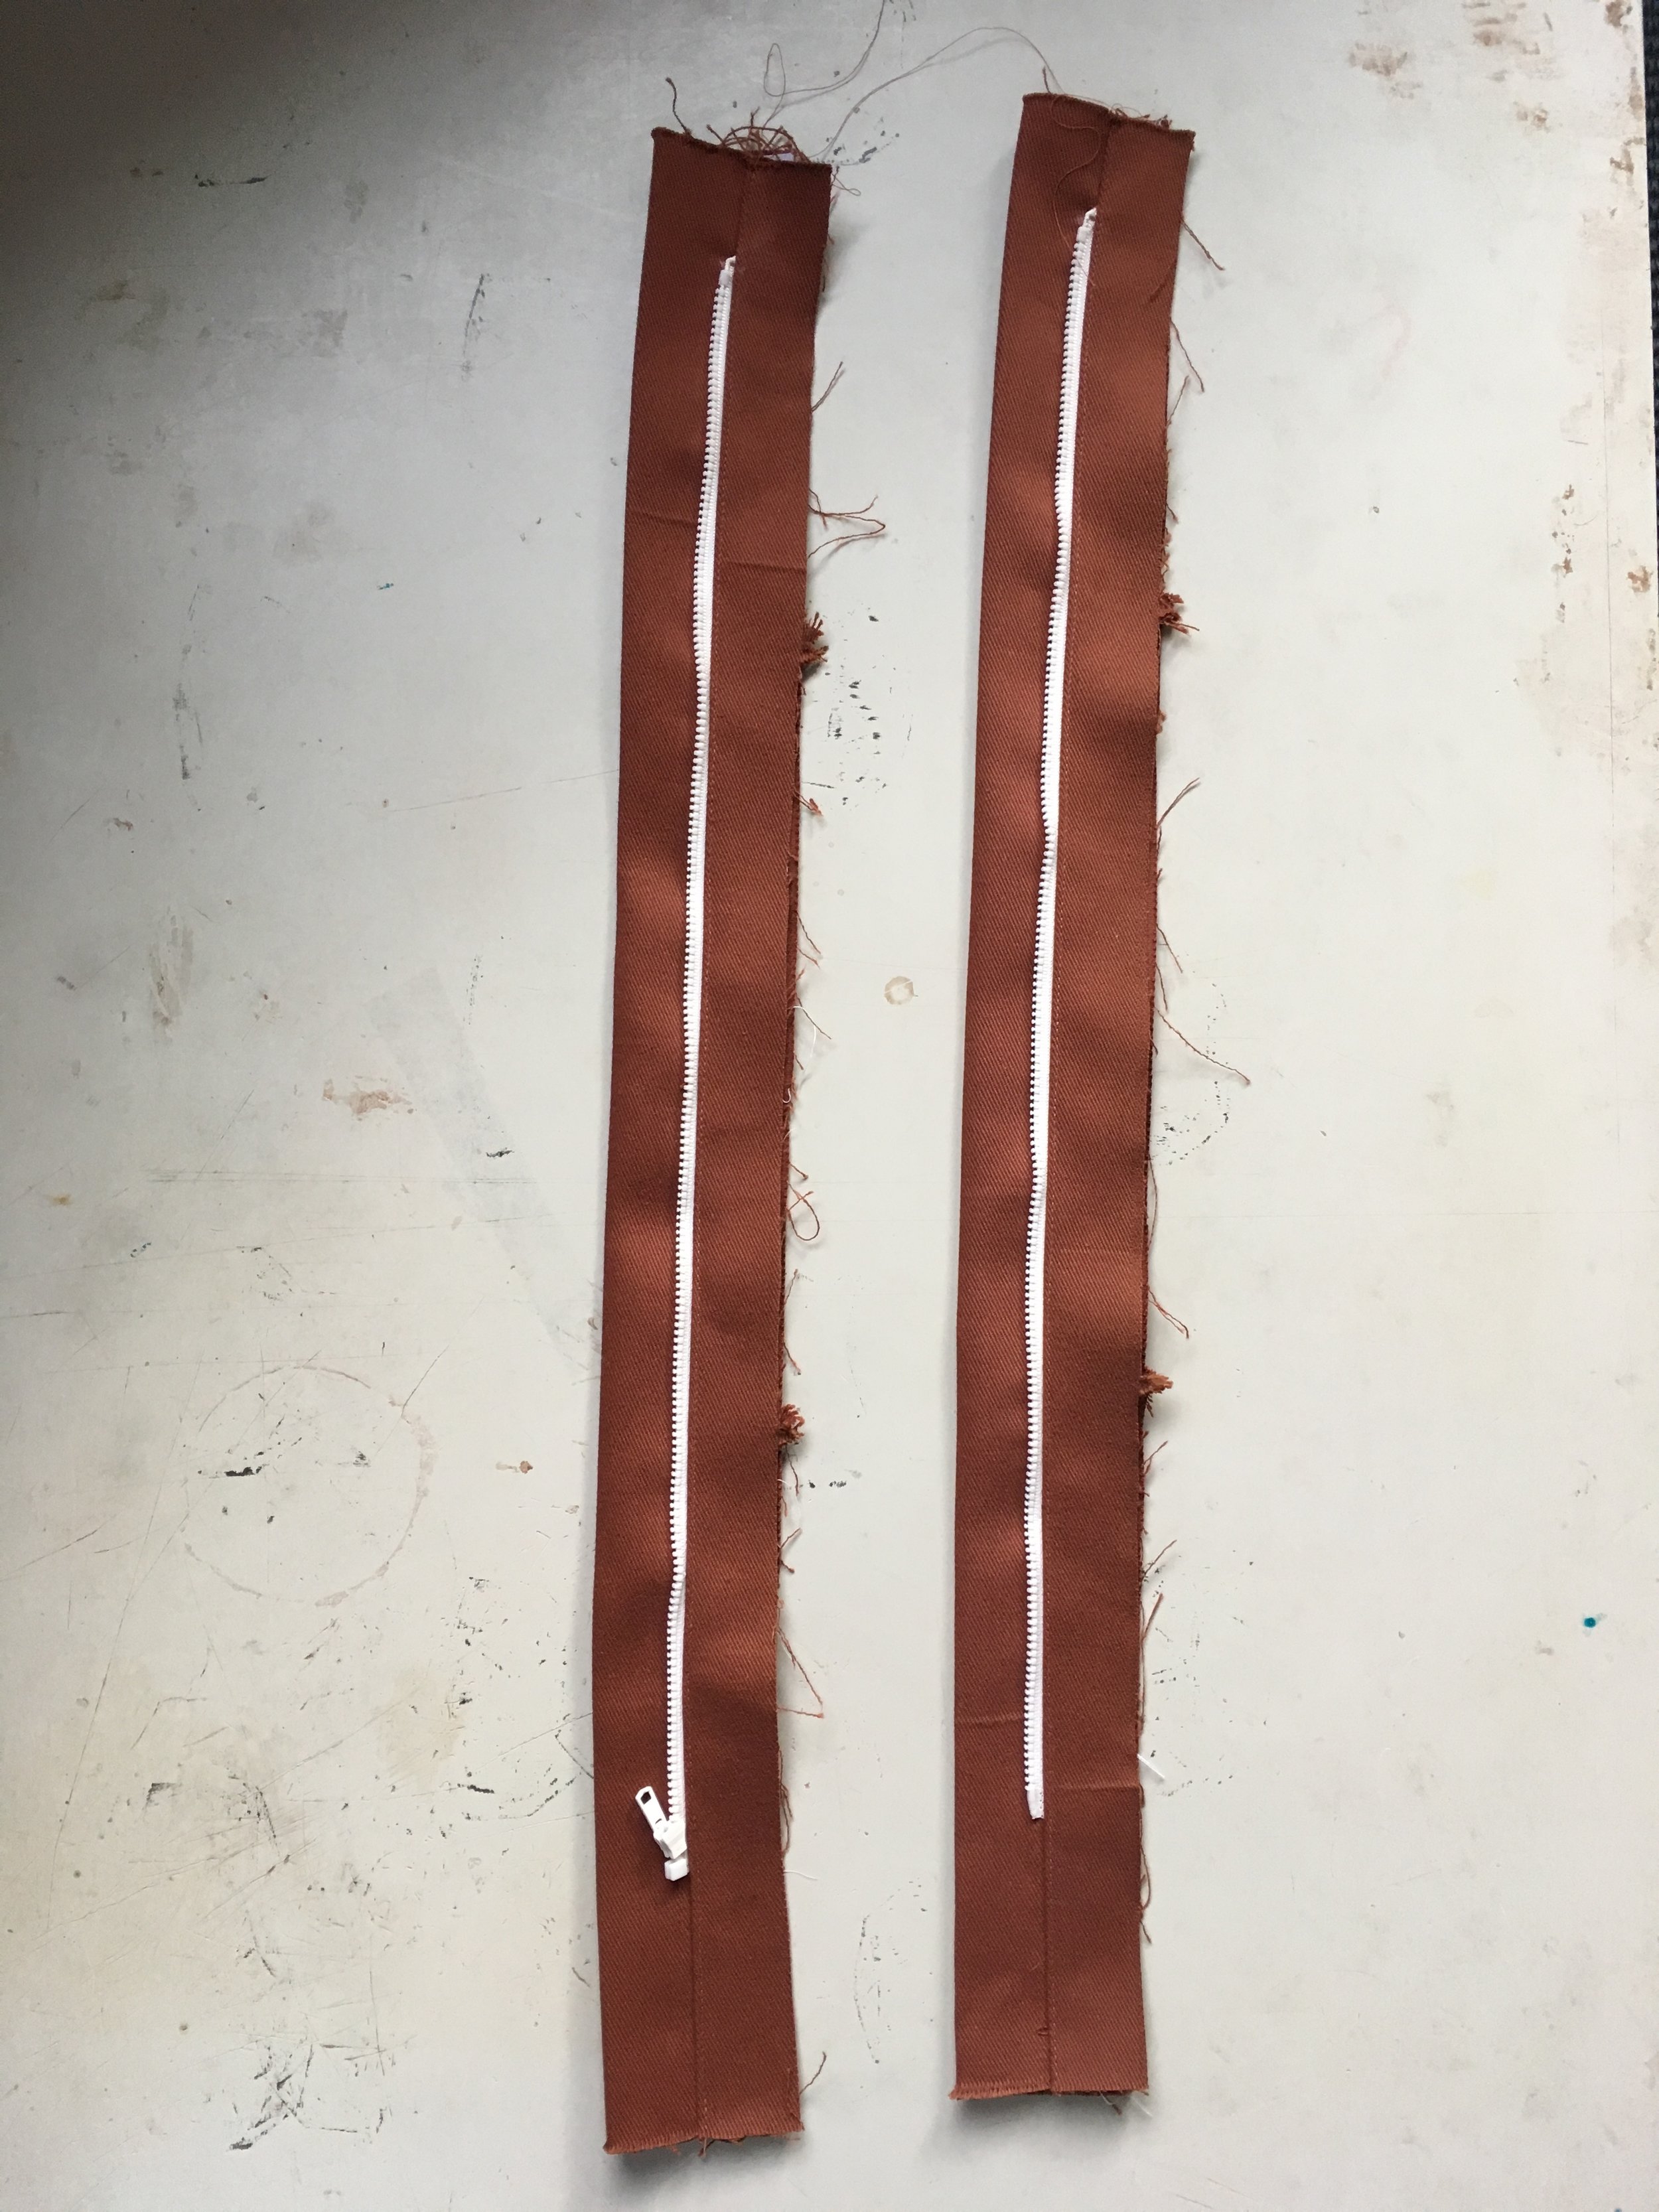
Both zippers facing left, the wrong side of the zipper showing on the left placket.
It’s important not to get these two plackets mixed up in the sewing phase or your zipper will be upside down. Before sewing them to the coat, mark the left and right plackets. Then, sew your coat as directed, substituting the altered plackets for the originals.
I added a zipper haphazardly to my sample V2 Moderne when I needed a quick fix for super cold weather, but I may eventually go back and re-sew the placket.
The version of Moderne I'm working on in this post will debut in its finished state in a few weeks, as I've used it to demonstrate several different pattern hacks! Next up, adding a lining to V1 (with some bonus pattern pieces!)